Ron Pope Motorsports                California Custom Roadsters               

Home made bench seat

oino

Supporting Member
Supporting Member
Built me a bench seat this weekend. Just finished it.

:)

Just need to do the final fit.
 

Attachments

  • DSCF0158.JPG
    DSCF0158.JPG
    49.9 KB · Views: 201
  • DSCF0159.JPG
    DSCF0159.JPG
    57.7 KB · Views: 216
  • DSCF0160.JPG
    DSCF0160.JPG
    55.1 KB · Views: 168
Well done Oino if that is your own workmanship. Is it flat plywood with foam glued to it and then vinyl stretched over it and stabled to the ply underneath? How comfortable is it when in the car? A short cruise or cross country trip??Does the base sit inside the seat base or screwed to the frame?? I am still trying out different ideas for my Bucket and as my hand brake is slightly more to the passenger side I'm thinking about narrow bucket seats out of a jappa van rather than a bench seat with a cut away for the handbrake.
 
When mounting that type of seat, the bottom needs to be at least 90 degrees to the back rest, and if using plywood, a cut out area where the butt sits with woven belt type material attached, to allow for a softer ride, keeps the tush and legs from going to sleep in any ride over 5 minutes,,, BTDT :)
 
...I'm thinking about narrow bucket seats out of a jappa van rather than a bench seat

I was kicking around the idea of using bomber seats in my T-Bucket but really didn't know what would fit and was trying to keep it within my budget so i decided cutting down a mini van seat would be to way to go. But i really wanted some type of bucket seats so last Thursday i grabbed some tools and a tape measure and headed to the local Pic-A-Part and started measuring seats. Seemed everything was just to wide. I figured 18" was about as wide as i could go. So i started scrounging through mini vans. I found some third row seats out of a '90 Pontiac Trans Sport van that were in excellent condition (3 individual bucket seats with lap belts attached to the seat frame) would be just about the right width. They're 18" wide, 25 1/2" tall with out the risers, the bottom cushion is 18 deep and 27" total seat depth. They'll stick up about 1 1/2" above the top of the bucket but i think they'll look okay. The backs also fold down.Cost was $75.68 out the door.

After a little mocking up i decided an 1 1/2" riser in the front and no riser in the back seemed to fit me the best.

If you don't care for the stock style seats you could always cut the top down so it would be below the top of the bucket and have then reupholstered.
 
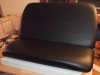
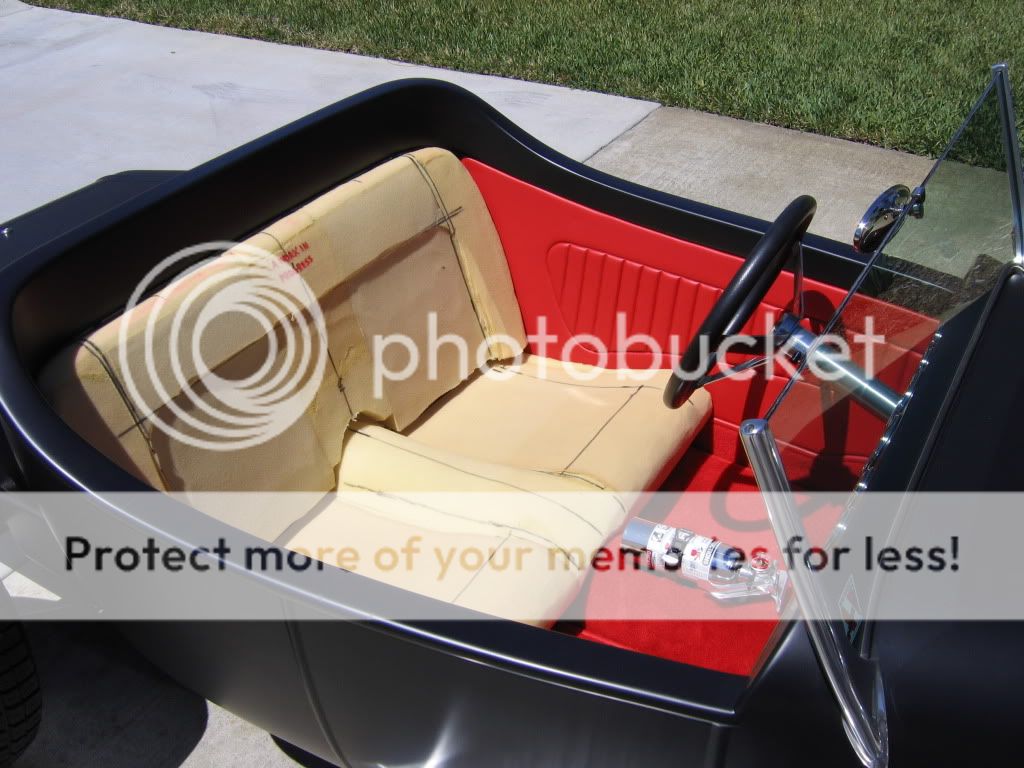
Perhaps I can add a little to this discussion since I made my own seat.

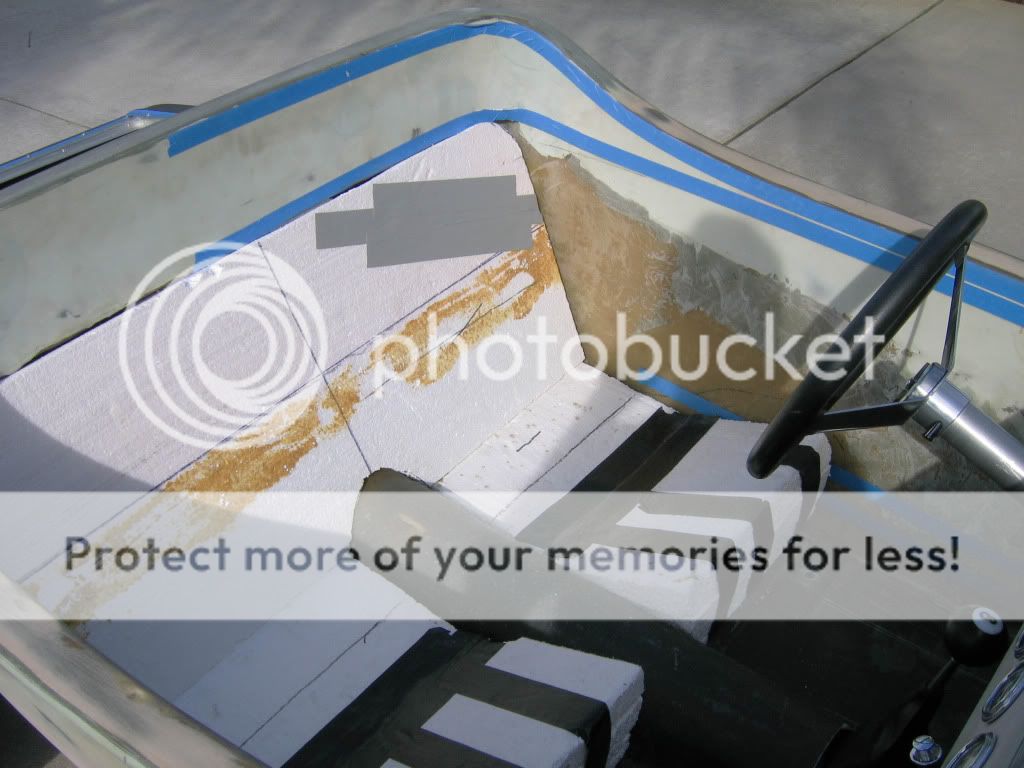
I am a firm believer in ergonomics. (That is the science of making things comfortable to use.) In making my seat I first made a mock-up out of 2" styrofoam sheets that are readily available from any home improvement store.

interiormockup1.jpg


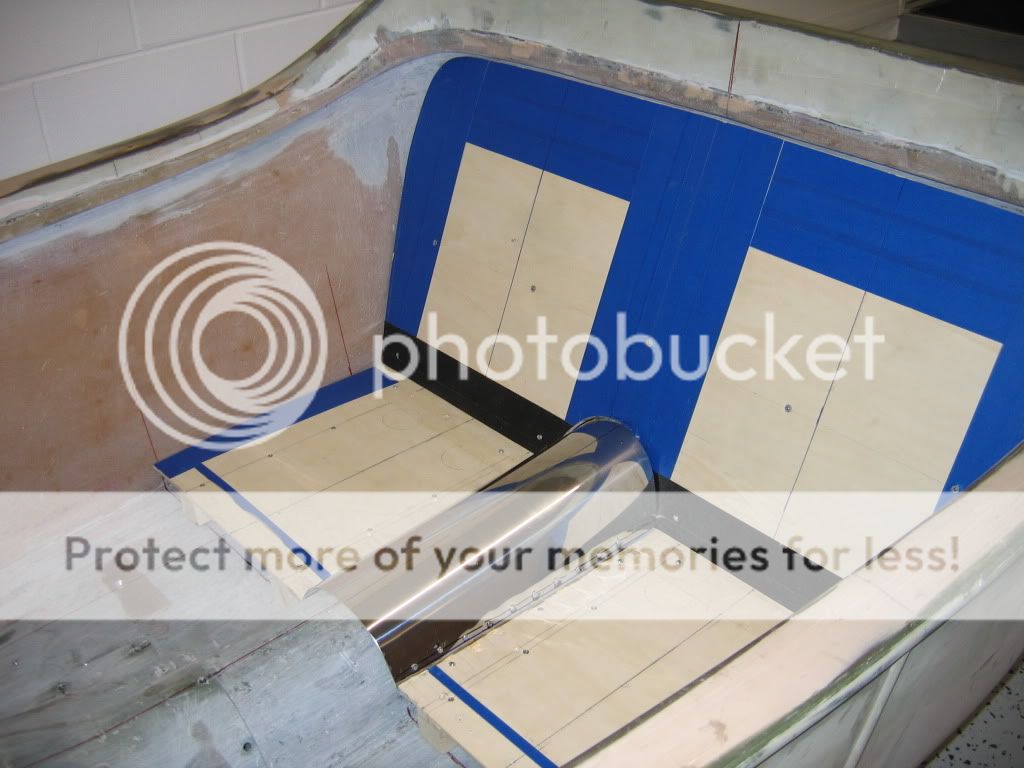
After finalizing the shape and fit for both the car and myself, I then made a wooden model of the framework.or base upon which the cushions were to be mounted.

IMG_0444.jpg


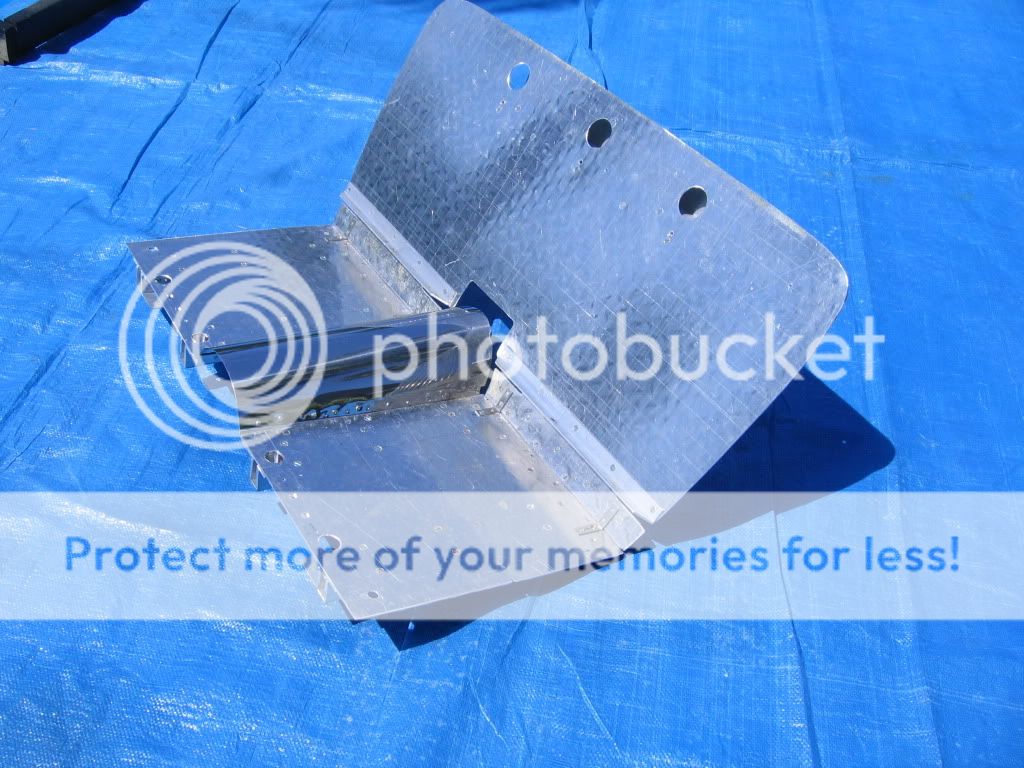
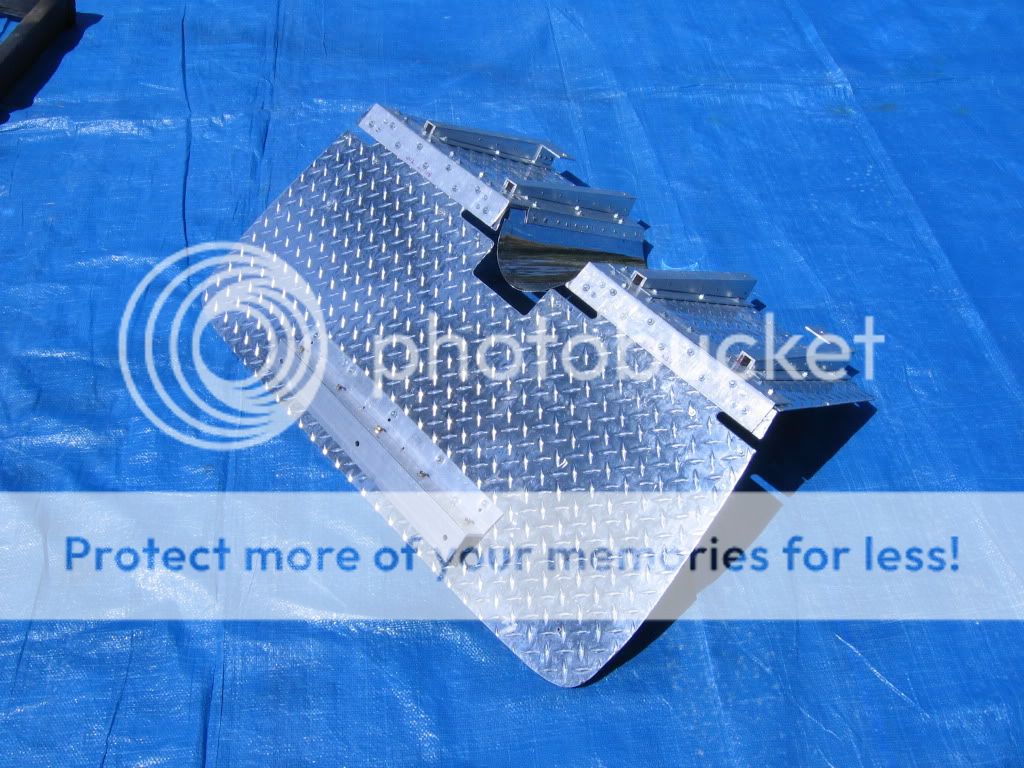
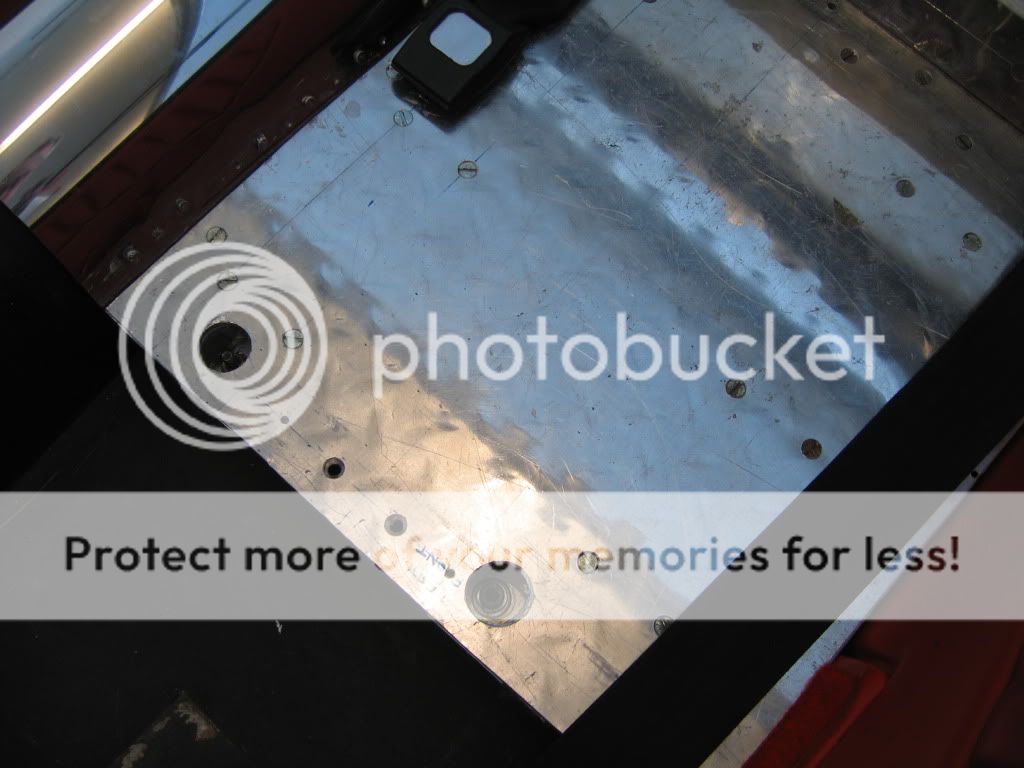
I then proceeded to make that base or framework out of aluminum. Since I don't have the ability to weld aluminum, I either riveted or screwed the entire thing together. The reason that I went with aluminum rather than wood is because I used no wood in building the car and did not want to start using it now. However, if you would rather use wood, that is your choice and there is nothing wrong with that.

IMG_0721.jpg


IMG_0722.jpg


IMG_0725.jpg


IMG_0726.jpg


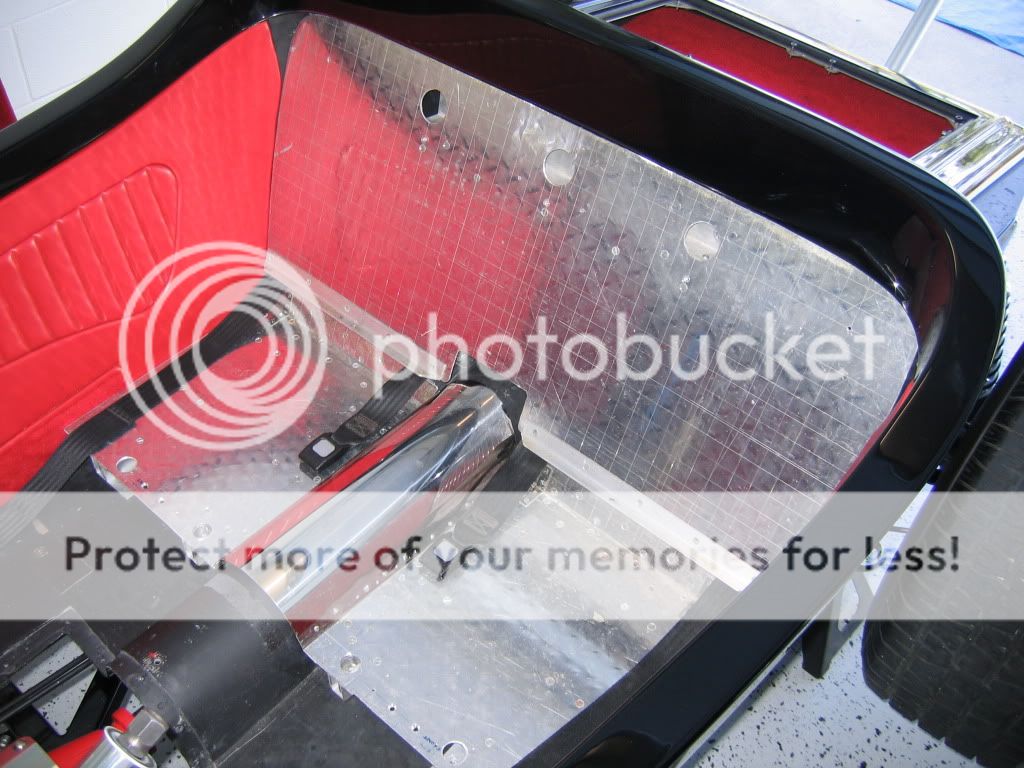
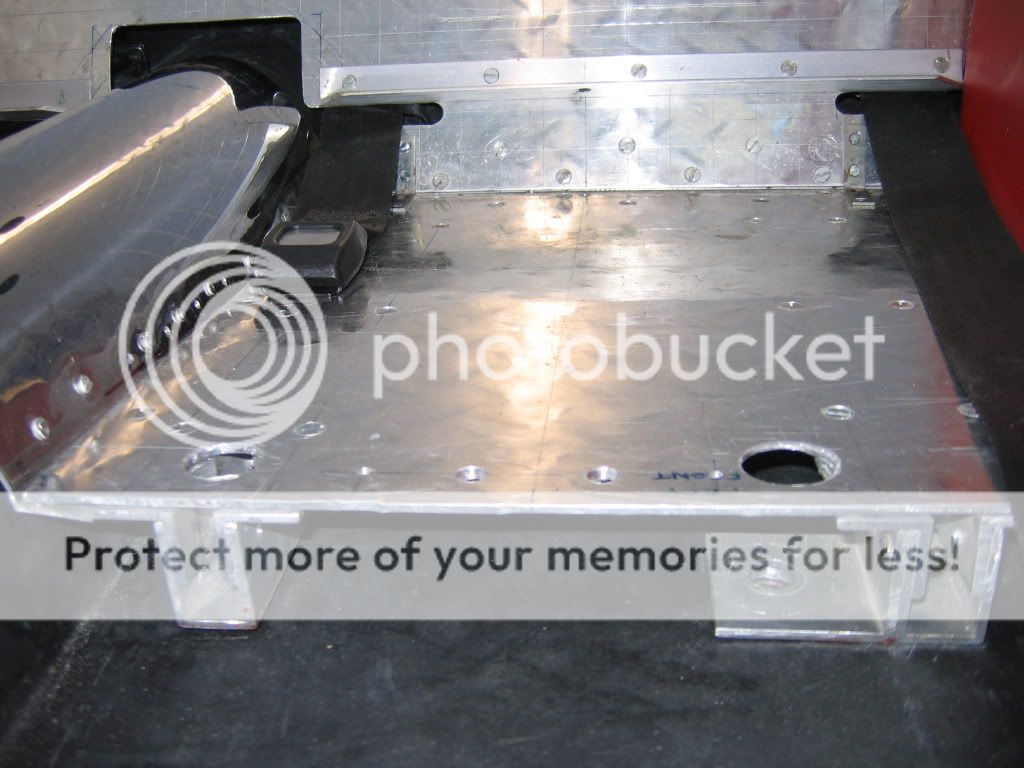
I made provisions for the seat to have seven mounting points. Two of them go to the frame and three of them go through the reinforced back of the body and the two remaining mounts are through the floor near the drive shaft tunnel.

IMG_0727.jpg


IMG_0728.jpg


IMG_0729.jpg


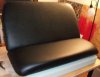
I then got some proper foam from an upholster and glued that to some 1/4" plywood. Yes, I used wood here because it made it easier for the upholster to glue and staple the material to than if I used aluminum. I also used an electric knife and a 4" grinder with a sanding disc to shape the foam for the desired upholstery pattern.

IMG_0794.jpg


The back rest is located with two pins that go into two holes in the piece of angle at its base.

IMG_0732.jpg


The bottom of the seat is held in much the same manner as the back rest. There are two pins near the front corners of the seat and it also goes under the angle that is at the base of the back rest.

IMG_0740.jpg


The cushions are easily removed for cleaning or "drying out" after one of our many summer afternoon showers down here in the Sunshine state.

Jim
 
Well to you both and Jim a special thankyou for the detailed photos etc on how you did your seat.I belleve that is how I will have to tackle mine but just don't ask me to pronouce egono..... you know THAT word but I agree with your thoughts on being comfortible as I intend to drive mine all around this country.
 
Jim, Nice job on the seats, above and beyond... Not meaning to hihack the thread, but... I noticed your windshield supports in one of the pix, and wonderred where those came from, or did you make them yourself? Do they penetrate the glass body and attach inside? I need something with that look Great job....
 
Jim, Nice job on the seats, above and beyond... Not meaning to hihack the thread, but... I noticed your windshield supports in one of the pix, and wonderred where those came from, or did you make them yourself? Do they penetrate the glass body and attach inside? I need something with that look Great job....

I got those a while back from Total Performance. They are for a '26-'27'. When I made the body I extended the cowl 6" and made it like a '26-'27. I mounted the windshield posts at a 20 degree angle for a slicker look. I have since chromed them since those pictures were taken.

Jim
 

     Ron Pope Motorsports                Advertise with Us!     
Back
Top