Ron Pope Motorsports                California Custom Roadsters               

How I scratch built a Modern T

Flexible moulding :61kafxtFC2L._AC_SL1500_.jpg Can be sanded , shaped & painted. This piece shown in my photo is half round , it's a half inch tall & a inch wide. It can also be purchased in a quarter round size which is three quarter of an inch tall by three quarters of an inch wide. Put them together & you have a half round moulding that is three quarters of an inch tall by one & a half inches wide. It requires urethane glue for adhesion. This will provide a form for the reveal. Once again , it's your choice. Your project looks great.
 
With all the fabricating completed we can take the car apart and get it ready for painting.

I usually have a friend of mine do any major paint jobs for me, he has a small paint booth in his shop and does a few paint jobs for aircraft repair shops. When he has time he will do painting for some friends if he feels like it.

Unfortunately he was going to be busy with a large repair job and would not be able to help me out for longer than I wanted to wait, so I decided I would give it a try myself, I never painted an entire car before so it was going to be a learning experience. But isn’t that part of what building a T is, a learning experience?
 
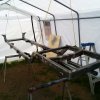
D57.jpg I purchased one of them plastic garages 20 x 10 ft and set it up in the back yard to be used as a paint booth. It worked out real well, better than painting out in the open. Handy for painting small parts as the build progresses, just hang them up and go at it.

Here the frame is ready for painting. I sprayed on a coat of epoxy primer then a coat of color the same as is going on the bucket.
 
View attachment 18800 I purchased one of them plastic garages 20 x 10 ft and set it up in the back yard to be used as a paint booth. It worked out real well, better than painting out in the open. Handy for painting small parts as the build progresses, just hang them up and go at it.

Here the frame is ready for painting. I sprayed on a coat of epoxy primer then a coat of color the same as is going on the bucket.
I like painting outside on a calm sunny day. Bugs and dust are the drawbacks. The natural light and curing by the sun is hard to replicate... especially on large items. I used to paint a lot. Good idea with the tent!
 
At this time I cleaned up the engine, tranny and rear axle so they could be painted. I did not want to haul all the parts out to have them sand blasted so I did it the hard way with a wire brush wheel on a drill and some small hand wire brushes. It was a lot of work but it worked out OK. I painted the engine Ford blue, left the tranny its natural aluminum color and painted the rear axle black. When I had the transmission off I checked the clutch disk and pressure plate. They were both good, looked like they were both replaced recently.

I also removed the oil pan and cam cover to check the engine internals. I was surprised how clean the engine was inside and there was very little wear on the parts despite there being over 150,000 miles on it. Whoever owned it looked after it properly.
 
I like painting outside on a calm sunny day. Bugs and dust are the drawbacks. The natural light and curing by the sun is hard to replicate... especially on large items. I used to paint a lot. Good idea with the tent!

You are quite right about the natural light being the best, even the translucent light from the cover I had makes the dark colored paint hard to see. If I had it to do over I would have used clear plastic for the cover.
 
I like your color choices. My colors are going to be Plum Crazy , Flat Black & Hot Lime. I'm biting at the bit to go back to working on my project. This pandemic is a P.I.T.A !
 
Or a DAMNDEMIC. I returned to work today. Tbuilder is the body going to be the same color as the frame ?
 
Let’s talk about engines, ignitions, intakes and things that go bump in the night.

The OHC 2.3 liter (140 cu in) four cylinder engine was one of Fords most popular engines. It was used in everything from the Thunderbird to the Mustang to the pickup truck. The 2.3 first debuted in 1974 using a progressive 2Bbl Webber/Holley carb and a points distributor. In ’75 they were upgraded to a Duraspark ignition system. They remained unchanged until about ’81 when the intake ports were changed from an oval to a D shape (flat floor). The 2.0/2.3 litre versions that were offered in Rangers starting in ’83 used a different head having four evenly spaced round holes of equal size. EFI was added to the engines in ’85. In ’89 the 2.3 was changed to a DIS (Distributorless Ignition System) ignition utilizing a new 8-plug head. This head had larger evenly spaced D-shaped intake ports and was used until the end of production of the 2.5 in ‘01. The 2.5 litre version was only offered from ‘98 To ’01, when the engine was replaced by a 2.3 litre DOHC Duratec based engine.

The engine puts out 105hp@4600.....135ft lbs@2600
 
The engine uses a lost spark ignition, it has two coils that fire four spark plugs each at both the top and bottom of the stroke. The PCM module tells the ICM module what the load on the engine is and the ICM sets the appropriate ignition timing. The crank location is picked up by a sensor on the end of the camshaft. Therein is the problem, the fuel injection system and all the computer modules and sensors have been removed so we need another way of firing and getting fuel into it.

I could purchase an MSD programmable ignition system for it but that would be a lot more expense than I wanted. My original plan was to use the distributor ignition from an older version of the 2.3 and use the lower half of the fuel injection manifold and mount a carb on top of it. The reason why I wanted a 94 model engine was that it was the last year that the block had a hole and drive system for the distributor. There is a stub shaft in the block that is driven off the camshaft drive belt. It drives the distributor and a shaft on the end of the distributor drives the oil pump. Earlier versions of the stub shaft also had a lob on it that drives the fuel pump. That lobe is not on this engine.

D59.JPG

In this earlier pic you can see the stub shaft sticking out of hole for the distributor just above the flat spot where the fuel pump was located on older versions of the engine. The lower half of the fuel injection manifold is in place. I was going to use two Holley 94 carbs on the openings in the top of the manifold.
 
After some research I ordered a distributor and coil for an 83 Mustang, it installed perfectly and looked like it was going to work ok. This is an electronic distributor so it will fire an electronic ignition module. Some more research determined that the GM HEI module word work with it as others have used it in similar installations. Some people have said that the HEI module is prone to failure from overheating because it is located inside the GM distributor but with it now being located outside in the breeze it should be more than reliable enough.

All this brought out another more serious problem, the top of the distributor cap hits the FI manifold, and by a lot. I thought I might be able to grind some aluminum off the manifold and get enough room but that was not going to work. I do not know why Ford made the distributor cap so high, I have not been able to locate a lower one so we are just going to have to live with it.

I have been conferring with the folks at TheRangerStation web site, they have a lot of accumulated knowledge on the Ranger pickups and the 2.3L engine. According to the members there nobody has succeeded in converting the newer 2.3L engine back to carbs and a distributor ignition, or at least no one has done it and said how it was done. One of the suggestions made was to use the cylinder head and intake manifold from an older model engine with a distributor. I do not want to do that, discarding a perfectly good cylinder head did not make any sense to me plus all the trouble and expense to find the needed parts, install them and then who knows what other problems would show up.

After a lot of thought and deliberation I decided I was going to have to fab up my own intake manifold.
Not to be a nay sayer, but putting carbs on fuel injected engines is not preferable. The cam grind is different, the ecm controls timing, fuel curve, etc. not sure about those 2300’s, but as a general rule. I’ve worked on various versions over the years, wiped cam lobes were not uncommon and they were hard on valve guides after the clock ticked a while, but those were the earlier ones I worked on. They did move the pinto and mustang 2, aka pinto supreme, along ok. Had a ranger with one and thought it was underpowered, a svo 351 solved that, even though I am not a big fan of the 351. Can you merge the fi intake with a carbed intake? As for hei, the issues I know of was that it was only viable to 4500 rpm or so, but aftermarket and corvette options solved that. Every module fails due to heat, eventually, even the fender mounted units. Definitely a interesting endeavor.
 
Instead of a complete manifold, why not make a wedge plate between the head and manifold? I don't think the injection will be a problem tilted some as it should run in any position.
 
I have an Offy 4bbl manifold that I had on a 74 2300 along with a 390 CFM holly, I'll have to dig deep, I had that car along time ago. I don't know if it would clear your electronic dizzy or even fit you head?
 

     Ron Pope Motorsports                Advertise with Us!     
Back
Top