

You are using an out of date browser. It may not display this or other websites correctly.
You should upgrade or use an alternative browser.
You should upgrade or use an alternative browser.
Keepers build
- Thread starter Keeper
- Start date
old round fart
Well-Known Member
Be sure to turn off the heat/air. That may solve the problem.
Keeper
Active Member
Yeah that will help. There are 2 bedrooms halfway above the garage. Along with the duct work for them. Warmer weather coming so less need of the heat/air.
I am pretty sure I know where the fumes are getting in, there are 2 lights and an outlet in the garage ceiling , I am almost certain they do not have gaskets on them. I will pull them down and take a look. I have been planning on ripping down that ceiling and spray foaming the bedroom floors to help with the heat/cooling of those two rooms. This just gives me more incentive as I plan on more builds in the future!
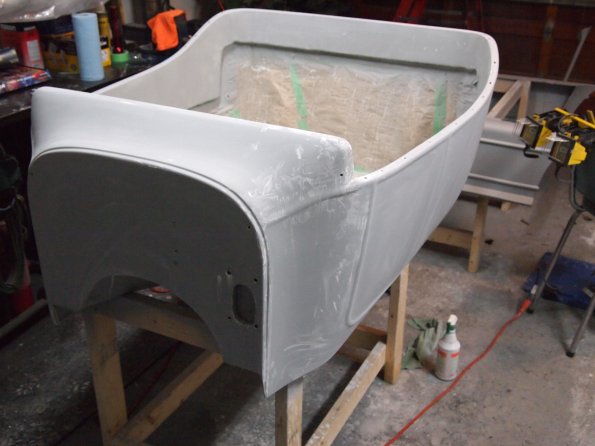
Not much today, about 3.5 more hours of wet sanding. Got the body ready for the next coat of primer, the bed will be tomorrow.
I finally broke down and picked up a set of dura-blocks. Have to admit, they are much nicer to use then the assortment of wood blocks and other stuff I was using.
I am pretty sure I know where the fumes are getting in, there are 2 lights and an outlet in the garage ceiling , I am almost certain they do not have gaskets on them. I will pull them down and take a look. I have been planning on ripping down that ceiling and spray foaming the bedroom floors to help with the heat/cooling of those two rooms. This just gives me more incentive as I plan on more builds in the future!
Not much today, about 3.5 more hours of wet sanding. Got the body ready for the next coat of primer, the bed will be tomorrow.
I finally broke down and picked up a set of dura-blocks. Have to admit, they are much nicer to use then the assortment of wood blocks and other stuff I was using.
Keeper
Active Member
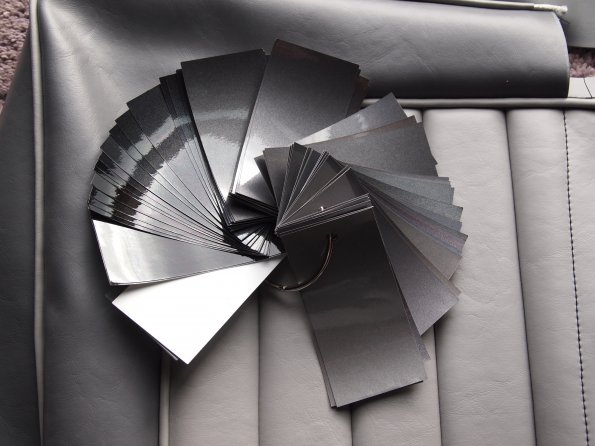
Hit the paint store yesterday. All I wanted was charcoal grey!! After an hour of looking at chips, I asked if I could take some chips home so I could look at them in the sunlight. Holy crap there are a lot of grey's!
I did get the final primer coat on. And yet more sanding. I am 3/4 of the way through 400 grit on my way to paint.
The plan is a metallic grey with a clear coat. I was not really planning on a "show car" paint job as its certainly a driver, but after 50+ hours and counting on block sanding and body work, I am moving toward the best paint I can put on it.
Thats all for now as I am heading back out for more sanding.
Keeper
Active Member
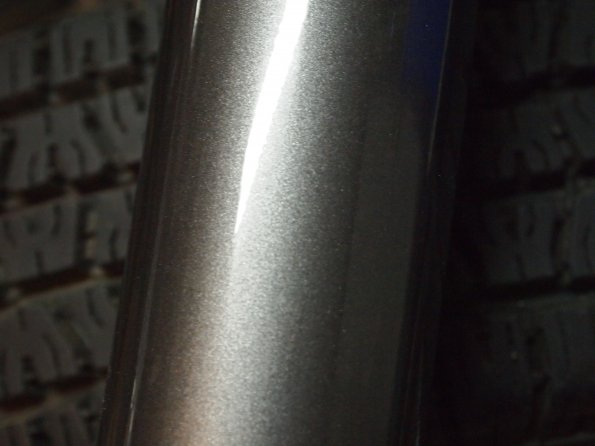
Finally got a color! After a ton of choices I sprayed one of the samples I picked up on Friday. Needless to say I am extremely happy with this color.
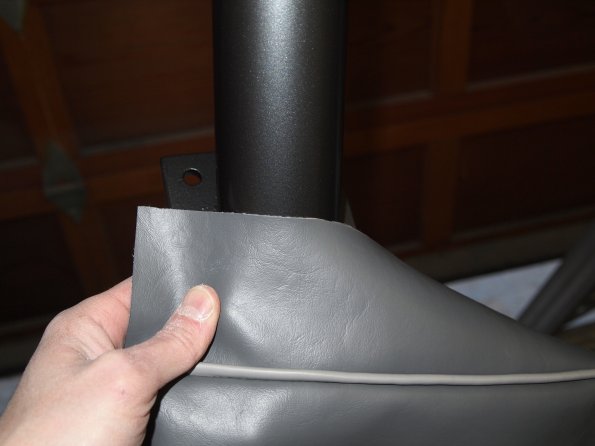
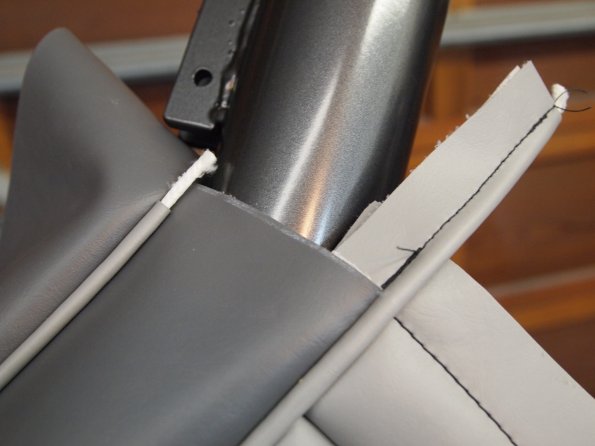
Looks great in the sunlight as well. Thats my steering column I used as a test platform as it had the same primer I used on the rest of the car.
Now for the not so fun stuff. I have been blocking the body using what I thought was 400 grit paper, well that is sort of correct turns out its P400, which apparently is equiv to 320 on the US scale. I stumbled across this when I was reading up on autobody101. So I now get to go over the whole car again with either P1000 or 600 grit. I have to go a step further then 400 due to using a metallic paint.
I did not know that prior to reading a ton of info on prepping for metallic. Just lucky I seen it as I was all ready to spray over the P400. From what I read you can run into issues with the metallic showing the sandpaper scratches on anything under 600 grit.
Keeper
Active Member
Thanks!
Picked up all the supplies for paint today, a bit of sticker shock, but I went for a higher end clear that cost 3 times as much as the basecoat!
Plan is to pack it up and take it to a buddies house on thursday, clean everything up and spray it all on Friday! I still have some more sanding to do, the body is up to 600, the bed is left.
bigfrank330
Member
Keeper
It is ALWAYS a good idea to spray a seal coat
That way it starts the finish coat with a solid base and covers alot of minute imperfections
Ask around at local bodyshops -- see what they do
Frank
It is ALWAYS a good idea to spray a seal coat
That way it starts the finish coat with a solid base and covers alot of minute imperfections
Ask around at local bodyshops -- see what they do
Frank
I also always spray some seal coat just before the first base, be it sealer or primer or whatever, and of course spray the base coat over that, no sanding in between. That way I never have to sand any finer than say 320 grit when doing the prep., the seal coat hides the 320 sanding scratches. I've seen lots of paint jobs where the last coat of primer, sealer or whatever was sanded and then the base was applied. Most people won't see the sanding scratches that telegraph through the base coat from the sanded primer, but they are there and if you look closely you can find them.
Keeper
Active Member
Thanks for the info. The more I read about it the more I realize that a sealer is the way to go.
I have to pick up some more as I used the whole gallon of primer/surfacer already! Next batch will be a primer sealer.
I did pick up a new toy today, I figured if I was spending $1000ish on paint/clear I should at least have a decent gun to put it on with. So I picked up a Tekna Prolite Premium gun kit today. Carquest had them on sale and I figure if you are going to buy a tool, get a good one as it always seems to work out cheaper in the long run.
Was planning on spraying the paint/clear on Friday, but the weather is not cooperating, so I put it off a few days, which is good since I ran into a few spots on the bed that need more work. Oh and I completely forgot about the gastank! So that will have to be primed/blocked/primered...etc
Flatsman
Member
oooooooo shiney.
Gastank after wetsand and polish.
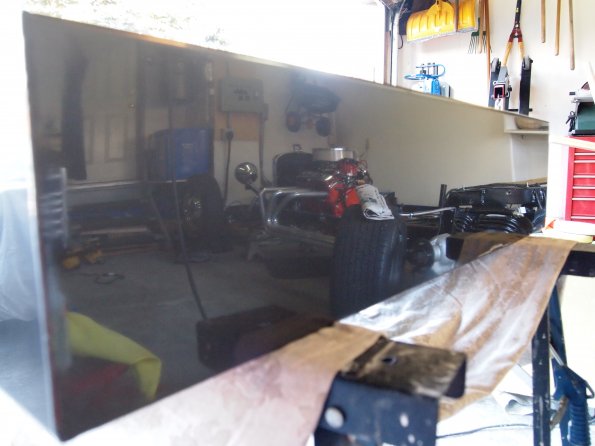
I will be battling some pretty nasty orange peel on the body itself. I am hoping that it will settle down a bit when its cured.
Never let a stubborn person paint your car!
You are one sick puppy!
Keeper
Active Member
You are one sick puppy!
You don't have to tell me, I already have over 60 hours of bodywork in this thing.
Never let a stubborn person paint your car!
The first time someone says "Beautiful paint job, who did it?" it will be worth all the extra effort. Nice work.
Similar threads
- Replies
- 22
- Views
- 4K
