

jimbo01
Member
I haven't been real good at updating this album so I figured I'd do it tonight. There may be several steps missing from the pictures or steps out of order. I looked at my frame metal receipt to see when this project was started on around September 9th or so marks the 2 year point. I'm getting so close now that I can hardly sleep at night because I'm day dreaming about the day I get to fire this thing up and take it for a spin. I can see why people loose interest in such a project because of the amount of time and money spent doing building a T Bucket from scratch.
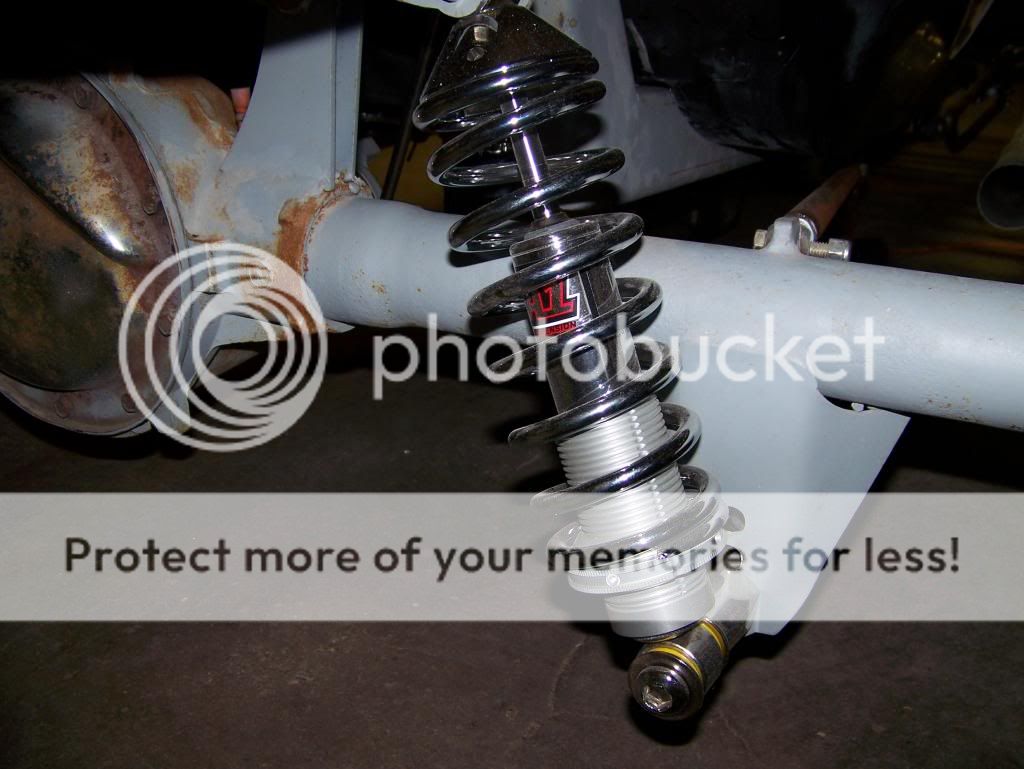
Rear coil overs from RPM. I still need to remove the QA1 sticker from the shock. I've done my best at keeping from buying anything that displays advertising on something I have bought. Even if I have to pay a little extra to avoid such.
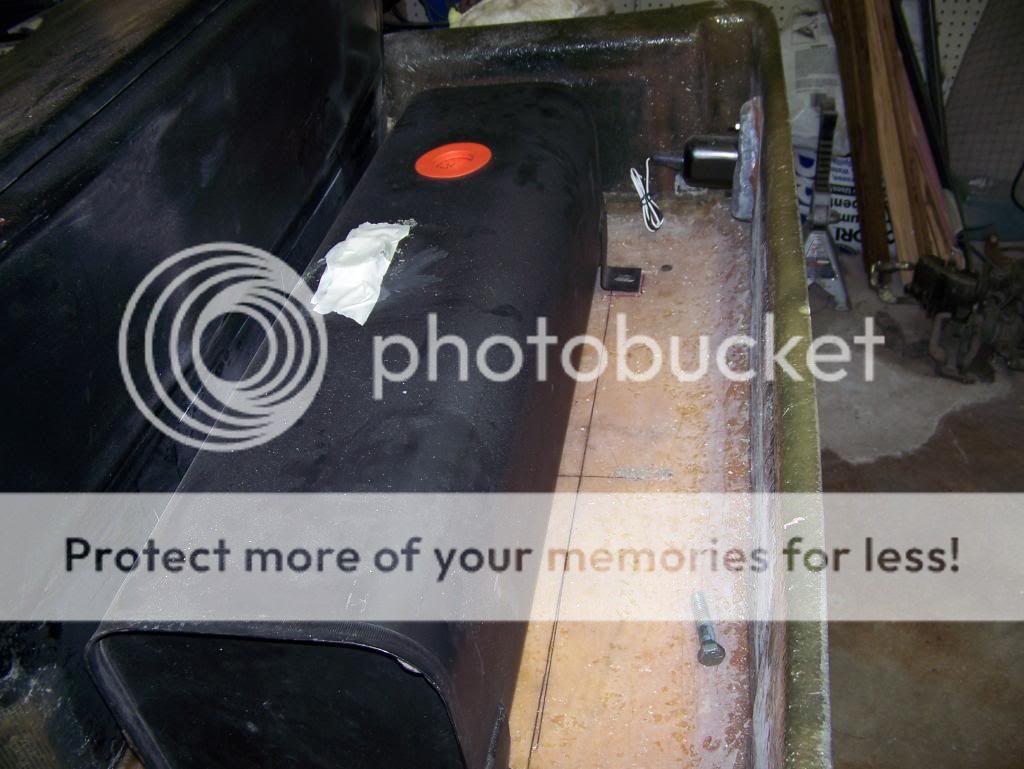
I found this gas tank on EBay. It's an old Total Performance tank that someone had stored in their attic. This was new and came in the original box. Every now and again I get lucky and find a deal. I bought the tank for $100.00 and I figured that deal couldn't be beat with a stick.
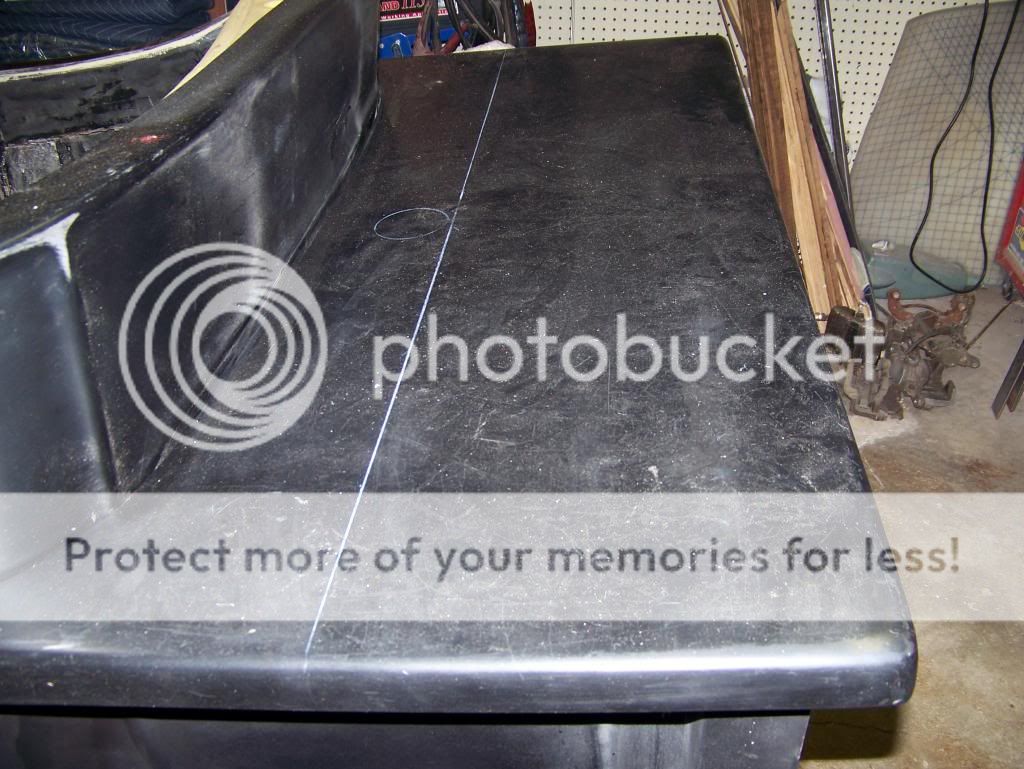
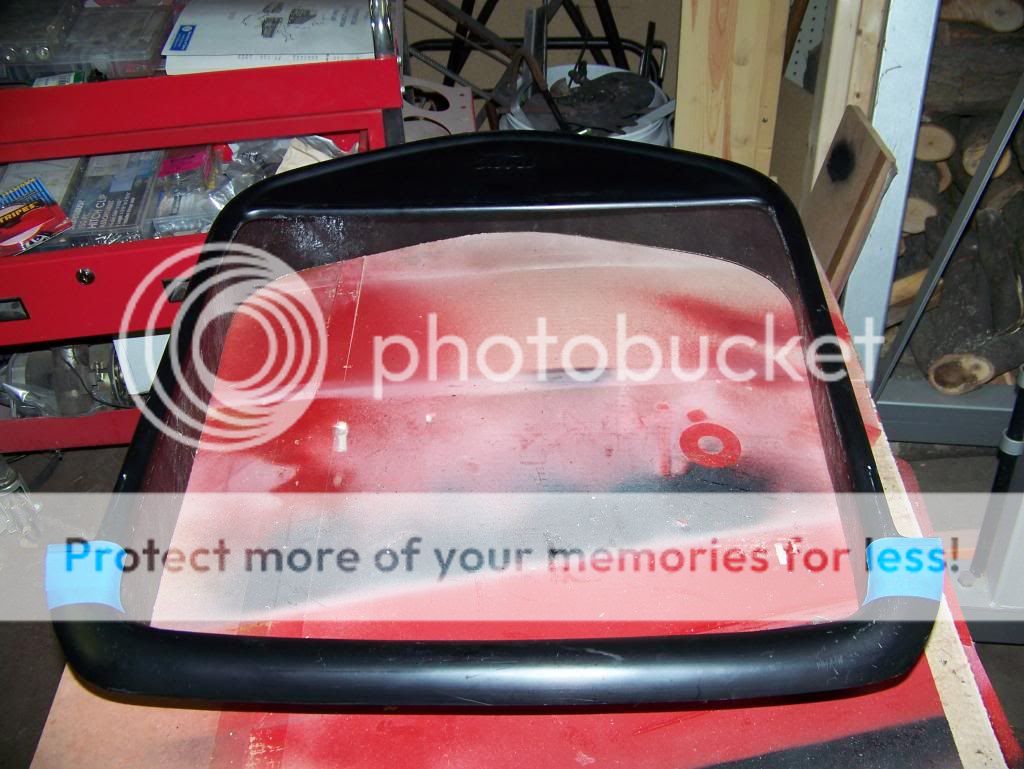
This is the deck lid that I bought from CCR. I cut it down to fit my bed. I had read that not all fiberglass bed manufactures use the same measurements as was the case here. So I wasn't surprised that I needed to put a little extra work into the lid. If you see the line across the top with the circle in the center, my plan is to cut the bed to allow access and the circle is for the fuel neck. Just need to finish those plans in my head before jumping on it but that project is coming up. Just wanted to say that CCR makes and sells great products.
Steering gear and drag link. I just need to finish w steering gear mount
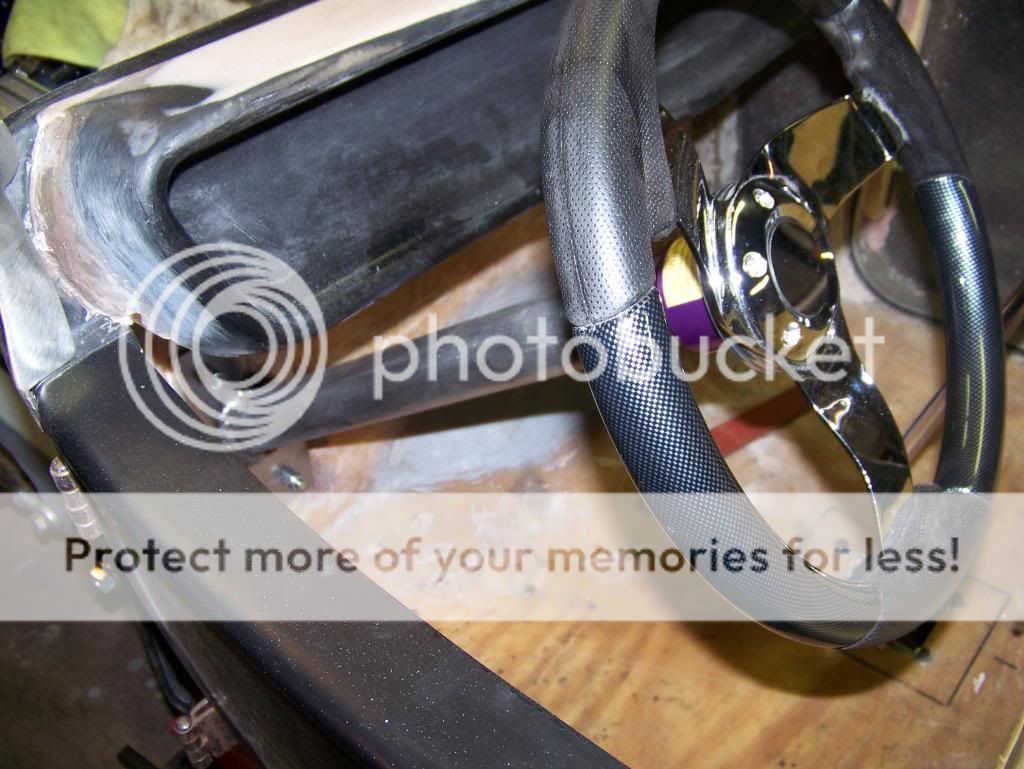
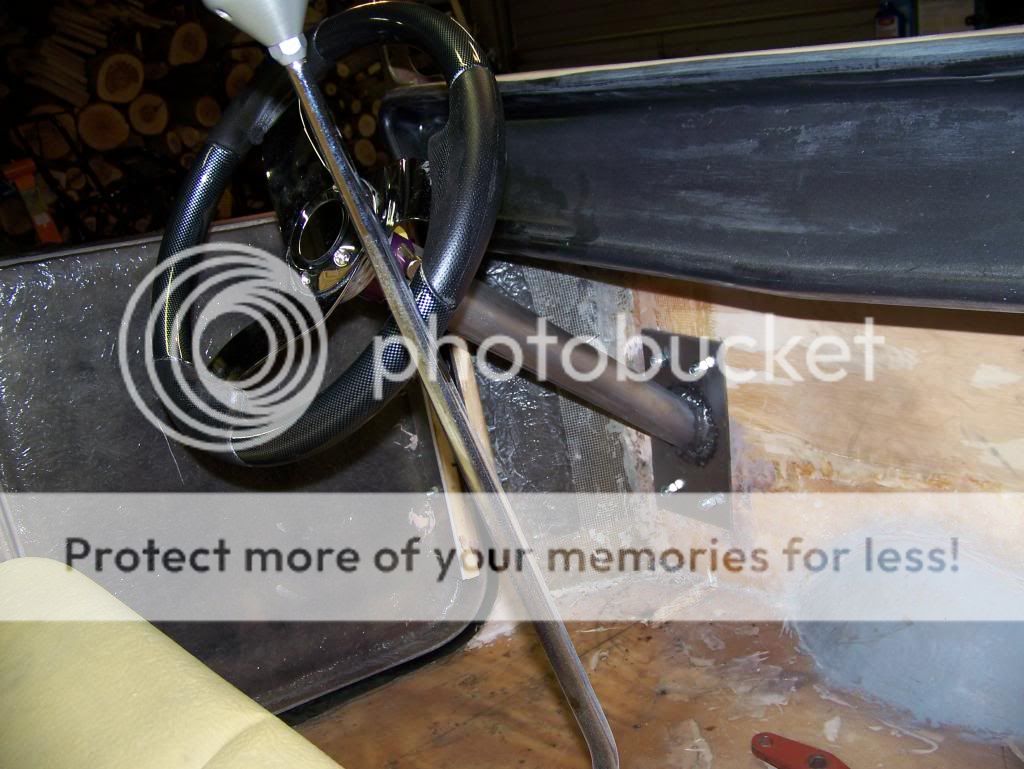
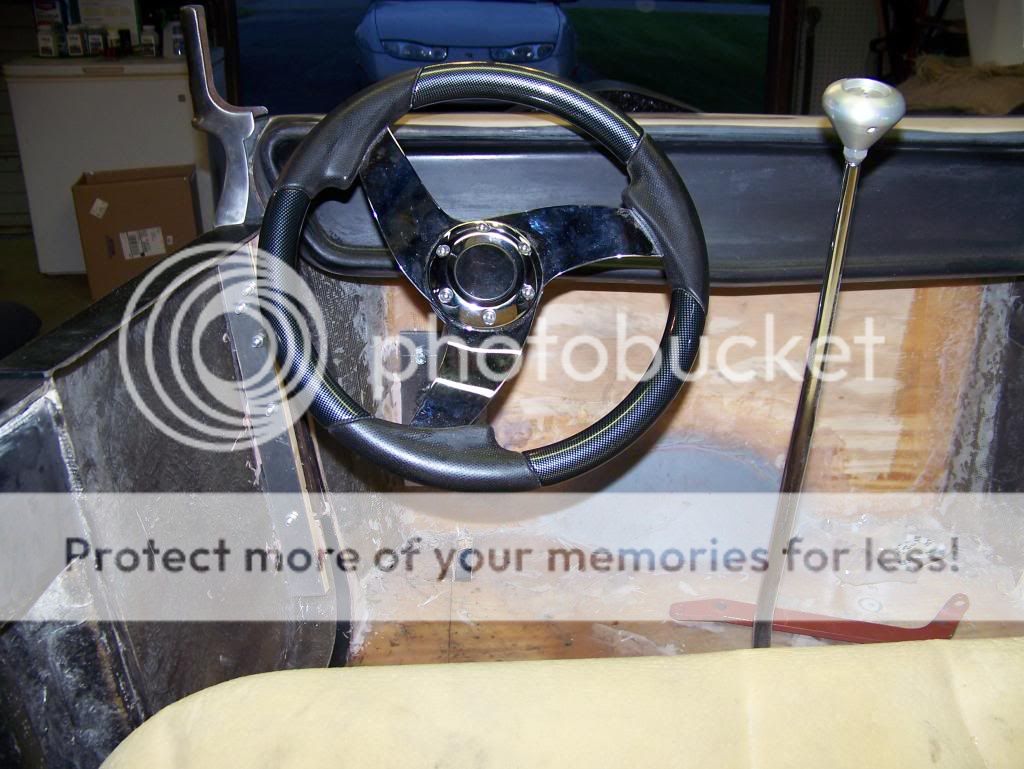
Steering wheel, column & the start of the column support.
The Lokar shifter in the picture came from a Craigslist purchase. It was set up for a Chevy transmission mount which I converted to a floor mount. I made the
bracket & mounted to the floor. If anyone needs the trans mount let me know. The shifter and mount was bought for $40.00. Another one of those deals
I just couldn't say no to. I also made the linkage as it was cheaper then buying what Lokar wanted by far.
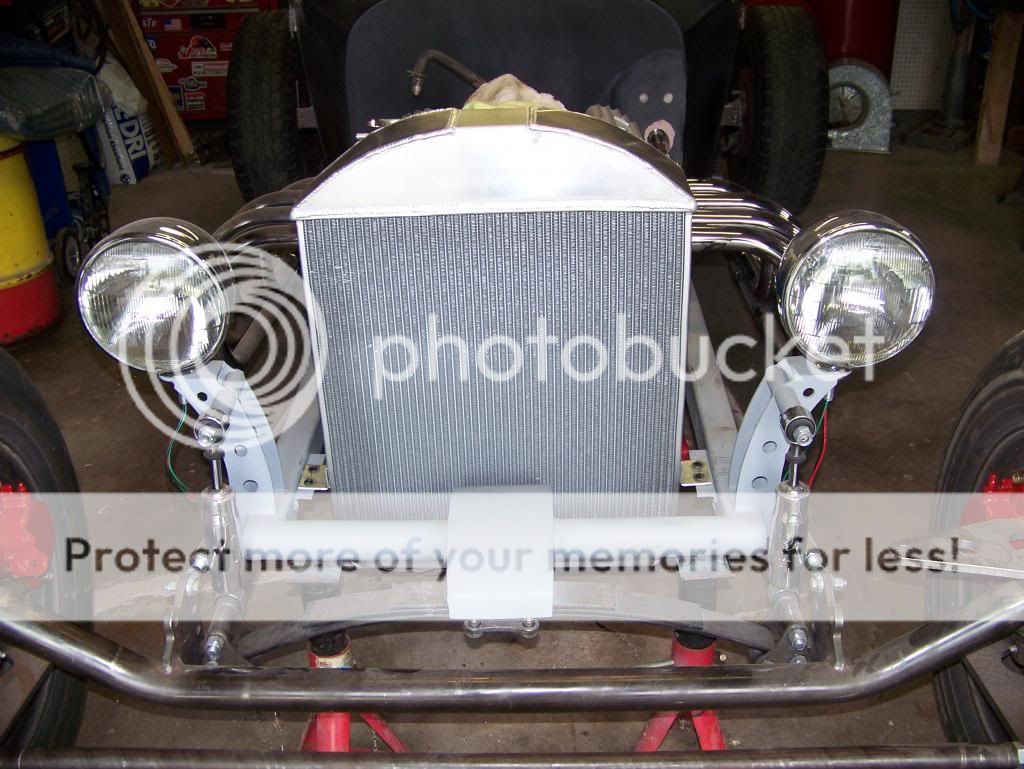
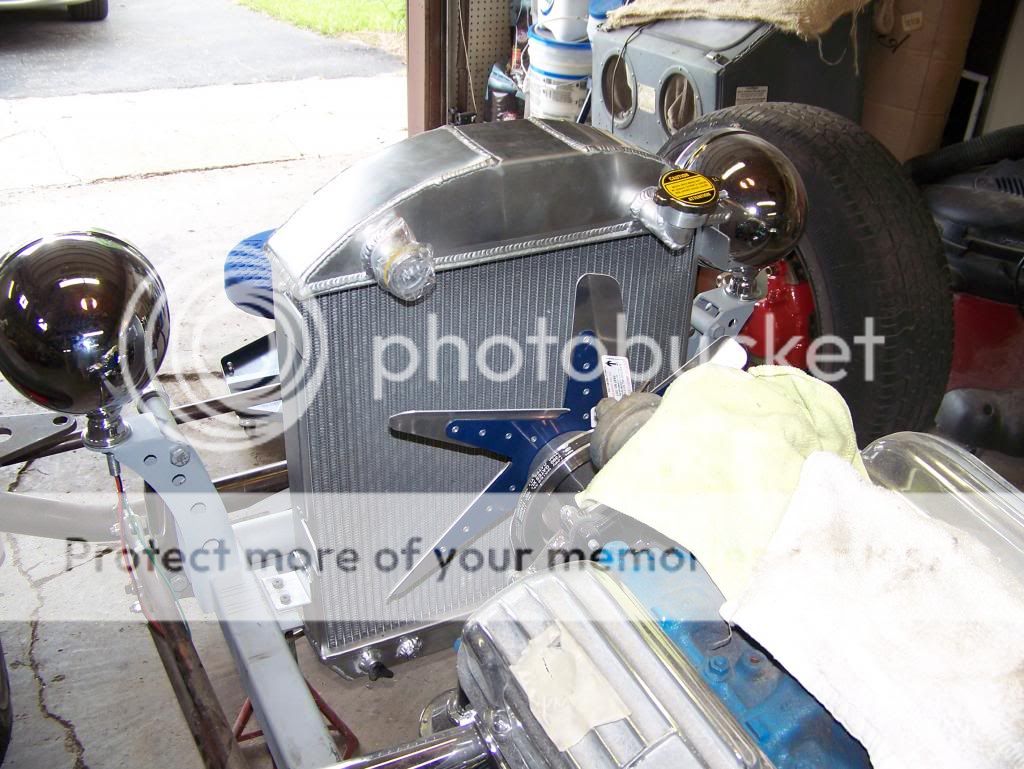
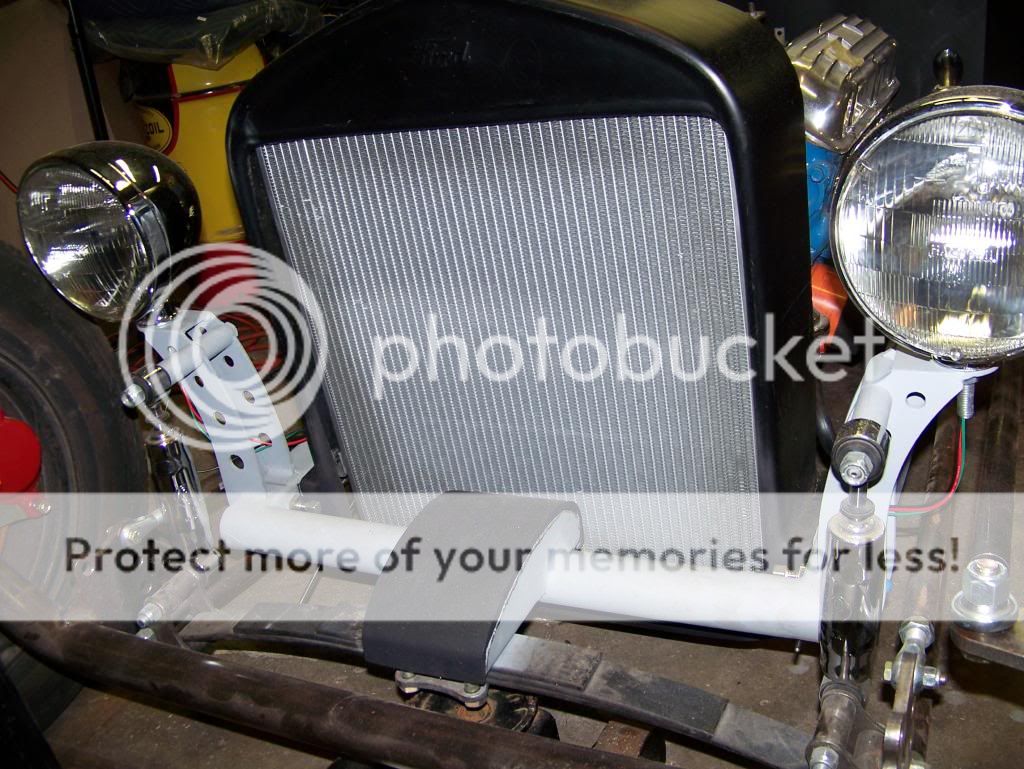
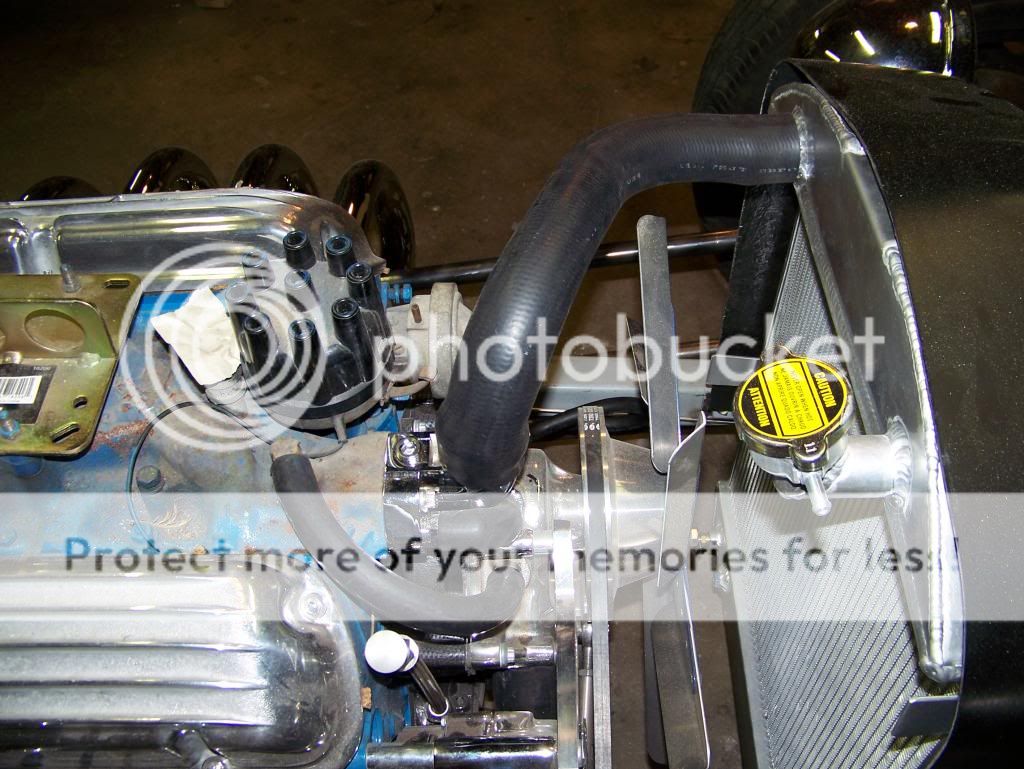
The radiator is mounted and ready to go. I looked all over the place for a radiator that would fit the shell. That was a painful process as it seems that that is a
very hard to find item. If I did come across one that did it would cost a small fortune. I took a radiator from a 1950 F-1 to the local radiator shop and asked them if they could modify it to fit the shell. Well after a long conversation I came to the conclusion that the radiator would look like total crap and the price would be between $600-$800 bucks!! The guy never cracked a smile when he offered the quote. The search was back on and I picked this one up on EBay. The problem that I kept coming across was the measurements would not fit the shell. The width from side to side was fine as was the fitment from front to rear. The problem that I had was top to bottom. So what I did was cut the shell at the bottom and if I remember right, I stretched it or added an inch of material to the bottom.
I also made the spring perch cover out of fiberglass. I was looking at the chrome ones and wasn't sure if there would be fitment problems and then looked at the cost again and decided to make my own and once again be a little different.

Driveshaft had been cut and installed and I did go with Spicer greaseless U-joints
The process of finding hoses has been pretty easy going. Just took coat hangers and bent them to the shape I was looking for and off to the auto parts store. I have found a couple of older guys that seem to be able to function without a computer and are willing to take the time to help me out. I just try to go to the store when things are a little slow and allow them the time to go through their inventory. I then take the new found hoses home and cut them on the band saw to the size I need.
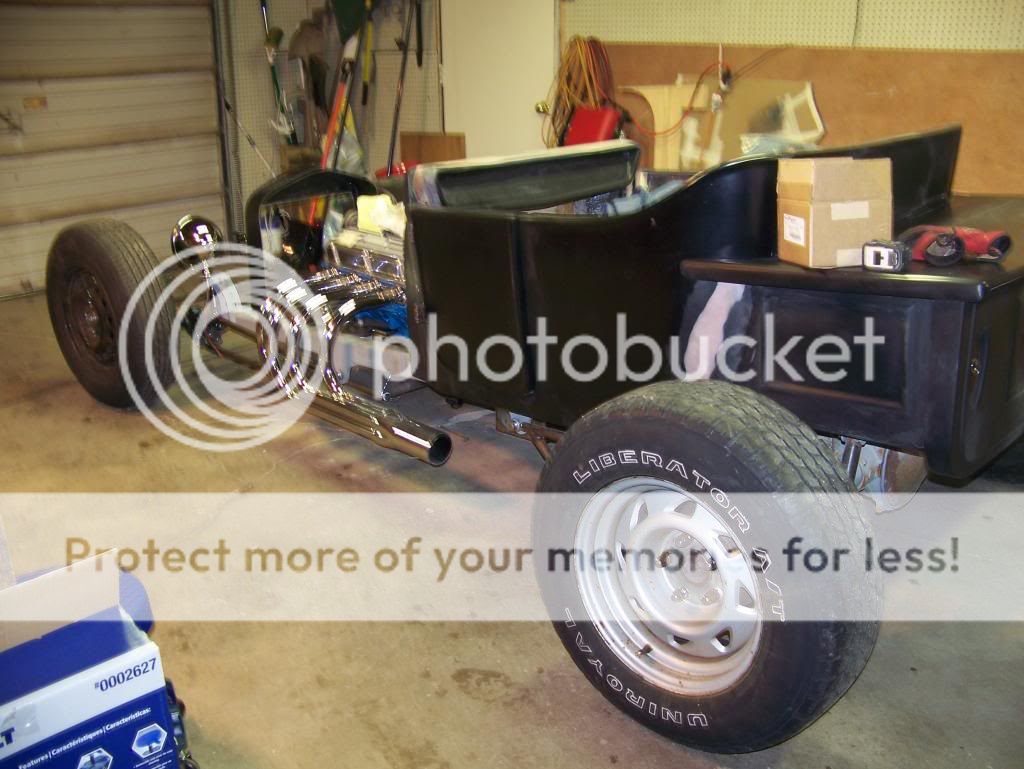
The car as a roller.
I started in on the brake and fuel lines a couple of weekends ago. The lines have been run and bent and just need to be flared. I went with 3/16 & 3/8 stainless line and am going to be using AN fittings. This Friday I plan to work on the linkage between the brake peddle and master cylinders. Once again I went with stainless round stock for the push rod or linkage. I have drilled & taped one end and will work on the other when the rod end comes in which should be Thursday. Friday is looking like a busy day. I'll post pictures of the above mentioned when these jobs are complete. I also hope to get better at posting pictures and keeping this album up to date. I'm also sorry for dumping so many pictures at one time LOL. What a PITA.
Rear coil overs from RPM. I still need to remove the QA1 sticker from the shock. I've done my best at keeping from buying anything that displays advertising on something I have bought. Even if I have to pay a little extra to avoid such.
I found this gas tank on EBay. It's an old Total Performance tank that someone had stored in their attic. This was new and came in the original box. Every now and again I get lucky and find a deal. I bought the tank for $100.00 and I figured that deal couldn't be beat with a stick.
This is the deck lid that I bought from CCR. I cut it down to fit my bed. I had read that not all fiberglass bed manufactures use the same measurements as was the case here. So I wasn't surprised that I needed to put a little extra work into the lid. If you see the line across the top with the circle in the center, my plan is to cut the bed to allow access and the circle is for the fuel neck. Just need to finish those plans in my head before jumping on it but that project is coming up. Just wanted to say that CCR makes and sells great products.
Steering gear and drag link. I just need to finish w steering gear mount
Steering wheel, column & the start of the column support.
The Lokar shifter in the picture came from a Craigslist purchase. It was set up for a Chevy transmission mount which I converted to a floor mount. I made the
bracket & mounted to the floor. If anyone needs the trans mount let me know. The shifter and mount was bought for $40.00. Another one of those deals
I just couldn't say no to. I also made the linkage as it was cheaper then buying what Lokar wanted by far.
The radiator is mounted and ready to go. I looked all over the place for a radiator that would fit the shell. That was a painful process as it seems that that is a
very hard to find item. If I did come across one that did it would cost a small fortune. I took a radiator from a 1950 F-1 to the local radiator shop and asked them if they could modify it to fit the shell. Well after a long conversation I came to the conclusion that the radiator would look like total crap and the price would be between $600-$800 bucks!! The guy never cracked a smile when he offered the quote. The search was back on and I picked this one up on EBay. The problem that I kept coming across was the measurements would not fit the shell. The width from side to side was fine as was the fitment from front to rear. The problem that I had was top to bottom. So what I did was cut the shell at the bottom and if I remember right, I stretched it or added an inch of material to the bottom.
I also made the spring perch cover out of fiberglass. I was looking at the chrome ones and wasn't sure if there would be fitment problems and then looked at the cost again and decided to make my own and once again be a little different.
Driveshaft had been cut and installed and I did go with Spicer greaseless U-joints
The process of finding hoses has been pretty easy going. Just took coat hangers and bent them to the shape I was looking for and off to the auto parts store. I have found a couple of older guys that seem to be able to function without a computer and are willing to take the time to help me out. I just try to go to the store when things are a little slow and allow them the time to go through their inventory. I then take the new found hoses home and cut them on the band saw to the size I need.
The car as a roller.
I started in on the brake and fuel lines a couple of weekends ago. The lines have been run and bent and just need to be flared. I went with 3/16 & 3/8 stainless line and am going to be using AN fittings. This Friday I plan to work on the linkage between the brake peddle and master cylinders. Once again I went with stainless round stock for the push rod or linkage. I have drilled & taped one end and will work on the other when the rod end comes in which should be Thursday. Friday is looking like a busy day. I'll post pictures of the above mentioned when these jobs are complete. I also hope to get better at posting pictures and keeping this album up to date. I'm also sorry for dumping so many pictures at one time LOL. What a PITA.

