benT
Active Member
"Purple Powder Pickup"
We've been picking at this project off and on for a few years now, so I thought this would be a good time to start a build thread. Maybe this will provoke us to get this build done!
A few years ago my uncle Dennis who does much of the powdering at our shop expressed interest in having a hot rod for himself. He's been on every trip dad and I have made with our '27's and wanted one for his own. Dennis is on a tight budget like most of us, so after a few brainstorming sessions, we decided the best way to proceed is to use as much of the leftover parts we have from our various builds and build a frame. Obviously, there are some items that have to be bought or are in our opinion, worth it for safety. We would powdercoat or ceramic coat as much as possible to be able to use this as a rolling example of our shop's work.
We figured that a '23 would be the way to go as far as expense, and availability. The theme is an early -sixties type T, with a nice rubber rake, steelies, whitewalls, etc. The body will be a metallic purple with a silver metallic chassis.
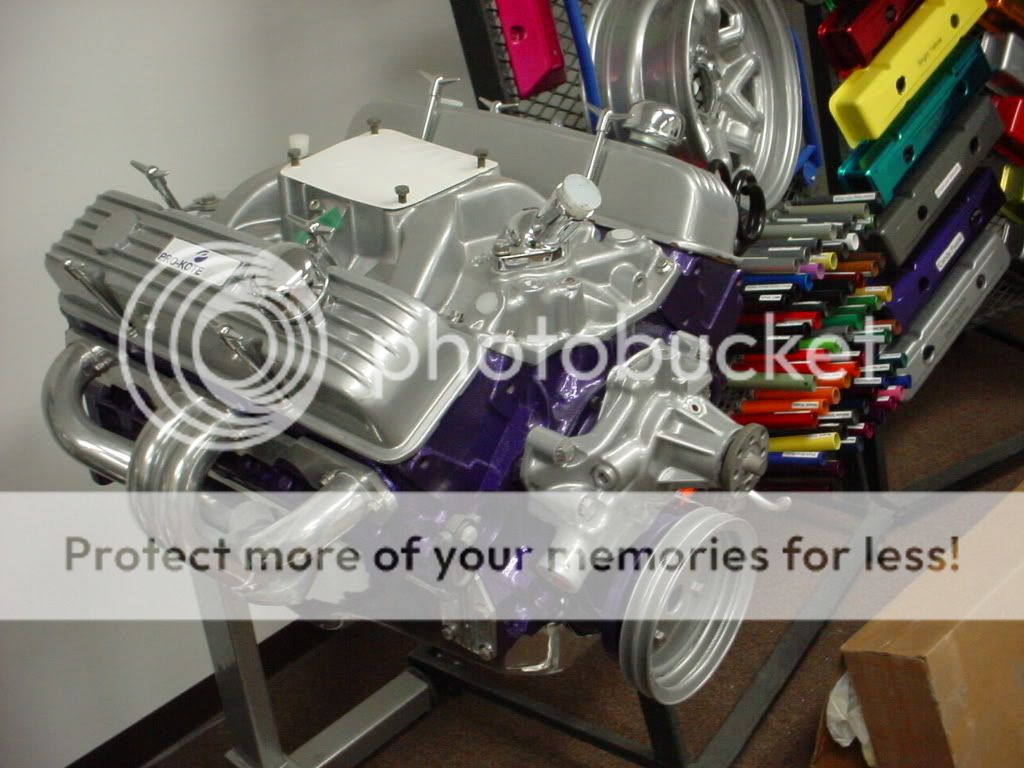
Engine: '66 283 that was formerly in my dad's '27. We freshened up the engine with a hone job, new rings, seals, gaskets, etc. The heads are older World Products and we gave it a fresh valve job ans seals. Intake is a swap meet special cleaned an powdercoated Silver Sparkle. The valvecovers were another $25 swap meet item that we cleaned and coated. Accessories are picked from our pile of stuff in the shop...
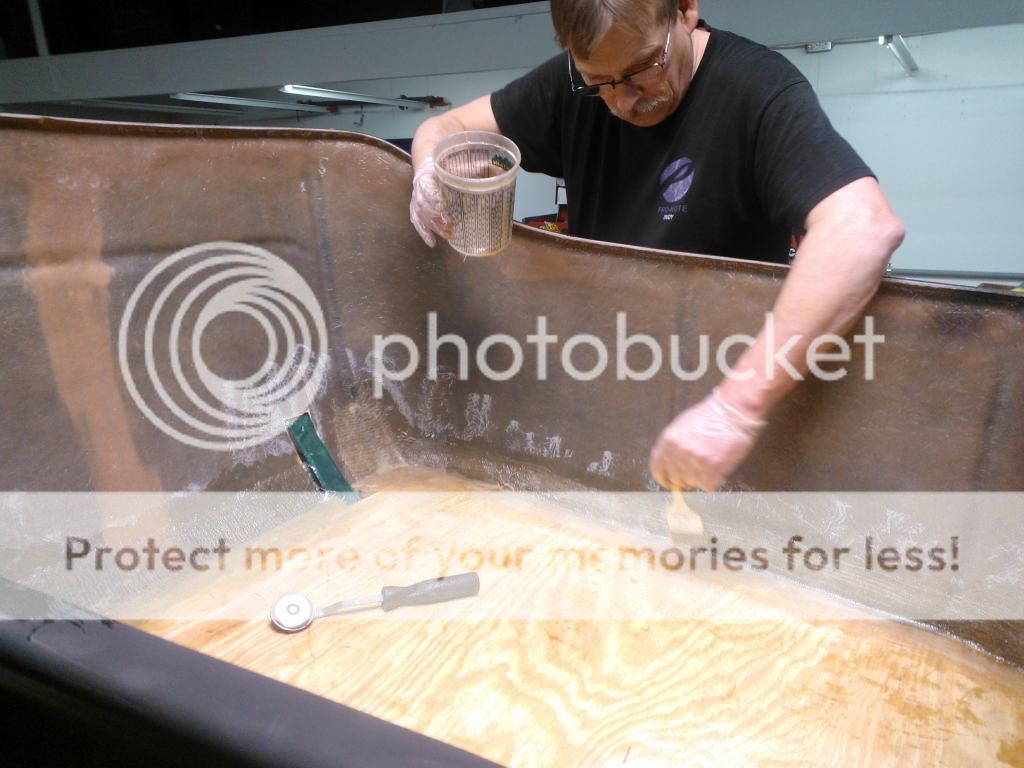
Body: We first started off looking at the MAS bodies when we were visiting relatives in MN. they were decent and we figured adequate for the nature of this project. Soon after, MAS went out of business, but we connected with the body builder and made a trip out there to buy one. We ended up buying three bodies and beds as they were decent and real cheap. We still have two and if we get this done, I have a few ideas for another one! We have only made cuts to the body to be able to put in on the frame at this point. The rest of the reinforcing, bodywork, etc will come later.
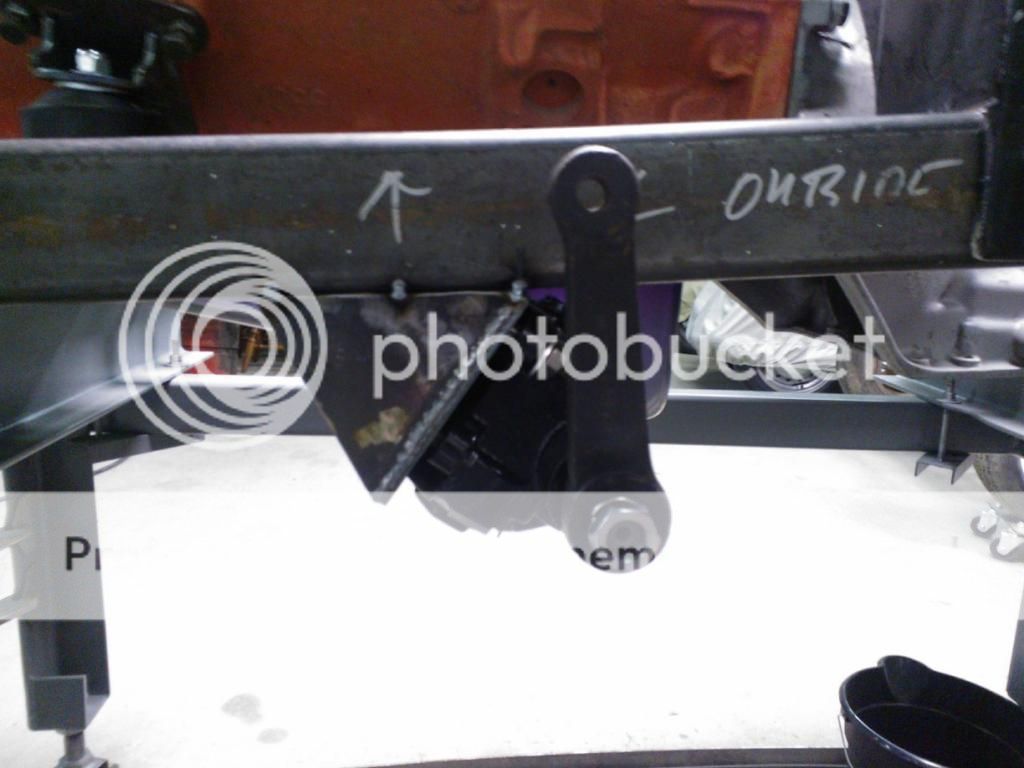
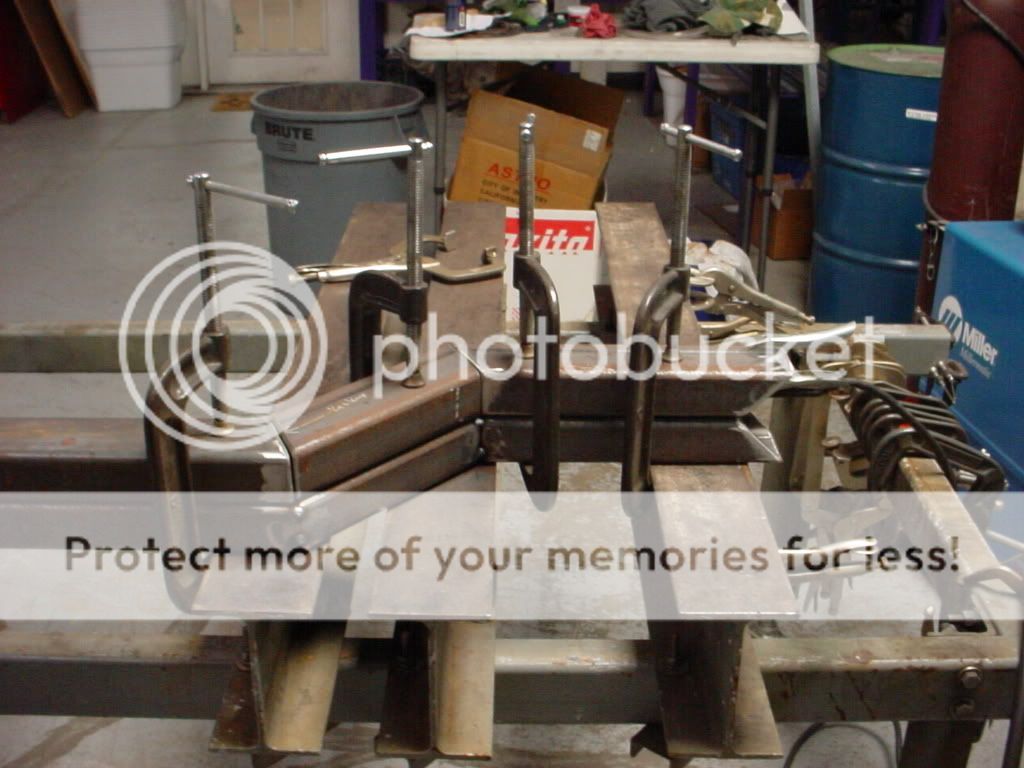
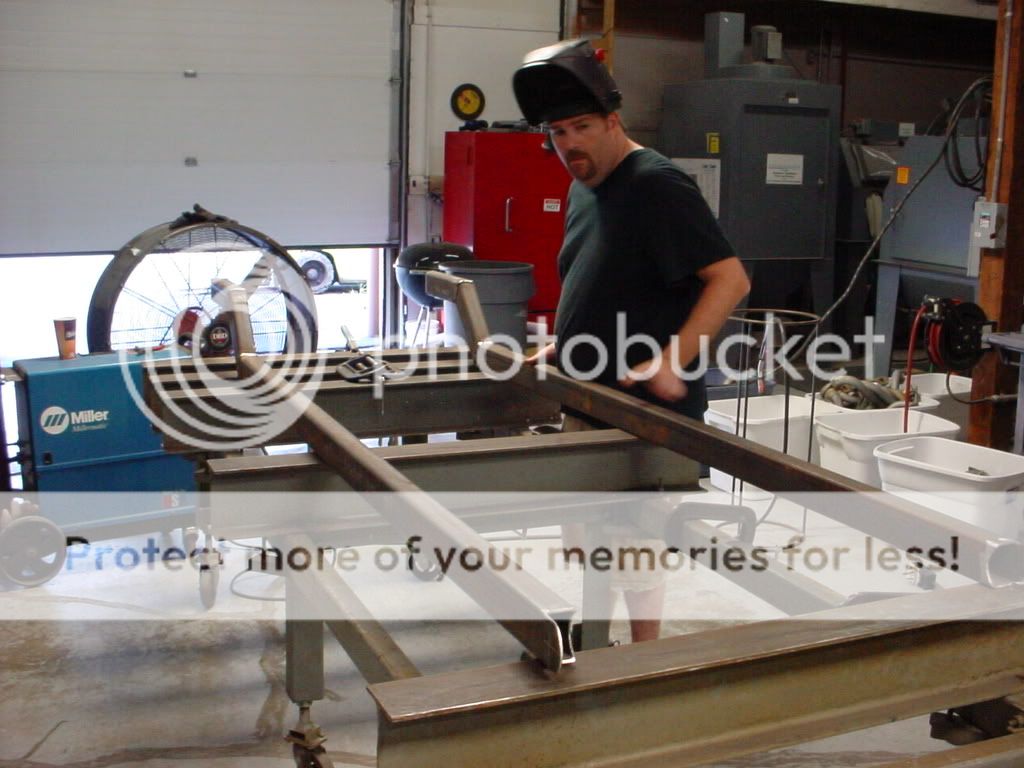
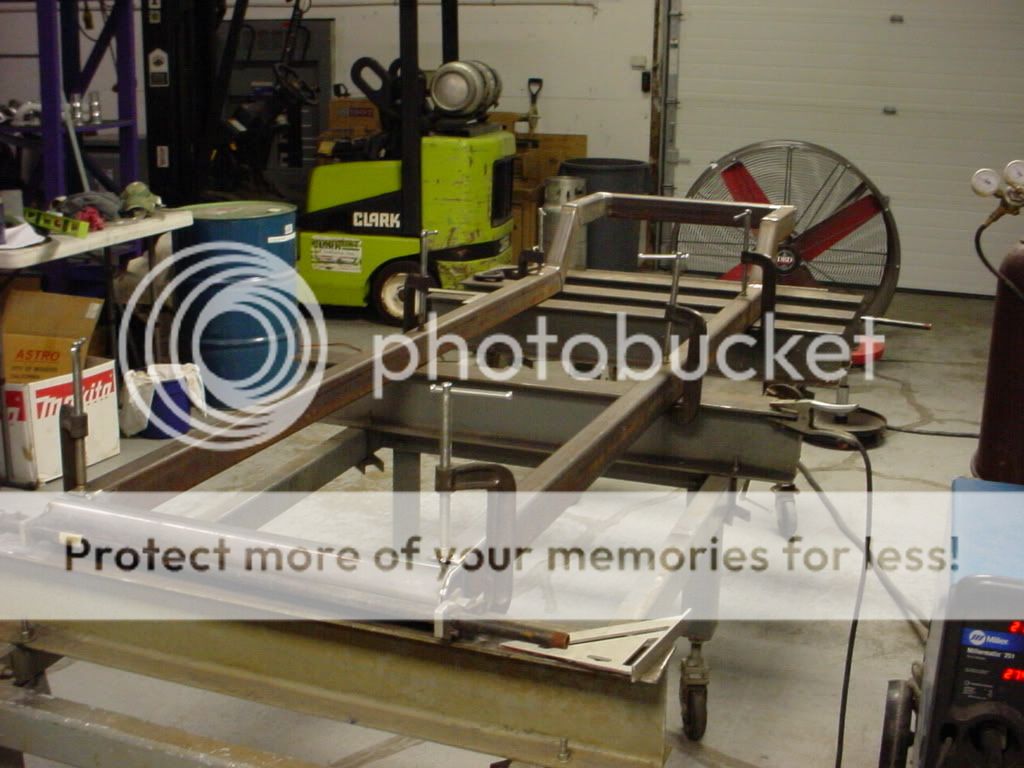
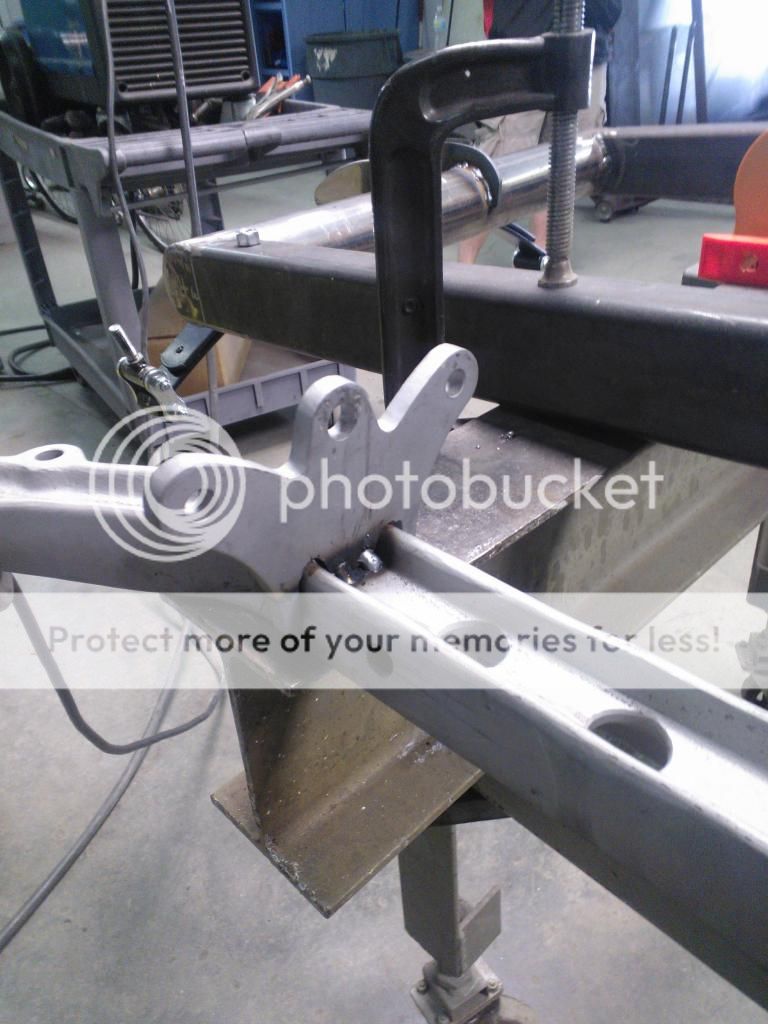
Frame: Decided on an untapered frame utilizing 2"x3"x3/16" rectangular mild steel. I used a variety of frame plans from Youngsters, to Spirit, to Chester's for the layout. Its pretty typical, and we used a 3" round tube for the front member. We bought the spring perch and engine mounts from RPM.
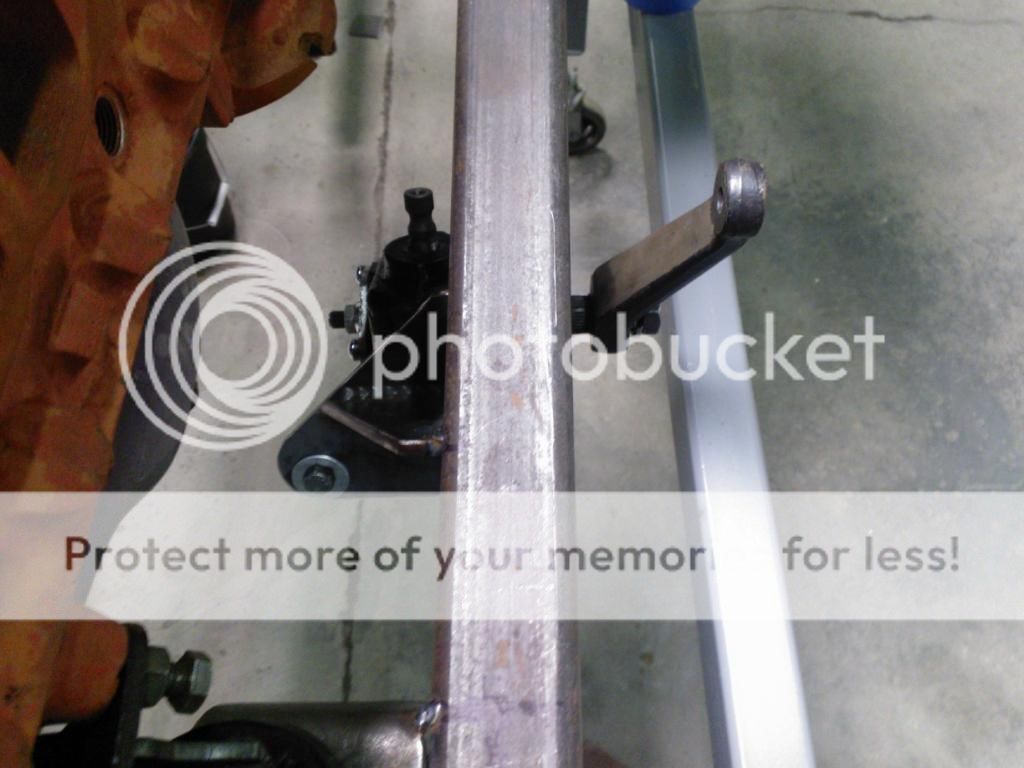
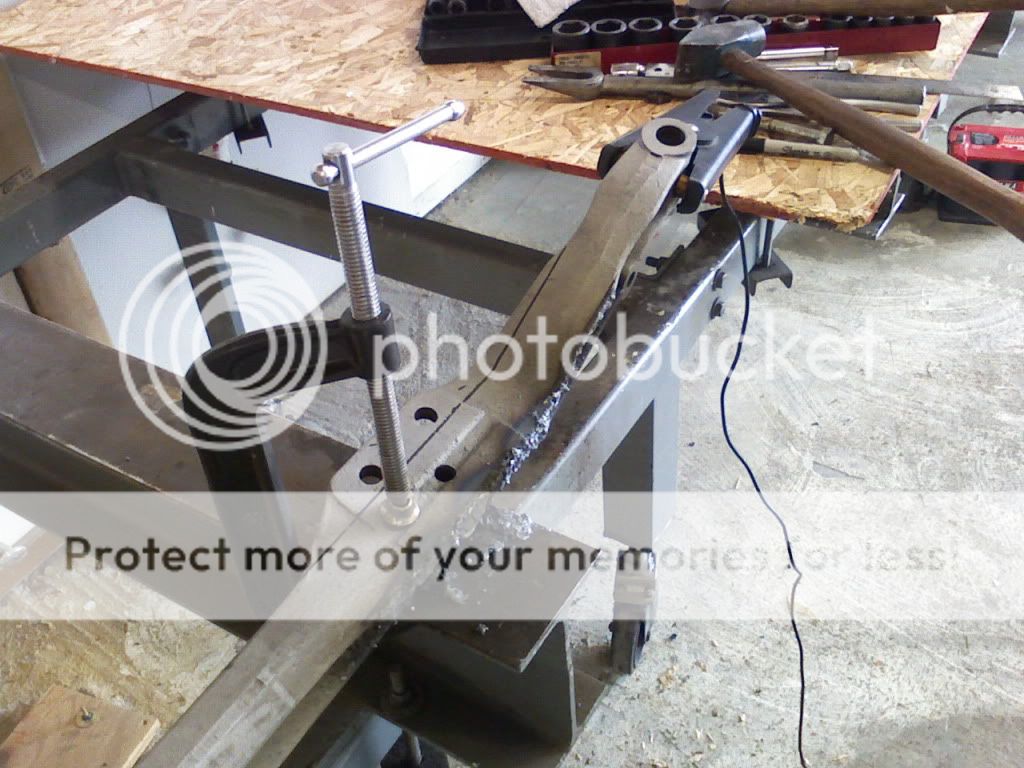
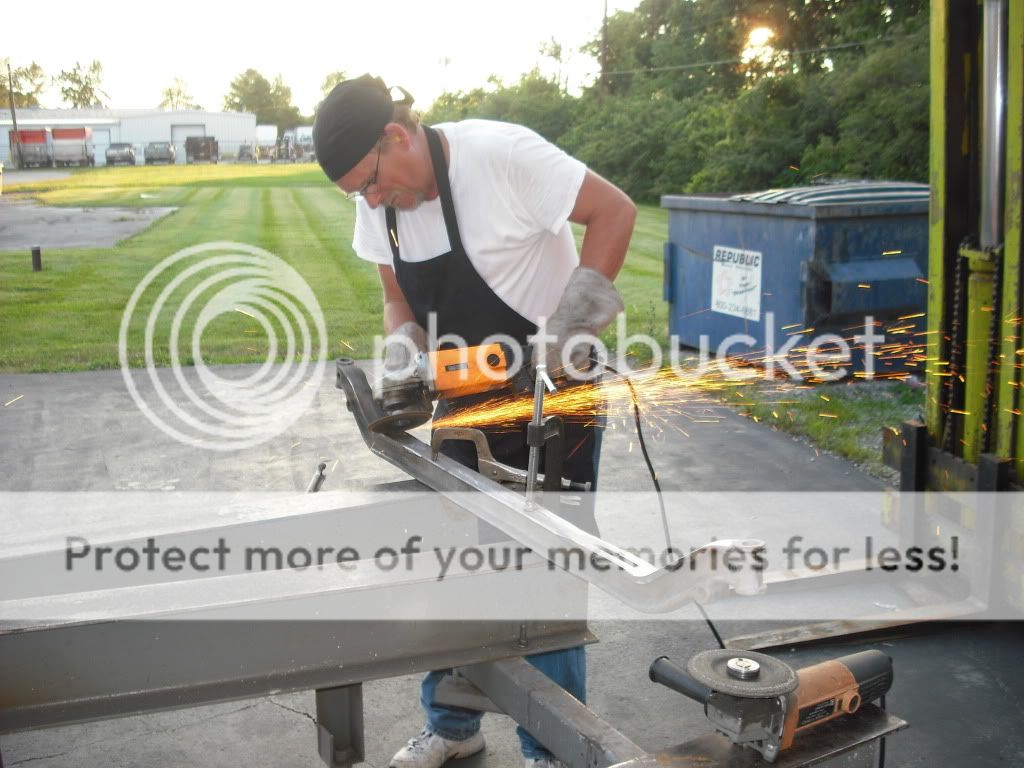
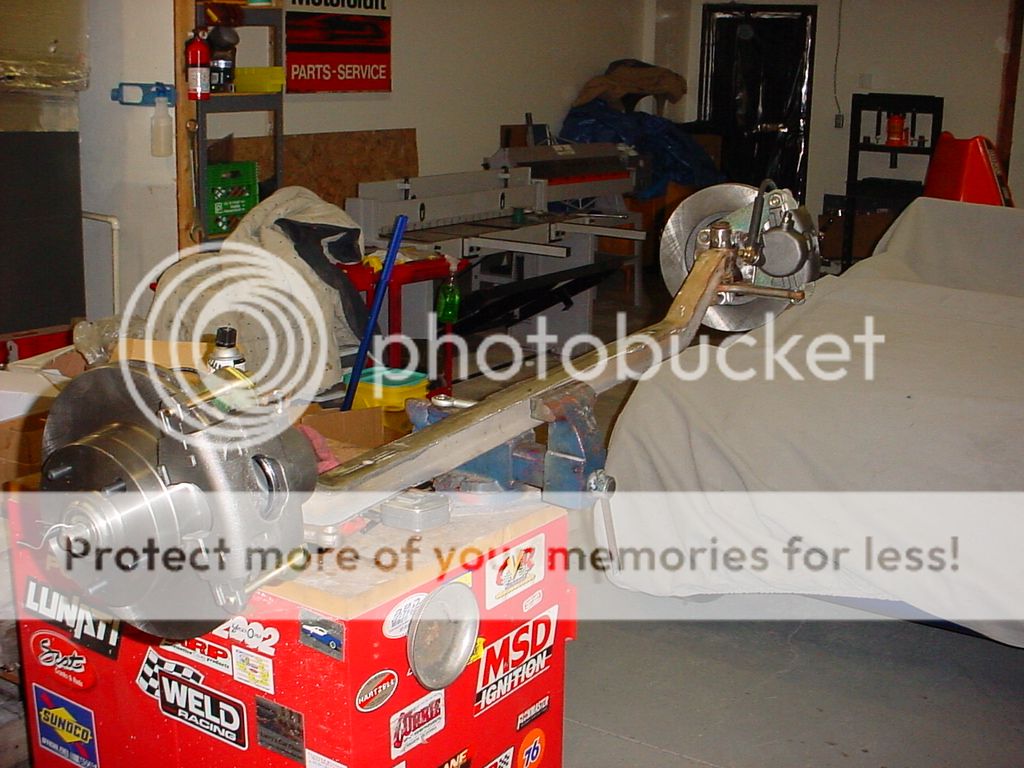
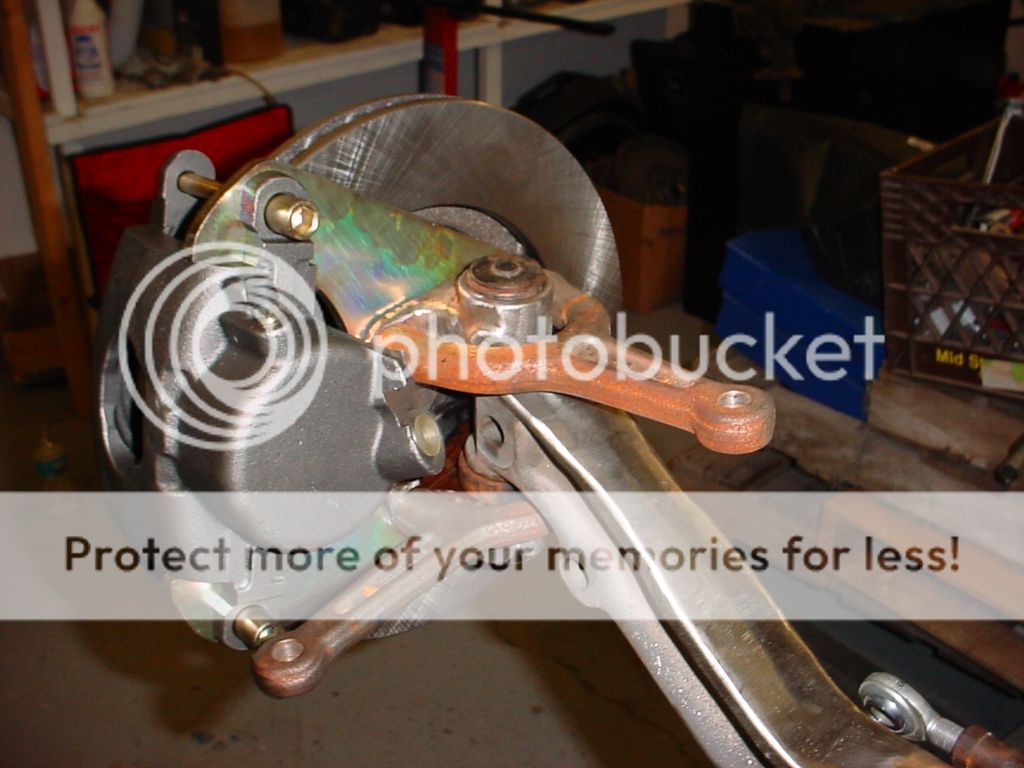
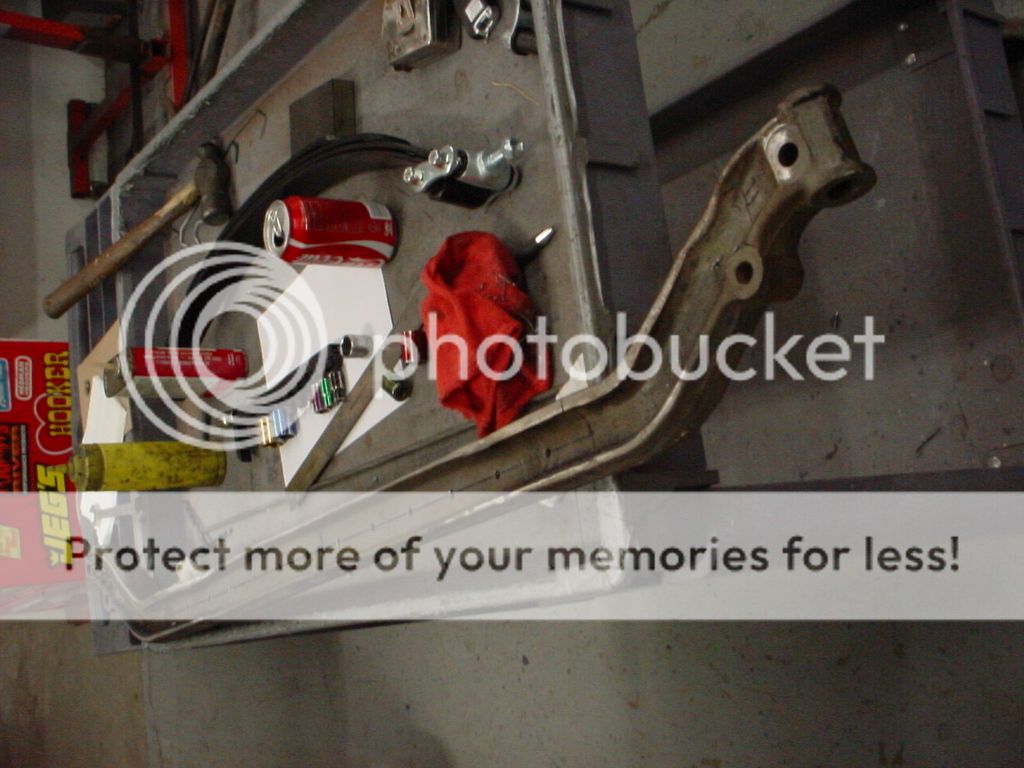
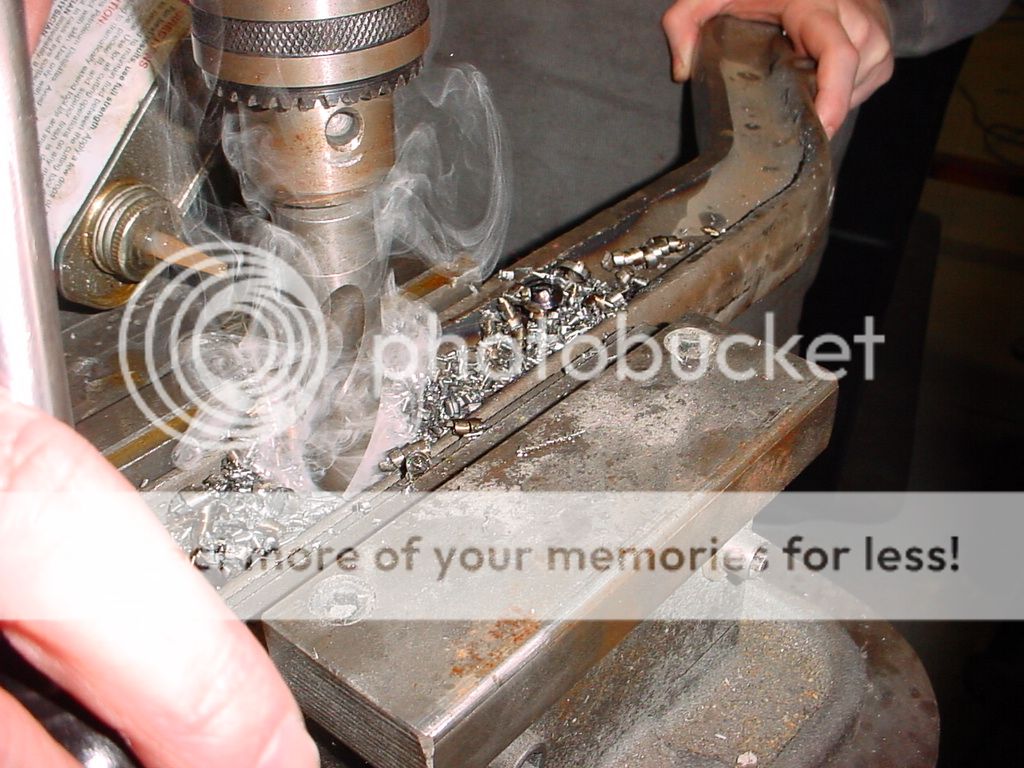
Chassis/Suspension:We acquired a 50's ford straight axle and figured with a bit of grinding, we might just be able to polish a turd. We first disassembled it and media blasted it. We pulled out the torches and started cutting off the spring perches and the arms on the spindles. With quite a bit of grinding, we were able to get it looking presentable. We then laid out a pattern and proceeded to drill 1" holes through the web to give it the drilled look. The batwing brackets were from RPM. We were able to clean up the spindles to allow for bolt-on arms to fit. We then ordered the economy disc brake kit from speedway. The truck spindles are similar, but he spindle bushing spacer will not work. Speedway got us in touch with their supplier and we were able to get ones that did work. Front suspension will be a buggy spring and either friction shocks or some small hot rod ones..not sure yet. Rear axle will be an S10 axle we pulled from the pic a part. Late 90's with a 3.42 posi. We will be using RPM shock mounts and panhard bar bracket of our own design. We are also building the front and back hairpins.
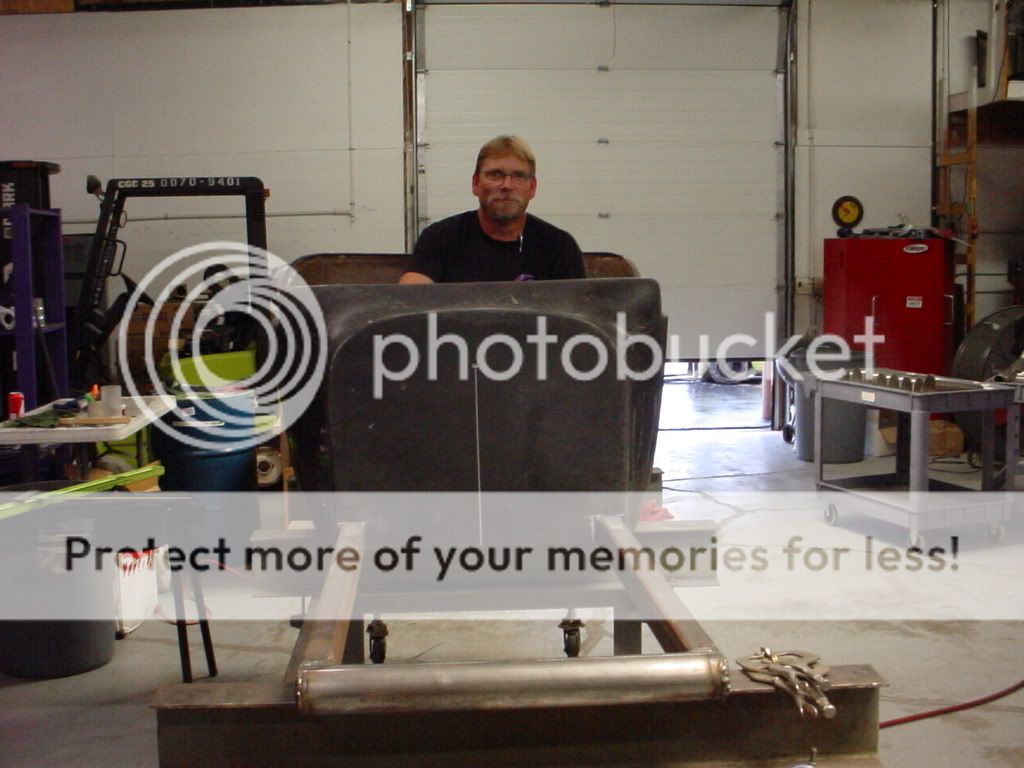
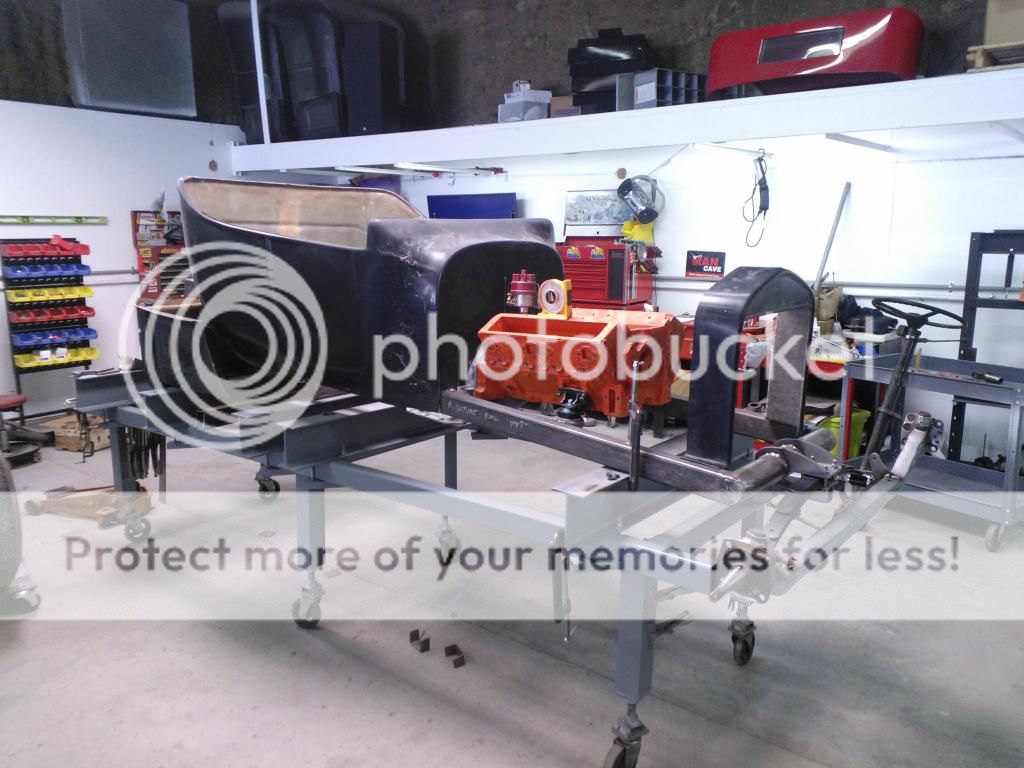
Current Status:Here's where we are at now. The engine is mocked up and the the body is placed. We are about ready to get the front steering figured out and mocked up. Rear end is ready to be mounted.
More updates soon!
We've been picking at this project off and on for a few years now, so I thought this would be a good time to start a build thread. Maybe this will provoke us to get this build done!
A few years ago my uncle Dennis who does much of the powdering at our shop expressed interest in having a hot rod for himself. He's been on every trip dad and I have made with our '27's and wanted one for his own. Dennis is on a tight budget like most of us, so after a few brainstorming sessions, we decided the best way to proceed is to use as much of the leftover parts we have from our various builds and build a frame. Obviously, there are some items that have to be bought or are in our opinion, worth it for safety. We would powdercoat or ceramic coat as much as possible to be able to use this as a rolling example of our shop's work.
We figured that a '23 would be the way to go as far as expense, and availability. The theme is an early -sixties type T, with a nice rubber rake, steelies, whitewalls, etc. The body will be a metallic purple with a silver metallic chassis.
Engine: '66 283 that was formerly in my dad's '27. We freshened up the engine with a hone job, new rings, seals, gaskets, etc. The heads are older World Products and we gave it a fresh valve job ans seals. Intake is a swap meet special cleaned an powdercoated Silver Sparkle. The valvecovers were another $25 swap meet item that we cleaned and coated. Accessories are picked from our pile of stuff in the shop...
Body: We first started off looking at the MAS bodies when we were visiting relatives in MN. they were decent and we figured adequate for the nature of this project. Soon after, MAS went out of business, but we connected with the body builder and made a trip out there to buy one. We ended up buying three bodies and beds as they were decent and real cheap. We still have two and if we get this done, I have a few ideas for another one! We have only made cuts to the body to be able to put in on the frame at this point. The rest of the reinforcing, bodywork, etc will come later.
Frame: Decided on an untapered frame utilizing 2"x3"x3/16" rectangular mild steel. I used a variety of frame plans from Youngsters, to Spirit, to Chester's for the layout. Its pretty typical, and we used a 3" round tube for the front member. We bought the spring perch and engine mounts from RPM.
Chassis/Suspension:We acquired a 50's ford straight axle and figured with a bit of grinding, we might just be able to polish a turd. We first disassembled it and media blasted it. We pulled out the torches and started cutting off the spring perches and the arms on the spindles. With quite a bit of grinding, we were able to get it looking presentable. We then laid out a pattern and proceeded to drill 1" holes through the web to give it the drilled look. The batwing brackets were from RPM. We were able to clean up the spindles to allow for bolt-on arms to fit. We then ordered the economy disc brake kit from speedway. The truck spindles are similar, but he spindle bushing spacer will not work. Speedway got us in touch with their supplier and we were able to get ones that did work. Front suspension will be a buggy spring and either friction shocks or some small hot rod ones..not sure yet. Rear axle will be an S10 axle we pulled from the pic a part. Late 90's with a 3.42 posi. We will be using RPM shock mounts and panhard bar bracket of our own design. We are also building the front and back hairpins.
Current Status:Here's where we are at now. The engine is mocked up and the the body is placed. We are about ready to get the front steering figured out and mocked up. Rear end is ready to be mounted.
More updates soon!
")