Ron Pope Motorsports                California Custom Roadsters               

The excitement is building

No broken bones . . . . No massive loss of blood . . . . No smashed fingers . . . . Not even a broken fingernail . . . . . :thumbsup: :thumbsup:

Long exhausting day, but I followed my plan and all went well with no ooopsies and no gotcha's, . . . . . I mean really . . . . what are those odds!

Anyway, the body is happily on its dolly and the chassis is ready for the engine / transmission assembly install.
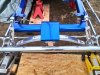
Here's some pics:


_Lift 1r.jpg _Lift Detail 1r.jpg _Lift Detail 2r.jpg _Sling Detail 1r.jpg _On Dolly 1r.jpg _On Dolly 2r.jpg _Chassis 1r.jpg _Chassis 2r.jpg _Chassis 3r.jpg
 
Seat belts are available in many colors. They make brilliant 'webbing' between the body and chassis. I have seen blue seat belts that would be just right for your bucket. Really cheap if you can get a couple from a wreckers yard; don't know if you have one on the Islands though. EFray maybe?

Just a thought.
G


We don't really have a wrecking yard here, everything scrapped goes off island to someplace with room and a facility to manage it, usually Puerto Rico.

That's one of the downsides to living on a small rock, (about 80 sq miles) in the middle of the ocean . . . . . everything has to be $hipped in and usable used stuff is almost non existent.

I did however, get a pair of nice blue ones from Summit when I was first buying bits for this project, though it appears they since changed the part number.

Was also thinking about going to a 4 point on the driver's side for the "race car look".
 
Last edited:
Most wrecking yards won't sell used seat belts because of law suits if something happens. Your ride looks great and deserves new bright ones.
 
I meant to be used as webbing between the body and chassis...
 
Have you got a pic to illustrate what you mean . . . .

I'm drawing a mental blank, . . . maybe it's the dementia kicking in
 
Sorry but no.
I am trying to say that instead of using shop bought webbing between the body and chassis ( to stop rubbing and isolate the body a little) you can use old seat belts in the same colour as your paint job.

Probably best to just leave me to my thoughts....
 
The darker gray on rear half of chassis is the body welt to stop squeaks and rubbing. Some use seat belt material.
upload_2020-9-4_9-49-22.jpeg
 
I use 3" round aluminum pucks 3/4" thick that go between the body and frame at each mounting hole. I use 4 on my cars. Thickness depends on how much you channel the body over the frame.Grade 8 bolts and steel well nuts.
 
Starting to Look Like a Real Hot Rod !!!


So I was finally able to corral a couple guys to help me get the engine & transmission installed

I checked the flexplate distance from the bell housing flange and it was right to spec.

Install converter onto transmission input shaft and check lockup O ring and depth from bell housing edge to converter bolt pad, . . right on spec

Slide trans up to engine and check converter spacing, . . . right on 1/8", as per spec . . .

It was all sailing along so smoothly until I checked to be sure the converter bolts would all line up with the flex plate holes and thread in without issues . . . .

Well shit, had to back the trans off twice and drill the flexplate + 1/64" and then another 1/64" before all 3 converter bolts would hand thread in without binding.

Was a real pain in the butt and kept me out in the mid day sun wayyyy more than I wanted to be, but it's all good now . . .

I'll go back and put 3 grade 8 washers under the bolt heads and add some locktite a little later.


Anyhoooo,

Now I can check the output shaft angle and adjust the pinion angle to match if need be and then get some measurements and order a driveshaft.

Woooo Hooooo . . . . . Rockin' and Rollin' now . . . . :roflmao:


Some pics of a long day's work :

_Front View 3r.jpg _Left Front Qtr 1r.jpg _Right Front Qtr 1r.jpg _Right Front Qtr 3r.jpg _Fan to Waterpump Clearance 1r.jpg _Fan to Waterpump Clearance 2r.jpg

Really looks like I nailed it pretty good on my rad mount and fan shroud module!

Good thing I wasn't planning to add a blower . . . . . :D
 
Last edited:
With the weight of the motor compressing the front suspension, I can see that I have to relieve the grill shell above the axle to allow for proper suspension travel, there's barely a half an inch clearance as it is.

I'm also a bit concerned about ground clearance under the "chin" of the grill shell, . . . . I'll check the tire inflation as they seem a bit low, but I may have to run a taller tire. . . I can just barely slide a 2X4 under the chin as it sits.

I thought about going to coil-over shocks in the front to add a little more spring to carry the big block weight, but there's not enough space. The current shocks clear the grill shell by about a quarter inch at most.

Wonder if I could add a leaf?

Anyway, . . . . some more pics:


_Lft Front Axle Clearance 1r.jpg _Rt Front Axle Clearance 1r.jpg _Rt RR Qtr 1r.jpg _Rt RR Qtr 2r.jpg _Rt Side View 1r.jpg
 
I am running the same style grill as you have. I had to enlarge the cut out for the axle a bit. I do have more chin clearance so that was fine. If your spring eye is reversed, maybe a non-reversed may give you what you need. As you say, just add another long leaf may do the trick also.
 
I am running the same style grill as you have. I had to enlarge the cut out for the axle a bit. I do have more chin clearance so that was fine. If your spring eye is reversed, maybe a non-reversed may give you what you need. As you say, just add another long leaf may do the trick also.


My spring eye is up . . . not sure if the shock mount would still fit if the eye was facing down . .

I'll look tomorrow and see how much space there is between the shock eye and the spring eye.
While it wouldn't give me any more suspension travel, it would get another inch or so of ground clearance . . . and I wouldn't have to relieve the grill shell as much for axle movement.

Can you get additional leaves for these springs . . . I like the idea of a little more spring rate for the extra weight.

Paging Josh !
 

Attachments

  • _Spring eye 1r.jpg
    _Spring eye 1r.jpg
    976.7 KB · Views: 15
Last edited:
That li'l roadster is DYN-O-MITE! Re: chin clearance, what about a spacer under the spring perch?


That might be the easiest. and least costly solution . . . . do I have to make one, or are they available . . .

Might be worth a shot, just to see how it looks.
 

     Ron Pope Motorsports                Advertise with Us!     
Back
Top