Ron Pope Motorsports                California Custom Roadsters               

Big redo of the old bucket

I tried to cover my interior with black vinyl, but it looked bad. Two things I've never understood: women and upholstery. So I ripped it out, did the Bondo and sand routine, then gave the whole interior two coats of primer. Then two coats of truck bed liner:
bed%2Bliner.JPG
This is serious stuff. Make a mistake with ordinary paint, no big deal. But bed liner is impervious to chemicals, sanders, and nuclear bombs (I didn't test that last one). The can says Xylol will take it off. I gargle with Xylol, but was out today. In any case, I did a super mask job:
masking.JPG

Any overspray is a major boo-boo with bed liner.
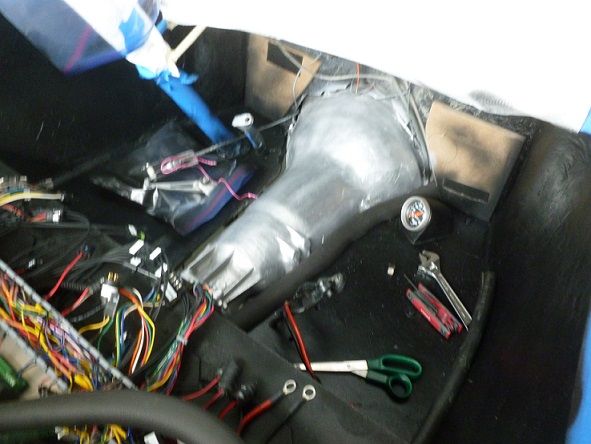
Did the floor and sides and interior firewall. The finish is really nice. Textured, tough as nails, weatherproof. I left the tranny exposed and painted it silver, with 3 coats of clear. It looks good, almost like plastic, and should withstand clumsy oafs like me. And I use this:
E6000.JPG

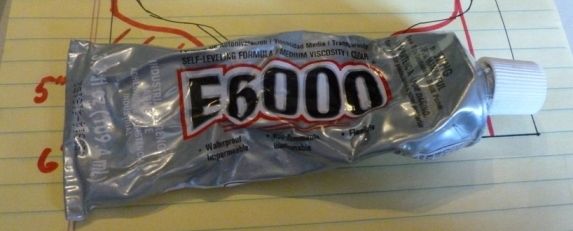
..it's a general purpose glue that will stick most anything; wood, 'glass, metals. More versatile than epoxy or superglues. Get it at hobby stores.

Nice! I used a Rust Oleum American Accents stone texture spray in my electrical compartment (under the seat). It turns out lightly textured and is a thick spray multi-colored more of a speckle (different colors available grays, browns etc...), and it fills in slight defects in the surface. Never thought about bed liner.
 
Did the interior with bed liner and it looks pretty good for spray can and it is tough. Also painted the exposed tranny silver:
P1030519.JPG

You can see some scratches on the tranny. I will look at them all summer and think "why didn't I grind, Bondo, sand, and primer more?" Added a tranny temp gauge in a pod on the floor. To finish the gap between the tranny and floor I used foam pipe insulation. Easy to cut and form,
I even did the pedals in bed liner:
P1030521.JPG

...and should have better wet grip than the rubber inserts.
A preview of the Houdaille shock mounts:
P1030522.JPG

...3/16" angle iron. The mount will bolt to the bottom of the frame rail and be painted body color. The shock arm will connect to the batwing at the lower 4-bar bolt.
 
Those dampeners look awesome compared to mine.
Can't wait to see the way you have them set up.
I have the end of the tube available where you have your rack coming through, so I will be mounting mine there with a mounting tab on the end as if the shocks were an extension of the tube.
 
Here's the setup:
shocks.jpg

...the shock mounts to a piece of 3/16" angle iron bolted to the frame. I'm thinking ARP 12pt SS bolts. They are advertised as stronger than grade 8. And sexier. The shock arm bolts to the batwing right next to the lower 4-bar. Note the slot at the end of the shock arm. Since the shock arm and 4-bar move through slightly different arcs as the axle moves vertically, the slot allows for the difference. The arm mounts with self-lubricating bronze bushings (bronzebushings.com). A nyloc nut will keep the bushings in place, but I'll allow for a little play so any sideways motion of the axle won't put bending force on the shock arm.
 
A very well thought out system. My compliments to your craftsmanship.
 
The secrets of success, nicely done. First look at the top pic, I thought 'here we go, bind' but then.... My bell cranks do the same. I turned up some engineering plastic 'bushes' spec'd for impact and wear resistance to go between the slot and the pin. Originally had spherical bearings in there, but they dont like too much shock.

Good call my friend, good call.
 
Have you driven it yet? How does it ride?
 
Did you know ARP SS bolts are stronger than grade 8? So says ARP.
Yes I knew, but very pricey when trying make the whole SS fasteners. I did buy their engine kit, 12 point!

I'm guessing at the price, but I have some 3/4"x6" SS (~Grade 2) were $15
each at Fastenal. I've yet to use them on my rear end radius rod for fear they
might fail. Others keep warning me, but it hard to see how they would fail
in shear.
 
Finished the shock install today and went for a short drive tonight. BIG improvement. 20 years of a bouncy front end and this was a really nice change. Gonna play with the shock settings (they're adjustable, you know) and see what is best.

P1030587.JPG
 
Oh my, it's been a long time. I'm just getting over triple pneumonia (didn't know I have 3 lungs, did you?) and have scheduled a few projects this winter. First is a replacement for the Panhard rod that came with the Speedway front end. I'm a little obsessive about lateral movement of the axle since the R&P is frame mounted, and any such movement causes the wheels to twitch. It's not a big deal, but I like to experiment. Here's the new setup:

9zjkRa8kRfI0b3zVgwbt2jqbFXLUixseYUxB5rUQbKIXNNRhW9EKxkOjOZUuzt0xH487a6mjV56MFa7rpypQc1RLSxVuXJPBkpRjQavoFyfY-eT8mihAhlgXPDFCYaIS4dh_SRgOIQZSPOEINQR_SAhKKPn6AufXbPS0FWBc0ugUn_N1KaPPo3yBWg8vwiFX1u6hGo8SbiInd_Ap5G61_QwU7OP9pHXiKc85ITP7J_bAc1dMPmnXNtqa8zyfM-tYKUJzlWwvrRjDRBgl1QTp0oYlbTuF7fLAKdJmhWiei4g5bjKE9Wn_-kr_IpxHnDQZZZ-erbQP_Hklgh7yagwc2gYu6uFNahXoUv6KaMkuaF3XSbLAnTQLtUmhq9phLhi4gCR_YTDiBM75dyk3g2ILpE2bP_anVC-QNWmzBc73v_PhWzXlpJ7AZ4Rb1dCyT17_LO5Fmuz-OGGDc6UztyrgMlKBRQLbo0ahcUujq9INoX2CeaHnTNm7CpLeUDiF_wAMPuM-Yj3KWbipLAK8sxZE9zmt38cwDgTUamSaMAyPauobKqFKfX4CBwiqz6t7d2TRF_Eqw8VeaAI6V51_EGyuuTxnC5NEkaP-WeOzQZyM-bjpocDTyRfIs_aefmjVR_SPldrD48wDmgxlY-SU2noW5pFrYfYYxS6MxqIMCTyiLw=w900-h193-no

It is a variation on a linkage that sports car racers use on their rear ends. Can you identify it?
And here's the central part:


p-xa63BLw-HOT-Dm4f6mHdtwNwnr6HuqElvdMfGDuTiZXWre3dTDWubxEsxK0wGApeSOdnNC9qO1jJoNK2i3OSB8MIVd6KIpNsZdypqiot4WhcJfKT2W2_tfp4KrWfvre7GsOyEMIMAIB07BzghKvQSer6WGVMuh8iuvTYF16JVdp7pYwccczieCizPi2f94nWjowD4oPJirhvMFjN1bFnMagxWa6L2T5ONJhgVYzHrWVVaxQGm62qFlHlE-l_pf8u0cSV2I-gXpEgQV4p9s8cWytsXQf-VbQuyTFzWZZup0EIk8UDMFQZGikX7vU8nn_5J6O05pXosJuqN9k9mTFNTeU30RC2yyZLz8q0QZrZL94xOYjFZ4PXz4Kg74c4qZn03TFwqVS03lylap3mLTYAHGodFXX3ENHPjF97B7nVjvWzNmAG3SKxiqbQh4_RVqZMqiA5u02rWCFf_hB-WNVWim27fcWIsVpQj_wWdQO2iDr60RaofN9f1J43zBglUgu7AujUecvddNDwwMJh5j1e5qKoJN9A1m-accPmZihKAhlR3Op3wCWAc0G94mU9AxsSliOR4PfYUgsk3vCwd9LCWWZGS4KrhYxNsnZMiT20fshObh=w1059-h794-no


I have no idea if this will make any difference, but without us buckethead pioneers the other hot rodders would be stuck in the 20th century, right?
 
Looks like a variation (in movement) of a rear Mumford setup.

mumford.gif
 
I thought about trying this once.

Slide1.jpg
 
Chop, you get the prize. And I thought of gears too, but had the material to make it this way. I'll post results when I can get back on the road.
 
Sorry to hear about your illness; glad you're back in the garage!:):thumbsup:
Yeah, wifey and I went to Dallas last month and both got pneumonia on the airplane.:sick: I'm swearing off flying. If I can't drive, I'm not going. Remember when flying was fun? No TSA, half-full planes, pretty young stews? Now we're X-rayed, strip searched and crammed into a boxcar full of coughing sneezing sickos. :oops:...I rant when I feel bad.
 
Yeah, wifey and I went to Dallas last month and both got pneumonia on the airplane.:sick: I'm swearing off flying. If I can't drive, I'm not going. Remember when flying was fun? No TSA, half-full planes, pretty young stews? Now we're X-rayed, strip searched and crammed into a boxcar full of coughing sneezing sickos. :oops:...I rant when I feel bad.
I feel ya. The last time I flew l had a hassle with a TSA jerk in SanAntonio over a baggage mistake by the airlines baggage check clerk and she admitted it and tried to reason with him too. The idiot was screaming at me, it took all of my restraint not to react violently. I hate being treated like an inmate. Also had much less than pleasant experience with a stewardess, or whatever they call them now. It left a very bad taste in my mouth. I refuse to fly unless there is no avoiding it, and haven't since. That was in 05. We used to fly fairly often.
 
I'm 40 plus year Pilot, Mechanic and Inspector in the Aviation (Helicopter) business. in 2009 I got so much hassle from the TSA that swore of flying commercially. They had PED enhanced Agents running around screaming to hurry up, get in line, do this .don't do that can't you read the signs.

There is no sure sign that the terrorists have won than this stuff.

I rant when I feel bad to.
 
Back to work. Here is the centerpiece of the new control linkage:
ZU9FPpZqrkMqAnxpINSoaDMf7Mc1KeJv0fycfg2Oxsve2bIQvC4gZHqM5tmfN5o6Jq87qX8yFu5f7g=w293-h220-rw

And here is the mount, which attaches to the leaf spring retainer plate:
V3KuhVi_AwQn6RSJ0AdfqWeNqIxdsxK6f5JzJosfPhbKs-vCwng1f6n3WX_Yc6ZCAkRc-esn91VmzQ=w293-h220-rw

Note the use of aluminum brazing. This is great if you don't weld. Brazing is done with a propane or MAP torch and an aluminum brazing rod. Both at HD and cheap. Brazing actually binds the pieces together like welding, but it's as easy as soldering. Check YouTube for videos.
I bought a paint booth! Well, Target calls it a storage bin, but at $7 for small parts it's hard to beat. Too cold in the garage, so I put it in the living room (while wife is at work):
csF99I2b1En2VhJZacUeE2aEL3BDthVcC726tF2rz0Gip1Nn8WwUz-n-ztAf8FFnCmqzRf_l7gmloA=w293-h220-rw

Hang the workpiece with a wire, and move the lid around to spray the piece, then close it while it dries.
1rFm0cCpohy4X4dWwEikjTQIsvctDM5YzH4E3SznxVhPV4Z827COrFWSTO8Ud-D_Pmz5WDi3Ehi4iw=w293-h220-rw

Primer, couple coats of body color and a clear coat, and it's ready for the car. I'll hide it before wifey gets home. They just don't get it...
 

     Ron Pope Motorsports                Advertise with Us!     
Back
Top