Ron Pope Motorsports                California Custom Roadsters               

My 2x2 tunnel ram

LKE

Banned
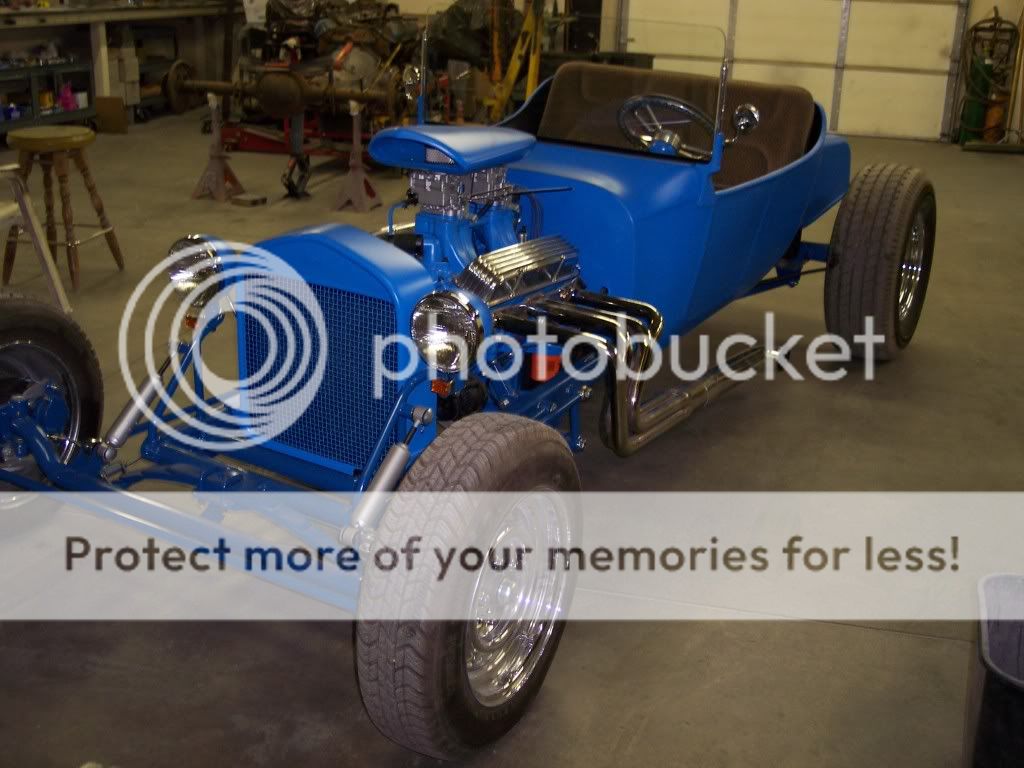
After posting a pic in Rooster's thread, I had a PM about it, so I thought I would post a couple pics, and give some info. Excuse the dirty engine, the breather spits oil. And I am to lazy to fix it LOL. I just hose it off before I go anywhere :rolleyes: I drive it so often, I dont want any down time on it. After cruise season I will fix it.
Here is what is done...
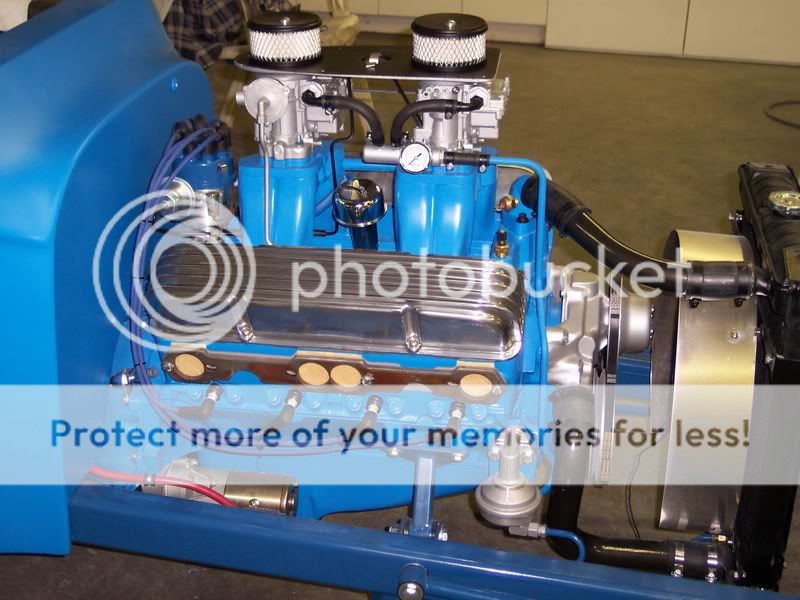
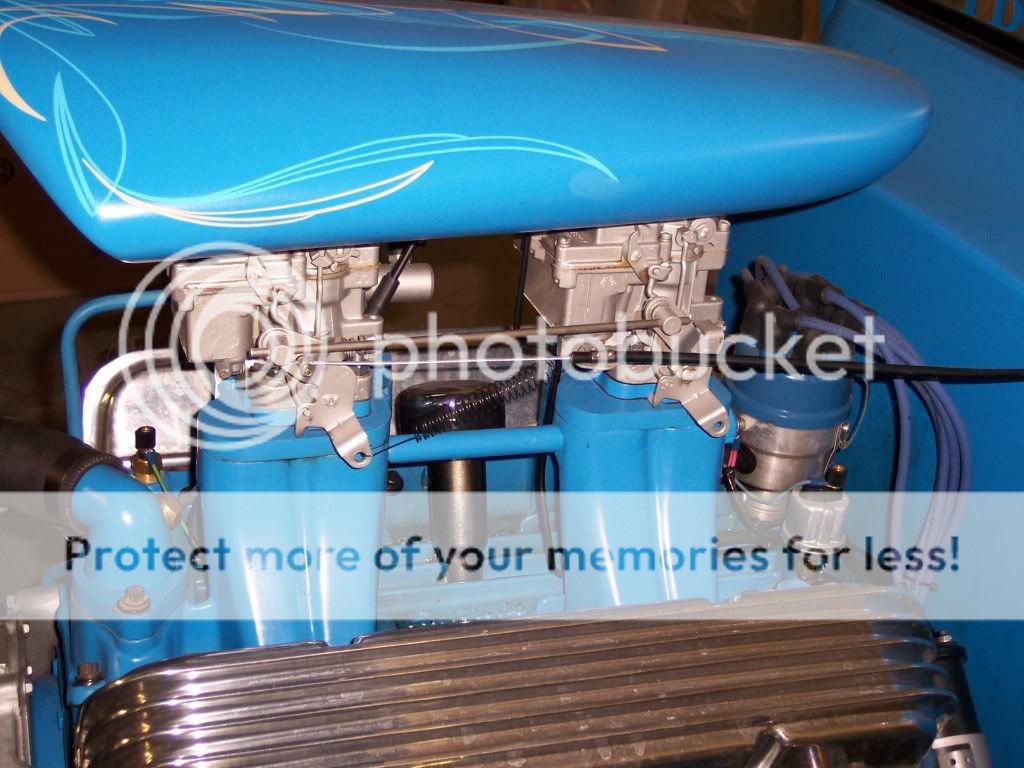
The manifold is an edelbrock street tunnel ram. I bought it used off ebay. The base has been modified to make decent sized plenums. The center of each set of four runners was machined out, and a piece weld in to make the bottom of the plenum. All the welding was done from the inside so none of it shows. I installed a piece of 3/8" aluminum sch. 40 pipe between the two plenums to balance the vacuum signal. Also welded from the inside. There is a threaded bung on the back for a PCV. Which is not on now, but will be again soon. It ran better with it. The linkage is very simple. I machined a couple small pieces for pivots, and then ran a piece of 3/16" rod between the two carbs. Then just used a universal cable hooked to one of them. Carbs are rochester 2g's for a 1966 impala with a 283. And were bolted on right out of the box. Choke is hooked up on the rear carb. No choke on the front carb. I drilled and tapped the T-ram 1/8" npt over the heat riser hole in the head. And ran a piece of 1/4" aluminum tubing to the choke. It works well too. The fuel lines are just -6 an adaptors from summit racing installed in the carbs. -6 JIC x 3/8" barb fittings from my local hydraulic shop (painted black to match the hose) attatched to that, and some rubber fuel line. The fuel manifold is custom made, and the gauge is from a local industrial supply warehouse. It uses a stock mechanical fuel pump.
In all, It's nothing fancy really. But there is a fair amount of machine work, and tig welding in it. So it may be beyond the average home builder. The thing I like the most is that it turned out so simple looking, almost like a bought part. So nobody really catches it, unless they notice they are 2 bbl's on there.

100_0453.jpg


100_0429.jpg
 
VERY nice! I'm diggin' the sweet pinstripes!
 
tfeverfred said:
VERY nice! I'm diggin' the sweet pinstripes!

Just for you Fred...

100_0430.jpg


100_0427.jpg


I seemed to have lost the pic of the radiator shell stripping. But you get the idea.
If you didnt know, the subtle white lines are grease pencil the stripper puts down as reference marks. And they just wipe off. These pics were taken the day after the stripping was done, and It wasnt time yet to wipe them off.
And before any one asks, I dont know what it costs to have that done. I traded some air bag cups for it ($200 retail price, $40 my cost :razz: )
 
:rock:Really sweet looking. This is what t buckets are all about build your individual car.
 
Like I said LKE..........thats a great piece there.....I even like the small fuel log...............things like this are what HotRoddin's all about!!!!!!!!!!!:cool:
 
Thats a sweet setup :rolleyes:
 
Thanks for the post. That's a well thought out engine and car. The blue and blue and yellow stripes make me a bit green with envy. :)
 
YO Larry, that is NICE !!!!!!!!!! I like modified tunnelrams. Should have my modified tunnelram/blower up and running soon. One question, do you really need a choke on that? Gues it depends on how cold you wanna drive there in Reno/Tahoe, wherever you are.
 
The choke isnt so much for driving when cold, but just for starting. I can just lean into the car, push the gas pedal twice, and turn the key and it fires right up, idles nicely while warming up. The carb with the choke was $10 more than the non choke carb. And the line and fittings are less than $15. To me it is worth it to have the car start and idle so easily.

It runs nice and smooth. The engine is a stock rebuild 283 with a small cam in it. It does pull away from a stop cleanly. Only possible problem is it doesnt like full throttle until it is up to operating temp. And that is so minor, it isn't really worth mentioning.
Gas milage I am not sure on. When ever I drive it, I usually put at least 60-100 miles on it :D And with a 10 gallon tank, I get gas most everytime drive. Some times I will skip a day of getting gas, but not usually. I am happy with how it turned out. Both looks and performance.
 
I wanted to add one small thing about the linkage. Those little pivot pieces on the carb linkage that the rod goes thru... I machined mine, but only becuase I have the machines. Those are parts that can be built with a drill press. They are just 1/2" solid rod, Maybe 5/8-3/4" long, with a 3/16 hole drilled thru for the rod. And the other side is drilled and tapped 1/4-28. The carbs linkage had a bushing with a 1/4" hole in it, so the bolts are what it pivots on. Those pieces are not stepped. Then I ground the bolts to the right length, so they would lock the rod in place, but not have any extra play.
So really the maching out the center of the runners, and the aluminum welding is about all the specialty work done.
 
Hey LKE........ is that a lube cup I see hanging off the side of the Distributor??????? With the brass cover in second photo..........Very Coooooolllll!
Tell us the year......the breather in the valley was on the early models.....


if you ever have problems with your oil misting too much thru that breather........put you a PVC valve there and vent both valvecovers.....or vent one and add PCV to the other.............keep that base pressure down...also oil leaks................:cool:
 
real cool ideal ... 1 question ... i have an air scoop like that, how did u do your filters in it? pics?
 
I'll try to get all the questions here...
That oiler looking thing is the condenser. It is a points dist. When the car was coming together, and I was buying all the small parts, carbs, starter, wanter pump, etc. I spending a good amount of money. And a new in the box mallory dual point came up on my local craigslist for $50. So I bought it. The first time it give me trouble, I will buy something else. And probably get my $50 back out of it on ebay :D

It does have an oil prob out of the breather. When first built, I had a pcv in it, but it still weeped out of the breather. So I machined a plug for the breather, and went with the pcv only. Then I had a mysterious leak I couldnt find. Then I found it, fixed it, and just havent put the pcv back in yet. But soon I will. I do not want to cut into or drill the valve covers. I will get this weeping breather thing fixed, when it really starts to bother me. The breather out of the middle of the galley... I left that out earlier. The tunnel ram didnt come like that. I angle milled the hole for the breather tube there. I didnt want it sticking out the front. As the manifold wasnt set up for that either.

The scoop air filters... that is a custom scoop. I bought one off ebay, it was WAY to big for the car, so I puleld a quicky mold off it, then layed up a thin copy to modify that into what you see there. The scoop has a recess on the bottom, that a base fits into, that has the filters on it. The scoop fastens to the base with four 10-24 SS button head allens from the bottom. I do not any good pics of it all. But here is one pic to kinda show it.

100_0387.jpg


Here is the rest of the car

100_0421.jpg


100_0424.jpg


100_0418.jpg
 
Great lookin car and thanks for the education on your set up very unique for sure.
 
dam, another junk hot rod on this forum. Well, I'll man up here,LKE just bring it by and stick it in my garage and I'll dispose of it properly. That would be by wearing it out I guess. Oh well, somebody has to look out for you guys:rolleyes:
 
jmr122848 said:
dam, another junk hot rod on this forum.


:thumbsup: My thoughts exactly :lol:


The front shocks seem to work ok at that angle. It rides good, but the rear is on air. And I usually have it pretty soft.
 

     Ron Pope Motorsports                Advertise with Us!     
Back
Top