


Mike
Well-Known Member
This tech article was provided by Handyman.
I don't want to get technical here, I hope to only offer some tips for the novice welder hoping to save a bunch of money by building their own frame or simply by welding their own brackets, motor mounts, etc. I hope these tips will be helpful to you.
You don't have to have lots of experience with a TIG welder to weld up a frame but you will need a stick welding machine or a MIG welder capable of burning .035" or larger wire to get a decent weld. I would not weld anything associated with the frame or suspension with anything smaller than .035" wire as you really won't build up enough heat to get proper penetration. I use my 110v .023" welder for the headlight posts, small brackets, radiator shroud, etc. I welded my entire frame and suspension brackets with a mid 70's Lincoln buzzbox and AC7018 rod. My welder is an AC only machine and that AC rod runs very different than the DC version. DC has a more consistent heat throughout the burn of the rod whereas the AC version runs hot towards the end of the rod. Welding with stick takes a lot more practice than wire and isn't nearly as versatile. You will need a lot less practice to put down a fairly nice weld with a MIG welder.
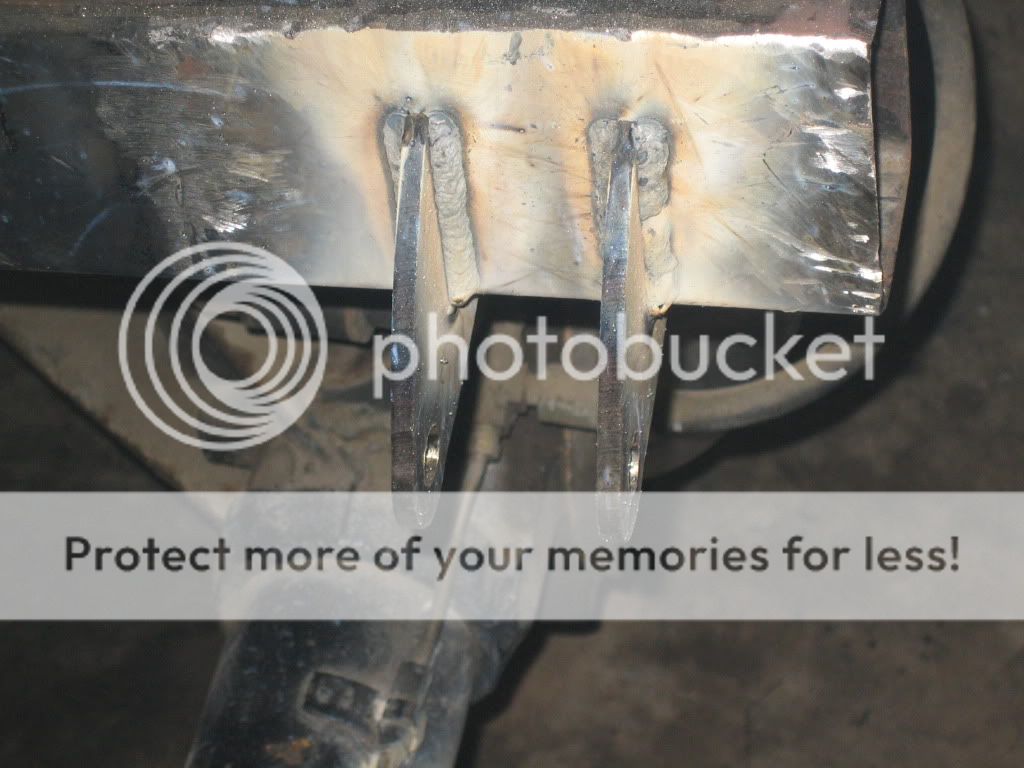
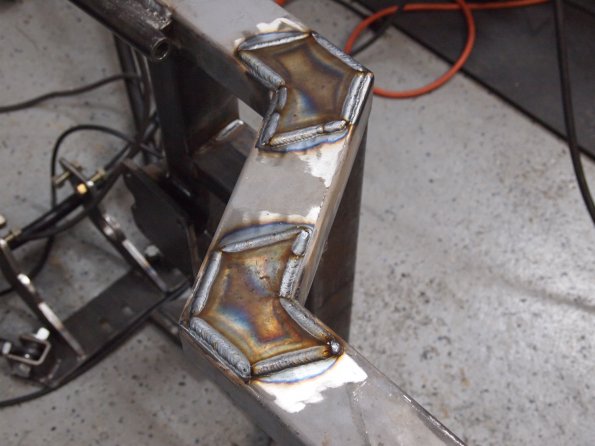
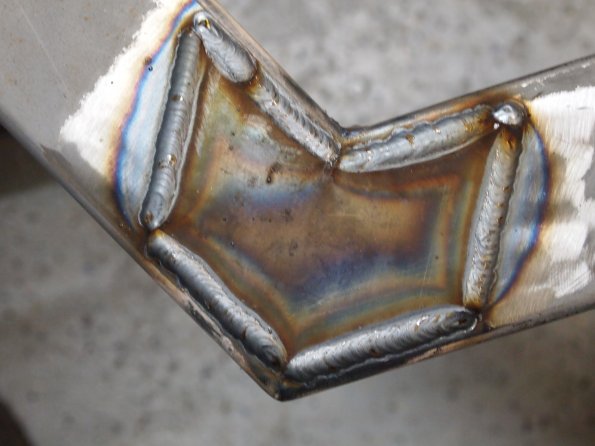
When it comes to your weld joints you should make sure they are clean and free of rust, dirt and oil. All joints will benefit if you put a small chamfer on the edges before welding but especially so for butt joints. On the kickup areas of my frame I put reenforcement plates on the outside and inside of the frame rails for extra strength. I believe it's ok to dress up your welds al little bit because what additional strength is there to be gained from a big ugly blob hanging from a bracket? You shouldn't grind them smooth though as you will lose much needed strength.
Don't let a lot of talk about being a certified weldor scare you away from trying to build your own frame. You do not need years of experience to do it. One thing I would like to say is that you should not be afraid to grind a weld out of a joint and start over. If you wonder what the weld is like under the surface go ahead and grind away. I have been welding in manufacturing shops for almost 27 years now and I have never been certified. I have welded on steel plate from 1/8" to 6" thick and everything in between. I can't tell you how many times I have had to cut, gouge or grind welds out and start over, it's just part of the deal. There's lots of reasons why you could get a bad weld. Dirt, grease or oil on metal, improper gun angle, too much stickout, or a lovely light gust of wind to blow your shielding gas away. Most fun.
Another thing that should be mentioned here is that you should not get into the habit of just dragging the wire along the weld joint. Whether you run stick or MIG wire you should move your weld puddle around a little bit in either "c" or "o" shapes. This will help to ensure you get good arc contact with both pieces of metal as you are welding.
Practice on some scraps to get the wire speed and voltage set right. You want to run it hot enough to almost burn through but not so hot as to make holes. Problem is you can't see what your weld is doing on the inside of your frame so practice on some pieces where you can look at the back side. So go ahead and fire up that welder and have some fun. Good luck to ya.
I don't want to get technical here, I hope to only offer some tips for the novice welder hoping to save a bunch of money by building their own frame or simply by welding their own brackets, motor mounts, etc. I hope these tips will be helpful to you.
You don't have to have lots of experience with a TIG welder to weld up a frame but you will need a stick welding machine or a MIG welder capable of burning .035" or larger wire to get a decent weld. I would not weld anything associated with the frame or suspension with anything smaller than .035" wire as you really won't build up enough heat to get proper penetration. I use my 110v .023" welder for the headlight posts, small brackets, radiator shroud, etc. I welded my entire frame and suspension brackets with a mid 70's Lincoln buzzbox and AC7018 rod. My welder is an AC only machine and that AC rod runs very different than the DC version. DC has a more consistent heat throughout the burn of the rod whereas the AC version runs hot towards the end of the rod. Welding with stick takes a lot more practice than wire and isn't nearly as versatile. You will need a lot less practice to put down a fairly nice weld with a MIG welder.
When it comes to your weld joints you should make sure they are clean and free of rust, dirt and oil. All joints will benefit if you put a small chamfer on the edges before welding but especially so for butt joints. On the kickup areas of my frame I put reenforcement plates on the outside and inside of the frame rails for extra strength. I believe it's ok to dress up your welds al little bit because what additional strength is there to be gained from a big ugly blob hanging from a bracket? You shouldn't grind them smooth though as you will lose much needed strength.
Don't let a lot of talk about being a certified weldor scare you away from trying to build your own frame. You do not need years of experience to do it. One thing I would like to say is that you should not be afraid to grind a weld out of a joint and start over. If you wonder what the weld is like under the surface go ahead and grind away. I have been welding in manufacturing shops for almost 27 years now and I have never been certified. I have welded on steel plate from 1/8" to 6" thick and everything in between. I can't tell you how many times I have had to cut, gouge or grind welds out and start over, it's just part of the deal. There's lots of reasons why you could get a bad weld. Dirt, grease or oil on metal, improper gun angle, too much stickout, or a lovely light gust of wind to blow your shielding gas away. Most fun.
Another thing that should be mentioned here is that you should not get into the habit of just dragging the wire along the weld joint. Whether you run stick or MIG wire you should move your weld puddle around a little bit in either "c" or "o" shapes. This will help to ensure you get good arc contact with both pieces of metal as you are welding.
Practice on some scraps to get the wire speed and voltage set right. You want to run it hot enough to almost burn through but not so hot as to make holes. Problem is you can't see what your weld is doing on the inside of your frame so practice on some pieces where you can look at the back side. So go ahead and fire up that welder and have some fun. Good luck to ya.


")
