Ron Pope Motorsports                California Custom Roadsters               

Engine builder question - intake gasket not sealing?

Keeper

Active Member
While I was pulling the intake to fix an offending leak on the rear of the intake I came across something that was concerning to me.

First off here is the offending seal - or lack thereof:

13%20Mar%202012%20001.JPG_595.jpg


As you can see there is a strip that that for some reason did not stick. I guess I need to change my cleaning method prior to installation. I always use brake cleaner to clean the surfaces first, guess this new crap they sell now does not do a very good job.

Anyway as I pulled the intake it looks to me like there was no seal anywhere on the intake gasket, and here I thought the plugs were black from running a bit rich the last trip out. It also explains why the oil was so black after only 400 or so km's.

Let me know what you think. The engine was never turned upside down to cause this.

13%20Mar%202012%20004.JPG_595.jpg


13%20Mar%202012%20005.JPG_595.jpg


13%20Mar%202012%20006.JPG_595.jpg


13%20Mar%202012%20009.JPG_595.jpg


13%20Mar%202012%20010.JPG_595.jpg


13%20Mar%202012%20012.JPG_595.jpg


If you want to see full size pics they are in here:
http://www.netquickposse.org/photos/index.php?album=bucket2&page=19

Could it just come back to the clean agent used prior to installation? The intake was brand new, the heads were rebuilt but not shaved. I am at a loss.

This will also lead to the next question of "Standard of high volume pump"
 
Keeper, are you using the rubber manifold-to-block seals at the front and rear of the manifold, the ones that come with a gasket set? The first pic shows what looks like a piece of one stuck under the tab on the manifold-head gasket. My engine builder told me to leave these out because they space the manifold up such that you can't get a tight seal at the heads. In my case it was causing a water leak. Instead of the rubber seals just put a nice 1/4" bead of RTV along the block edges and let it squish out as you tighten the bolts. Worked for me.
 
Keep, 1st ,oil pressure/volume has nothing to do w/what you're seeing. What I see is a mismatch between the angle of the intake ports & manifold. There are various ways to diagnose this, 1 is to find some washers close in thickness to an intake gskt. [about 1/16"] glue these to the intake bolt holes,then use some clay balls at various spots around the ports,set the intake in place, snug the bolts,then remove the intake carefully& check the thickness of the clay,this will tell you if the interface is off. You can either machine the intake to match the heads or mill the heads to the proper angle[recomemded].... There is a tool available to check these angles but it's high dollar..hpoe this helps....dave
 
In the last year we have become experts on sealing intake manifolds. We didn't intend on that happening, but we had fits with the 468 Olds in my Son's rpu and kept getting oil sucked into several of the intake ports no matter what we did. He is using 66 Olds 442 heads and a 66 Olds tripower setup and after running for a while the plugs were getting fouled with oil. Long story short, we found out the intake mating surface angle did not match the heads exactly so we had our machinist resurface the heads, but they still were not a perfect match, so he angle cut .008 off of the intake and we finally got a good seal. He said even brand new aluminum intakes will need trued up 4 out of 5 times when they check them.

Then we went to Mr Gasket composite intake gaskets on the sides and sealed around each port with Aviation sealant..........not just the water ports, but the intake ports too. Finally, we scrapped the rubber end seals and used a thick bead of Permatex Right Stuff sealant instead. That stuff is amazing and since we did all of that we have no more oil control issues at all. The weird part is that we talked to several tech reps at various gasket companies and they all had different opinions on how to do the gaskets. Some said to put them on dry, and some said to use sealant. Our machinist builds only race motors and he said to use sealant so that is what we did and what worked.

Don
 
looks like a mis match on the mounting surfaces, has the intake been cut? if so it will looking at the phots not align properly. You to cheeck could put a torch under the engine and place the manifold on with out the gasket, and see if you can see light, best done at night. Or you could place the manifold on and see if it rocks again without a gasket, the front and rear rails i use a centre punch and dimple the raisl on the manifold and the engine to give the rtv sealent something to stick too , throw the cark and rubber gaskets away.
Mr gasket intakes are the ones i use , after problems with the felpros over the years. Good luck.
 
I will take the intake down to the machine shop and see what he thinks. The Intake is brand new, it came out of the box and on to the engine. Edelbrock 2101.

These were felpro gaskets that came with the engine kit I bought from Summit.

Maybe I am lucky I found an oil leak!
 
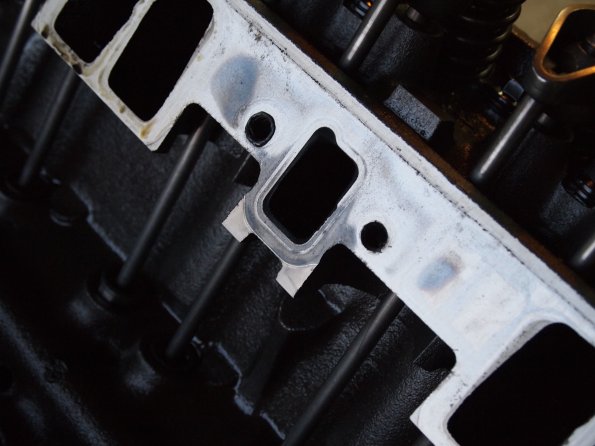
Keeper, from the pictures, it looks like the block has been decked a considerable amount. And remember, unless you've been with those cylinder heads since they day they rolled off the assembly line, you've no idea if they've been milled or not. How about that intake, has it ever been cut?

The end rail wasn't clean, that much I can see.

Make a run for some supplies. Auto paint shop for some lacquer thinner and some 3M 08001 yellow weatherstrip adhesive (and I'm being specific for a reason, you only want 3M 08001). Then hit the parts store for a set of intake gaskets. In this case, if you can lay your hands on a pair of flat Mr. G. gaskets grab them. But grab them with the intention of possibly not using them. Be sure to get some disposable, rubber gloves, as well.

Now, clean off all the old gasket material and silicone sealer. From the block, from the heads and from the intake. Every last trace. Soak a paper towel with thinner and clean every sealing surface. When you get it all clean, soak a paper towel with thinner and clean it again.

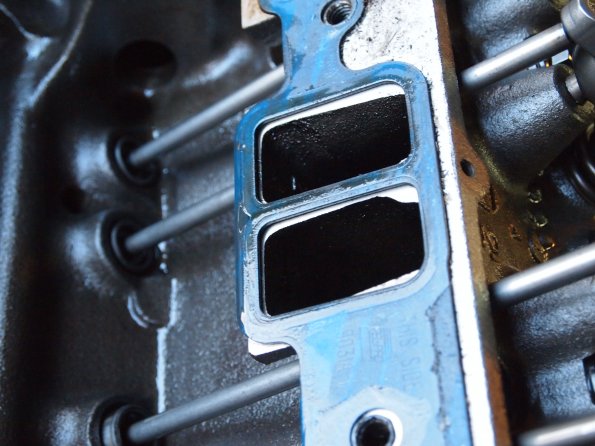
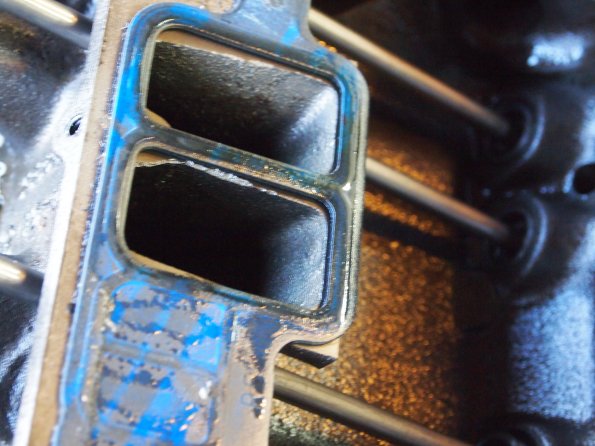
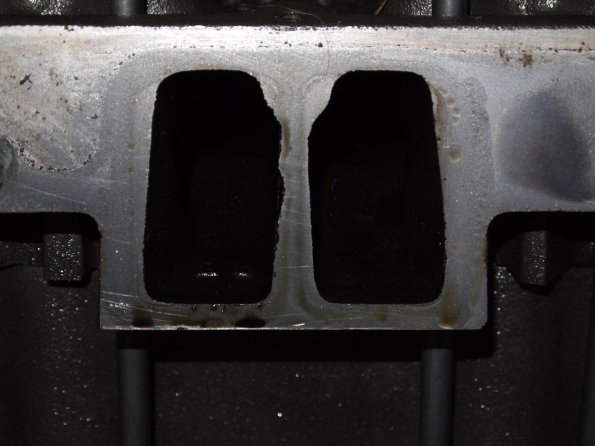
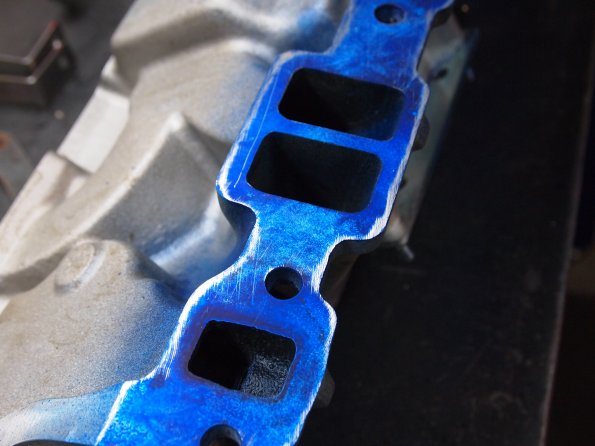
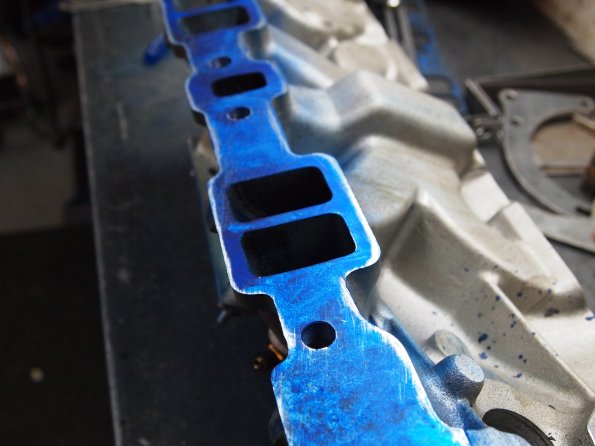
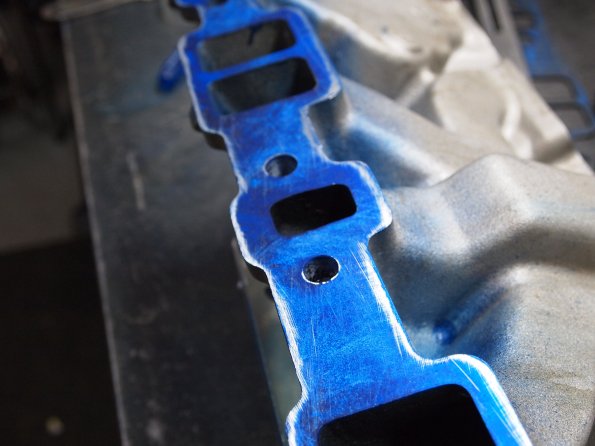
Pull the side gaskets out of the package, lay them on the heads and set the intake on them. With a flashlight, start checking everything. Look through the intake runners, to see how things are lining up between the intake runners and the cylinder head runners. Is the intake too high? Check the gap at the end seals. If there is adequate gap there, then maybe things have been milled/decked and you need a thinner gasket. If the intake is too low, then you need a thicker gasket. Check how the mating surfaces look at the top and bottom, to see if the surfaces are truly parallel. Once you are certain you have the proper thickness side gaskets, pay attention to how big the gap is at the end rails. As for gasket choices, I am a big fan of FelPro, but I hate to think how many Mr. G. gaskets I've used, with zero problems, over the years. I don't know there's that much difference in intake gaskets, particularly when you are careful abut how they are installed. It's rare for a manufacturer to ignore new materials, so I think pretty much anyone is going to get you a gasket that will seal things up.

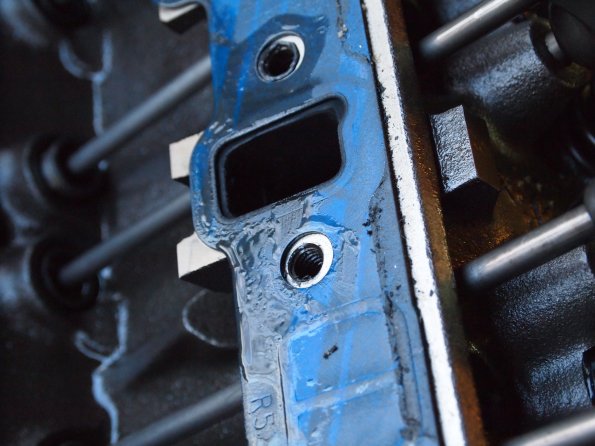
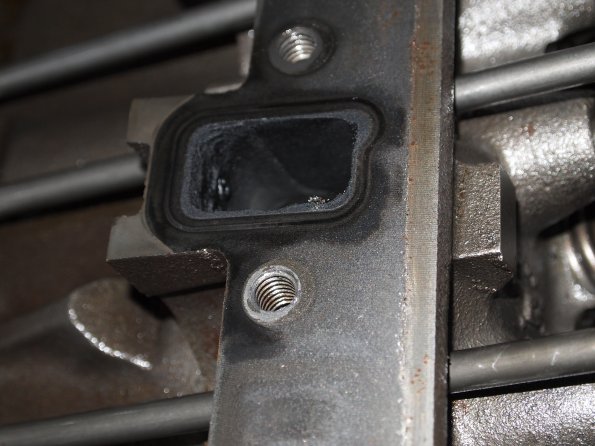
OK, pull everything apart. Soak a paper towel in thinner and wipe everything down. Don a pair of gloves, soak a paper towel in thinner and clean everything again. Make a small skin bead of silicone sealer around the water ports on one cylinder heads. Then make a small (emphasis on "small") bead of weatherstrip adhesive around each intake port. Lay the side gasket on, positioning it carefully, so you're not smearing your sealers around.

Repeat the procedure on the other cylinder head.

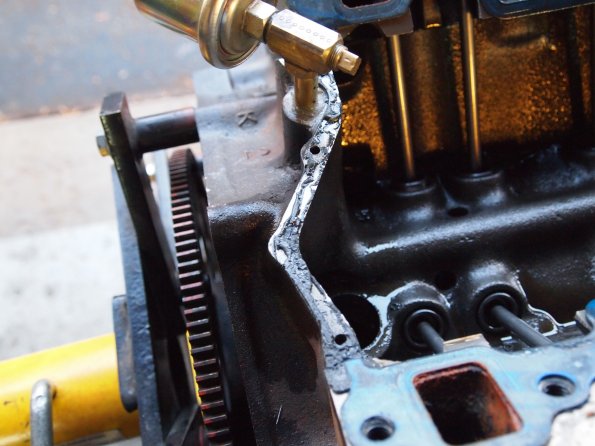
Now, place a bead of silicone in the parting line between the cylinder head and the block end rail. Then, make a single pass across the end rail, making sure the bead of silicone is just a bit deeper than the gap you noted between the intake and block.

Lay another skin of silicone sealer around the water ports on the intake gaskets. Then lay another bead around the intake openings on each gasket. Then it's time to check the silicone bead on the end rails, to see if it is starting to cure. If it is, soak a paper towel with thinner and clean all the sealing surfaces on the intake manifold, one last time.

C-a-r-e-f-u-l-l-y lower the intake down. Get a second pair of hands and eyes, to make sure you are lowering the intake straight down, because you do not want to be disturbing all of those beads of sealers you've carefully laid down. A bolt in each corner of the intake and then add the rest of the bolts and start tightening things down.

Once you have everything torqued down, check those end rails. If the silicone sealer is oozing out, wet a forefinger and trowel it back into the gap, to ensure it is sealing from side to side.

Yes, I know, that gorilla snot is going to have you cussin' if you ever have to remove the intake down the road. But the fact it is such a b*tch to clean off is a testament to how well those intake runners are going to be sealed.

Yes, the rubber gloves seem over the top to some of you, but the oil from your skin can prevent silicone sealer from doing its job. Any surface you are applying silicone sealer to must be completely clean of oils and completely dry. Clean everything, carefully, two times. Then go back and clean it again, just to make sure. For the no-believers, go to the local hardware store and start fitting nuts and bolts together, until you find a combination that feels stiff and not wanting to go. Pull the nut off, wipe an index finger down the side of your nose and then wipe the finger down the side of the bolt. See how easily that nut will now thread on? You have a lot of oil in your skin and silicone isn't going to stick to anything you've touched with those oily hands.

We used to buy 5 gallon pails of acetone to clean things, but the price got prohibitive and we switched to lacquer thinner, with no adverse effect. Whatever you do, avoid fingernail polish remover at all costs. Yes, most (not all) of it is acetone-based, but it also contains a bit of oil to keep your significant other's fingers from drying out. And oil is your enemy, when trying to use silicone sealer.

On the wet sump race motors, we ran external vacuum pumps, to draw a vacuum in the crankcase. On the dry sump motors, we would add a pump stage to accomplish the same end. Which left us with the problem of gaskets being sucked in, rather than pushed out. And if an oil-sealing gasket failed to seal, the vacuum pump was instantly turned into a raw oil pump. So we had to make sure everything was sealed up, solid and tight.

Clean, clean, clean. And then clean again. And don't compromise with an improper thickness gasket set, be absolutely certain you have the right gasket. Don't compromise with weatherstrip adhesive, either. 3M 08001 works, so spend the extra 6¢ to get the good stuff.
 
Thanks Mike.

I have all of those supplies minus the 3M 08001. I can grab that today.

Between the Acetone and Thinner which would you recommend?

I will talk to the machine shop guy I dealt with for the engine. It was a fresh block when he started with it and did not mention decking the block at all.

The intake had no work done on it, it was brand new!
 
Just keep in mind that all the cleaning & prep & care & gskt. goop & gorilla snot & secret potions doesn't mean a thing if the clearances are off!!

dave
 
Just keep in mind that all the cleaning & prep & care & gskt. goop & gorilla snot & secret potions doesn't mean a thing if the clearances are off!!

dave


This was something I had never even thought about until my Son started having those sealing issues. For years and years I would just clean up the intake and heads, put some goop on them, and drive away........never had any leaking problems. But the intake problem on his car opened my eyes. First of all, his intake is a very rare 66 Olds W30 intake and we just assumed it was straight.......it was not. The center of the mounting surface was higher than the ends so it could "rock" on the heads slightly and the end ports didn't get a good seal. Once he machined it laid perfectly flat on the heads.

That was problem number one. The next problem was that the bottom of each mounting surface was further away from the head than the top, the top was hitting first. We put a feeler gauge in there and you could see where that was happening. So he took the .008 tapered cut off of the intake, taking more metal off of the top. Now it laid perfectly flat on the heads.

I also agree about the Mr Gasket intake gaskets. Mondello recommended them too. We tried a set of the ones Mr G sells that have the silicone type bead around each port and didn't like those as well as just their regular composite gaskets. The composites seem "softer" allowing the intake to sink down and seal a little better around each port. The others were harder and it seemed like the intake didn't bite down as tight, if you get what I am saying.

Don
 
So I did some super scientific tests today to determine wtf was going on.

First up the flashlight test: Place two flashlights in the valley, set intake on top and look at all the gaps, not the best of pics but it shows an even gap all the way around.
14%20mar%202012%20002.JPG_595.jpg


Seeing that the gaps seemed the same all the way around I thought to check some other things. Got out the straight edge and the head surfaces are flat with no gaps.

Next up was the intake, I found that they did not seem so flat to me. So I got out some dye and a flat file:

14%20mar%202012%20005.JPG_595.jpg


14%20mar%202012%20006.JPG_595.jpg


14%20mar%202012%20007.JPG_595.jpg


So tomorrow its off to the machine shop to see if he can true them up.
 
Are the bolt holes lined up? They might need to be elongated
 
Between the Acetone and Thinner which would you recommend?
Thinner is readily available and a lot cheaper.

The intake had no work done on it, it was brand new!
And guess what managed to sneak up on you. This is an excellent example of new never equating to right.

Just keep in mind that all the cleaning & prep & care & gskt. goop & gorilla snot & secret potions doesn't mean a thing if the clearances are off!!
Exactly. Which is why I recommended checking everything before mentioning anything else.
 
So I took it to the machine shop and he tested it with his much higher quality straight edges and feelers, and yup its out. Front to back it is okay, but there is a definite dip from top to bottom.

Anyway gonna cost $80 to fix so I am going to see what Edelbrock will do about it, I have a feeling it will be nothing as it was purchased 3 years ago.
 
Keep, something else I neglected to mention, w stock smallblock heads it's mandatory to use a good thread sealant on the intake bolts , especially the center 4 on each bank as they are open into the valley & oil will " walk -up" the threads !!

dave
 

     Ron Pope Motorsports                Advertise with Us!     
Back
Top