You are using an out of date browser. It may not display this or other websites correctly.
You should upgrade or use an alternative browser.
You should upgrade or use an alternative browser.
steel '21 T roadster
- Thread starter Youngster
- Start date
I'm starting a project that is probably going to be a little more hot-roddy, but the basics are the same, so please keep the pics and comments coming. Next T is going to be steel.
Jeff
Jeff, if you are doing a pre-'26 body, you'll be surprised at the compromises that have been done to make the glass bodies.
Ron
Jeff, if you are doing a pre-'26 body, you'll be surprised at the compromises that have been done to make the glass bodies.
Ron
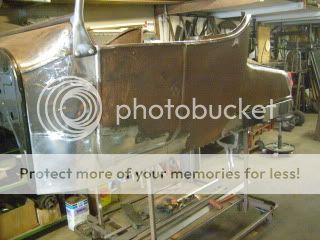
I have 3 fiberglass body T-buckets in the garage now, so I want to try to build something different. I bought a complete 1930 Tudor, sold everything but the body and now I'm going to learn how to do steel. It needs lots of patch panels, is going to get a 3" chop and a 4" channel, a steel roof and suicide - inset doors. I know it is a lot of work for very little return, but how else do we learn?
If this comes out OK, maybe next a Touring T-bucket using a T sedan body? We'll see.
Jeff
Your sedan sounds cool. A 3" chop is about prefect on an A. Look for a pair of early Mustang buckets. There are perfect for the chop and channel you're doing. While your at it, that Mustang gas tank will fit into the rear seat riser. Just run the filler out the back of the body. Good luck with your project. If you run a thread on it, let me know where so i can follow it.
Ron
Ron
I was having trouble getting the recurve shape in the cowl patches so I built the body sub frame. I was going to make it out of wood like it was originally. The problem with that is I wanted something more ridgid. The body has enough stress cracks in it already. I had some "C" and "Z" channel bent and put this together last week.

Tried the side pannels and it's easy to see they need some more work to get them to fit. The frame mounting brackets will be welded to this. Qestion now is, do I do the rest of the body wood in wood or metal?
Ron

Tried the side pannels and it's easy to see they need some more work to get them to fit. The frame mounting brackets will be welded to this. Qestion now is, do I do the rest of the body wood in wood or metal?
Ron
Looking good Ron.
I just blew mine all apart to repair / rebuild / build the sub-frame (using an old one shortened from a touring).
As for wood or metal... which one appeals to you? Which would you be able to look at and say, "That's neat" ... ?
I know you've built a lot of cars but have you done more wood or metal?
Looking for a challenge or to just get it done?
Personally if I wanted it rigid I would go metal. The roads around here would shake the wood loose.
Decisions, decisions.
Joe
I've been working on the chassis off and on for the last couple months. The local F.A.S.T. boys are having a flat hill climb this Saturday in Northwood Iowa. Thought I'd clean the ol' Girl up a little and show up there.
Finished welding the frame up today. I'll be moving it outside tomorrow morning for cleaning and paint. I'll post pictures then. It's a really fun project. I wish I had saved some of those old Model A part I sold, gave away or (gulp) scraped now. More soon.
Ron
Finished welding the frame up today. I'll be moving it outside tomorrow morning for cleaning and paint. I'll post pictures then. It's a really fun project. I wish I had saved some of those old Model A part I sold, gave away or (gulp) scraped now. More soon.
Ron
Mr. Fixit
Member
That would be cool youngster with your frame "A" front axle, banjo rearend , flathead 3 speed all paint no chrome on the motor,stopsign floor boards,minimal interior,a cool logo on the side and just seal the body in primer or something flat ,oval fuel tank with the round bracket mount tail lights.wire wheels, and low as she will go.
That would be cool youngster with your frame "A" front axle, banjo rearend , flathead 3 speed all paint no chrome on the motor,stopsign floor boards,minimal interior,a cool logo on the side and just seal the body in primer or something flat ,oval fuel tank with the round bracket mount tail lights.wire wheels, and low as she will go.
Apparently you havent put much thought into this. LOL ...
I like it.
Mr. Fixit
Member
I was having trouble getting the recurve shape in the cowl patches so I built the body sub frame. I was going to make it out of wood like it was originally. The problem with that is I wanted something more ridgid. The body has enough stress cracks in it already. I had some "C" and "Z" channel bent and put this together last week.

Tried the side pannels and it's easy to see they need some more work to get them to fit. The frame mounting brackets will be welded to this. Qestion now is, do I do the rest of the body wood in wood or metal?
Ron
This looks great. Nice work.
Let me back up here a bit. I wanted to drop the front some so I used a T rear xmember with a slot for a 1/2"spring perch. The perch goes thru the front side of the xmember and is also welded to the back side of the channel.
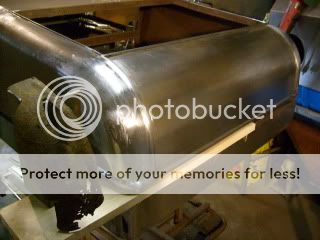
I narrowed the frame to 23" from the front xmember to the center member so that one needed to be cut down also.
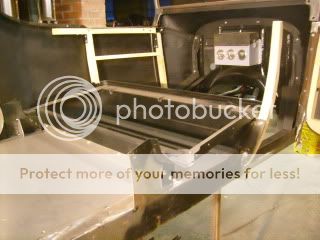
The side rails got about a 4 1/2" kick. I did this by cutting thru the rails at a 45 degree angle and set the rear pieces on top of the front halves. Everything was trued up and the kick was boxed.
I had planned on using a Model A rear spring mainly cause in had a spring and crossmember. A sluck would have it, the night before I got a call and was offered a T rear spring and xmember. so this is what the frame looked like at the time of post #48.
Ron

I narrowed the frame to 23" from the front xmember to the center member so that one needed to be cut down also.

The side rails got about a 4 1/2" kick. I did this by cutting thru the rails at a 45 degree angle and set the rear pieces on top of the front halves. Everything was trued up and the kick was boxed.

I had planned on using a Model A rear spring mainly cause in had a spring and crossmember. A sluck would have it, the night before I got a call and was offered a T rear spring and xmember. so this is what the frame looked like at the time of post #48.

Ron
tfeverfred
Well-Known Member
AWESOME WORK! Man, I'd like to have the coin for a genny.
At this point I have around $400 invested in this car. True a lot of the parts are leftovers from other projects but the cash layout is minimal.I paid $565 for the chassis and sold off bumpers, fenders, rear spring. and the spindles and brake off the '41 axle that came with it. The body was partial payment for some work I did.Another point to make here is I've modified this chassis. A stock chassis could easily be used to build a car like this. A friend just bought a '31 chassis and is in the process of rebuilding it now. This winter we are going to build a T type speedster body for it. He paid $650 for his chassis and we figure the body shouldn't go over$500 in material. He might have $3000 in it when it's running.
Ron
Ron
I needed to make sme room in the shop to work on the customers Model A speedster so I rolled the ol' girl outside for a bit. It really hasn't progressed much lately but this is how it sits as of today.
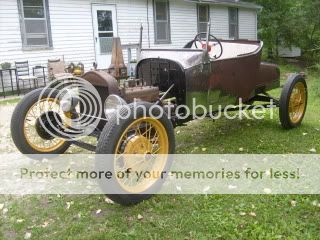
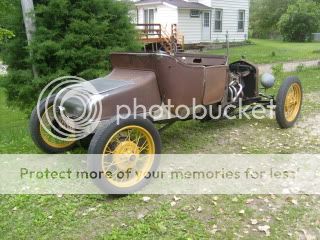
Ron
PS ... Oh did I mention I just closed the deal on a 1919 rolling T chassis for my next speedster project.
Hint: Bare bones T chassis with a '28 Chebby head on a Model T block ...


Ron
PS ... Oh did I mention I just closed the deal on a 1919 rolling T chassis for my next speedster project.
Hint: Bare bones T chassis with a '28 Chebby head on a Model T block ...
Similar threads
- Replies
- 4
- Views
- 265
- Replies
- 7
- Views
- 2K


