


You are using an out of date browser. It may not display this or other websites correctly.
You should upgrade or use an alternative browser.
You should upgrade or use an alternative browser.
The "what's left of my build thread!"
- Thread starter Hotrod46
- Start date
Hotrod46
Member
Thanks for the kind words!
John - The closer I get, the worse I get it!")
I was asked on the CHR board about what distributor cap I used to route the wires like I did and how I did the PCV set up I'm using. Since I'm trying to mirror the build info on both sites, I'm posting the answer to both questions here, too.
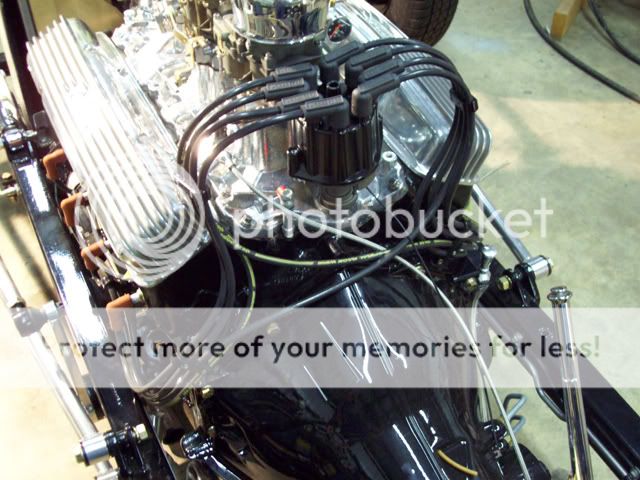
The distributor cap is just a stock Standard Parts unit from my local parts house. The “trick” is the way the distributor is installed and timed. Looking down from the top, #1 is at approximately 11 o’clock with the rotor pointing more or less at cylinder #1. Set up like this you get cylinders 1, 5 and 7 on the left of the cap and 8, 4 and 6 on the right. Cylinders 2 and 3 of course have to cross over. I run these under and behind the distributor and line everything up with the Made for You looms. The looms go a long way to cleaning up the look. The 90 degree ends at the distributor gives the set up a look that reminds me of the old crab distributor caps.
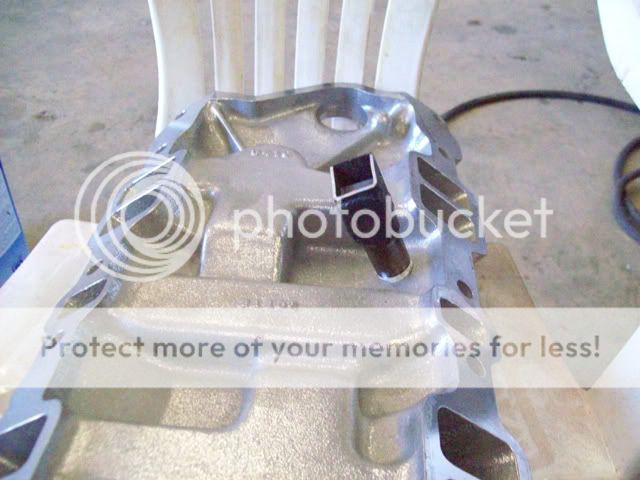
The PVC set up uses a hidden baffle made from junk I had laying around. I used a ” stainless high pressure pipe plug, which is just a solid rod threaded for ” pipe. I drilled this all the way through and tapped it for ” internal pipe threads on the same end as the ” external threads. The actual baffle is made from 1” square tubing with a couple of small pieces of flat stock welded in to form a labyrinth. I know it looks kind of crude, but I think it will get the job done. The manifold is drilled and tapped for ” pipe threads from the bottom and the breather screws in with the threaded end just above the outside of the manifold.
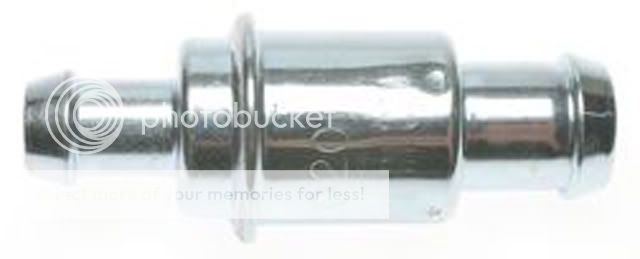
I originally intended to use a screw in PCV valve from a 65 327 Vette, but none of the local parts places carried that valve. What they stocked for that application was an inline style valve that had a 3/8” hose connection on the carb end and a ” hose connection on the breather end. I used a ” compression fitting with ” pipe threads to convert the inline valve to screw in. If you cut the expanded portion of the 1/2” hose fitting off of the valve, the stub that is left will fit in the compression fitting just fine.
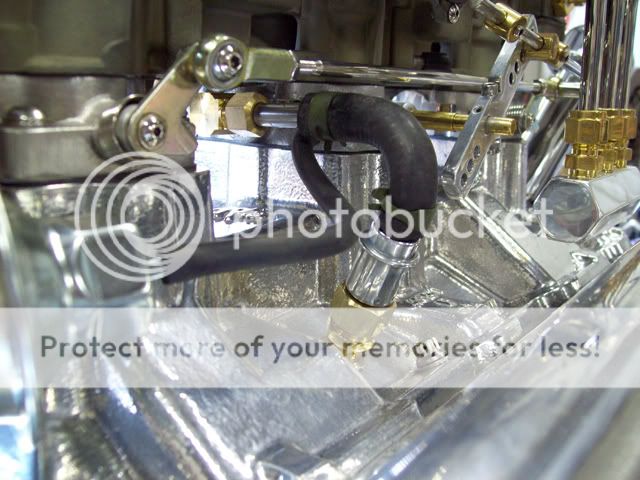
The hose is just a PCV 90 degree molded piece from my local parts house. Sorry, I don’t know what it fits, but I’ve seen similar hoses on the “Help” isle at some chain parts places. The carb fitting is a compression fitting with a short piece of stainless tubing.
Mike
John - The closer I get, the worse I get it!
I was asked on the CHR board about what distributor cap I used to route the wires like I did and how I did the PCV set up I'm using. Since I'm trying to mirror the build info on both sites, I'm posting the answer to both questions here, too.
The distributor cap is just a stock Standard Parts unit from my local parts house. The “trick” is the way the distributor is installed and timed. Looking down from the top, #1 is at approximately 11 o’clock with the rotor pointing more or less at cylinder #1. Set up like this you get cylinders 1, 5 and 7 on the left of the cap and 8, 4 and 6 on the right. Cylinders 2 and 3 of course have to cross over. I run these under and behind the distributor and line everything up with the Made for You looms. The looms go a long way to cleaning up the look. The 90 degree ends at the distributor gives the set up a look that reminds me of the old crab distributor caps.
The PVC set up uses a hidden baffle made from junk I had laying around. I used a ” stainless high pressure pipe plug, which is just a solid rod threaded for ” pipe. I drilled this all the way through and tapped it for ” internal pipe threads on the same end as the ” external threads. The actual baffle is made from 1” square tubing with a couple of small pieces of flat stock welded in to form a labyrinth. I know it looks kind of crude, but I think it will get the job done. The manifold is drilled and tapped for ” pipe threads from the bottom and the breather screws in with the threaded end just above the outside of the manifold.
I originally intended to use a screw in PCV valve from a 65 327 Vette, but none of the local parts places carried that valve. What they stocked for that application was an inline style valve that had a 3/8” hose connection on the carb end and a ” hose connection on the breather end. I used a ” compression fitting with ” pipe threads to convert the inline valve to screw in. If you cut the expanded portion of the 1/2” hose fitting off of the valve, the stub that is left will fit in the compression fitting just fine.
The hose is just a PCV 90 degree molded piece from my local parts house. Sorry, I don’t know what it fits, but I’ve seen similar hoses on the “Help” isle at some chain parts places. The carb fitting is a compression fitting with a short piece of stainless tubing.
Mike
Ted Brown
Member
I hope you will not feel bad if I make some suggestions, after the fact, but it may help the next guy or Your own next project... I always try and make the/any panard (sway as some call it) bar, as long as possible, Ft. or Rear, if the suspension is going to be doing it's job of providing a nice ride. Soft movement up and down... this will minimize side movement. There are some that offer no side movement at all (watts links, etc) but you need room for whatever you use... I also noticed you are using a power booster on you brake system, another un needed item, use a smaller bore master to get all the power you need, or more leverage with your brake pedal. Also, I see you now have a large water pump pully, some early models used real small pullys, this speeds up the water movement and keeps your engine a lot cooler, easier... sure would love to see some pics from a bit farther away, to show just what you are really trying to do.. too close to tell for sure.. Thanks you are doing very clean work, no matter, very nice... looks safe and thats the most important...
Hotrod46
Member
Ted
I don't feel bad about constructive comments. I'm always glad when someone shows interest and I love bench racing.:dummy: I see you're a pro chassis builder and I appreciate your knowledge and experience(no bull).
I understand what you're sayiing about the length of the panhard bar. What I wound up with is a compromise at best. I kicked around running a 3 link with an upper wishbone locator, but was concerned about what would have been a very short upper link. If this was a 27 T with it's longer rear section, that's the route I would have gone. I also thought about a Satchell link (upside down triangulated 4-link), but in the end I went with something simple.
This was my first T chassis and now that I have this one under my belt, I could probably get more creative on my next one. Wish I would have had someone like you to ask when I was laying this suspension out. I didn't even join a forrum until I was already up on wheels.
The booster was added to allow less pedal leverage ratio and therefore less stroke at the pedal to achieve full stroke on the master cylinder(for saftey). This allows the pedal to be moved a little further away and closer to the floor. With a 3 to 1 ratio (and the booster doing the heavy work) instead of the typical 6 or 7 to 1, my maximum pedal travel is half that of most T's. I'm almost 6' and need all the inches I can get for comfort. I agree that it's not needed for a proper functioning T bucket brake system. Again, it's a compromise I made strictly for comfort. Since I can apply over 200 lbs. of force with my leg and since I'm using self-energizing brakes front and rear, I feel the car can still be stopped safely in the event of a booster failure.
The water pump I'm using is a high volume Stewart unit so I'm hoping it will work OK. I used the pulley I did just because it was chrome. Gotta have some engine "bling".:wall: Seriously though, I do have a smaller pulley I can switch to if I have cooling problems.
Mike
Hotrod46
Member
Milestone!
I have reached a very important milestone!!!
IT IS ALIVE!!!!! :rofl::lol::lol:
The engine runs!!! Sorry, but I got so involved (and a little rushed), that I completely forgot to take video.
A couple of good friends (thanks John and Jimmy) got a set of old T bucket headers to me that I used for a temporary exhaust.
Initial fire-up didnt happen without a problem or two. Self inflicted of course. I completely forgot that the oil pressure sending unit was not installed and merrily cranked away while setting the pre start-up timing. Made quite a mess! :rofl::surprised:
It still needs a little tuning, but the oil pressure is good (60 PSI), vacuum is good (18-20 inches), the transmission seems to work and nothing mechanical makes any bad noises.:lol: Had a couple of minor leaks, but thats to be expected. The cam has mild specs, so it doesnt have a lot of lope, but I kind of expected that.
It sure does feel good to hear it run! 2 years to get to this point.:surprised: I NEVER thought it would take so long.
I ran out of time and have to go back to work (gotta pay the bills), so itll be another week before I can get anything else done.
Mike
Hotrod46
Member
Thanks Ron.
I still have to check it over thoroughly. I think the open headers may be causing it run a little lean.
I'm going to throw on the mufflers that came with the headers and run it again this weekend. I still need to check the dwell on the points and tune the carb. I barely had time to start it Sunday evening.
Mike
Hotrod46
Member
The good, the bad and the (almost) ugly!
Thought I would post a quick update. Been a lot going on since the last one.
The almost ugly is that I had a water leak under the intake manifold. A few miles on the road and the engine would have been toast!!! If I hadn't decided to change the lifters I probably wouldn't have found it until it was too late.
I think the intake gaskets were too thick. These were the special Offy gaskets that came with the 3x2 setup from Hotrod Carburetion. They were .090 thick. I switched to Edelbrock gaskets similar to the Fel-Pro Printo-seal type gaskets. The new gaskets are .070 thick. I also used a little silicone on the water passages instead of the Aircraft Permatex I normally use. I'll keep a close check on the water level for a while just to be sure.
I probably had a vacuum leak on the bottom of the manifold too, since I was able to lean the idle mixture out a good bit from the original setting.
Between the new lifters and gaskets, the engine is running like a top now! The oil pressure is 50 psi at idle and it pulls 20 inches of vacuum at idle. It could probably use a little tweaking after it's on the road, but it's good enough finish the car.
The bad is that time is getting short if I'm going to make the March car shows. I have 11 days of shop time left before the first show. It's going to be close!!
Now for the good. The body is painted!!!!! I still have some buffing to do, but it's on the inside and I can't get to it right now, since the body is up on sawhorses.
It's my first complete paint job. Normally, I do the primer and sanding and get a pro to do the color. I decided to try it myself this time.
I'll get some pics of the body up as soon as I can. I've been too busy with the engine to take any after paint pictures.
I also delivered the seat insert , bed cover and door to the upholstery shop and they're working on them. They might be finished by next weekend! Hope so, anyhow.
Looks like I'm going to be pretty busy for the next few weeks, but I'll try to keep up to date with the progress.
Mike
Hotrod46
Member
Paint Pics
Here are the pictures of the painted body as promised.
Like I stated earlier, this is my first complete paint job. I've painted frames and small parts, but never the finished body. I would like to say that it was easy, unfortunately , that wasn't the case.
Due to a malfunctioning paint gun (or bad technique), I wound up with some orange peel. In a few places, it was pretty bad. I called my buddy Brandon who is a pro painter and he said it was salvageable.
So my wife threw some burgers on the grill and Brandon brought his family and buffer over. I spent the rest of the evening getting lessons in color sanding and buffing paint.
I thought it was going to need a redo, but my buddy was right, it buffed up pretty good.
It's not perfect by any stretch, but I'm kinda proud of it, though. I still have a few places to work on. Now that I have a better idea about how to buff, I'll work most of them out.
Here is the body after the initial block sanding and body work:
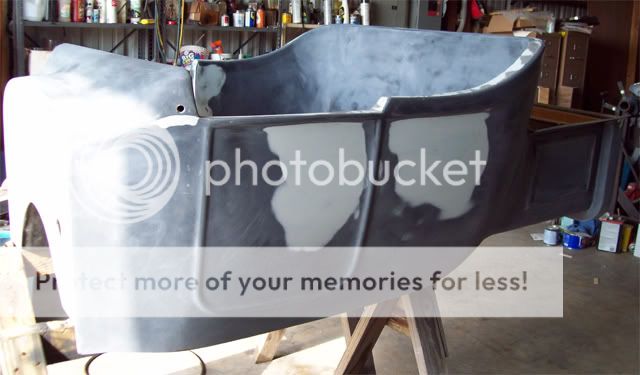
Here it is after DP90 primer:
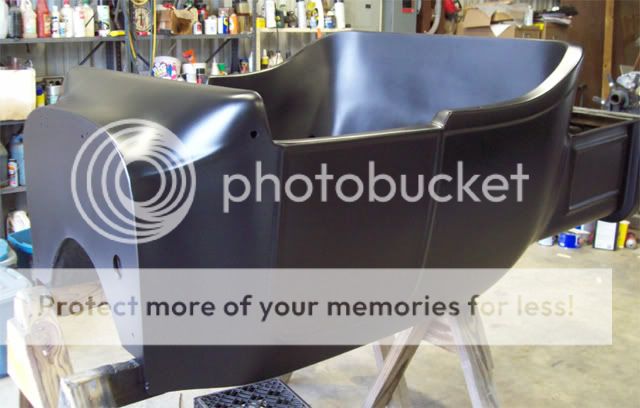
The final paint and buff:

A close-up of the firewall:
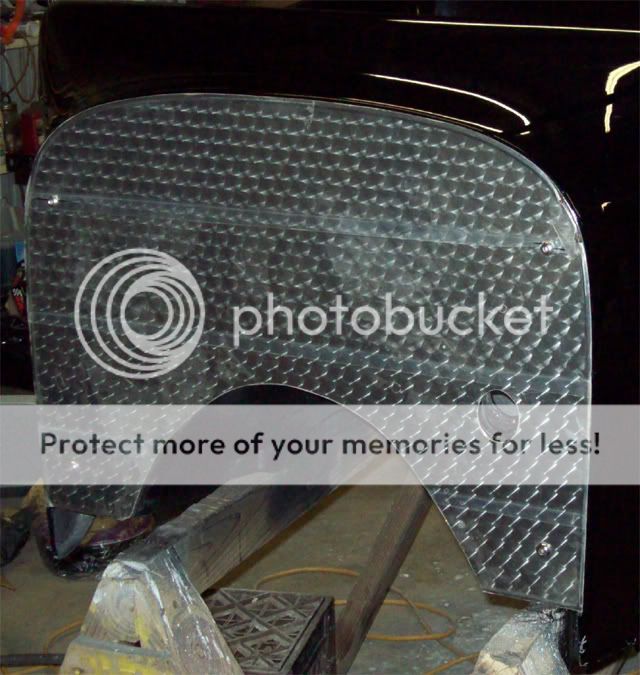
The firewall was made by Haneline from a pattern I sent them.
I''m hoping that I can get the body on the frame permanently next weekend. Then I can get started on wiring.
Mike
Here are the pictures of the painted body as promised.
Like I stated earlier, this is my first complete paint job. I've painted frames and small parts, but never the finished body. I would like to say that it was easy, unfortunately , that wasn't the case.
Due to a malfunctioning paint gun (or bad technique), I wound up with some orange peel. In a few places, it was pretty bad. I called my buddy Brandon who is a pro painter and he said it was salvageable.
So my wife threw some burgers on the grill and Brandon brought his family and buffer over. I spent the rest of the evening getting lessons in color sanding and buffing paint.
I thought it was going to need a redo, but my buddy was right, it buffed up pretty good.
It's not perfect by any stretch, but I'm kinda proud of it, though. I still have a few places to work on. Now that I have a better idea about how to buff, I'll work most of them out.
Here is the body after the initial block sanding and body work:
Here it is after DP90 primer:
The final paint and buff:
A close-up of the firewall:
The firewall was made by Haneline from a pattern I sent them.
I''m hoping that I can get the body on the frame permanently next weekend. Then I can get started on wiring.
Mike
dovehunter79
New Member
I think you did a beautiful job on the paint... afterall, everyone is their worst critic 
Hotrod46
Member
Thanks everybody!
Al - The wiring never bothered me too much, but then again, I've never had so much trouble with an engine build either!!!!
I beginning to feel like the end of "The Good , The Bad, and The Ugly" when Clint says' "Looks like we're just gonna have to work for it".
Mike
Al - The wiring never bothered me too much, but then again, I've never had so much trouble with an engine build either!!!!
I beginning to feel like the end of "The Good , The Bad, and The Ugly" when Clint says' "Looks like we're just gonna have to work for it".
Mike
Ted Brown
Member
Re: Paint Pics
Mike, You did a great job with your paint, the color sanding and rub out saves all paint jobs, even the pros.... I learned from a great engine builder that you never use silicone and gaskets together, just use one or the other... But I know you are good at what you do, so don't let me bother you at all Lookin Very nice...
Mike, You did a great job with your paint, the color sanding and rub out saves all paint jobs, even the pros.... I learned from a great engine builder that you never use silicone and gaskets together, just use one or the other... But I know you are good at what you do, so don't let me bother you at all
Lookin Very nice...Similar threads
- Replies
- 194
- Views
- 10K
