Ron Pope Motorsports                California Custom Roadsters               

Engine builder question - intake gasket not sealing?

Yup I used sealer on all the threads.

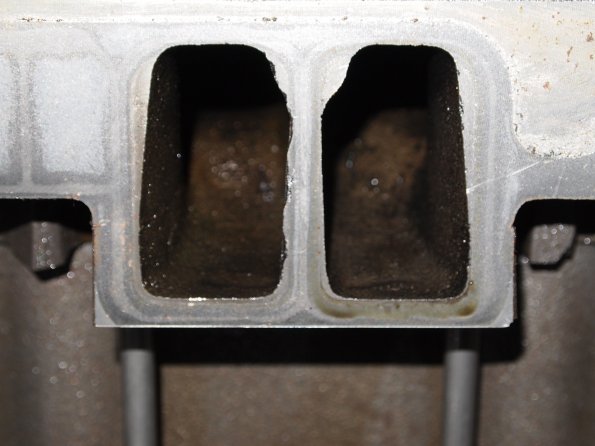
Update: I talked to Edelbrock their recommendation was "Send it to us so we can test it" which would cost more then having the machine shop fix it.

Other things they pointed out:
- they allow for a tolerance of 12 thousandths end to end.
- the blue felpro gaskets are not for aluminum intakes and will not seal as well, since they have no "give"
- use felpro 1205 - (using the procedure Mike posted.)

Machine shop recommendation:
- take a fine oil stone and run it along the surfaces, this may smooth things out enough that the gasket will take up any other irregularities
- use the felpro 1205 - or a mr gasket composite gasket.
 
Do absolutely as Mike said, you can't go wrong:thumbsup: ! Its the attention to details that gets you thru times like this. every time you pull a motor down, especially when your building a new motor for you T, ALWAYS check how your intake sits on the motor with block and heads, inplace, torqued, use old head gaskets if you got to. Especially if you've just picked up a intake on sell or on Fleabay, or at a swap meet.
You always want to pitch those front and rear intake gaskets.
The more you machine the deck of your block and deck your heads, the 'higher' your intake will sit in the Vee of the motor. This affects port matching, sealing of your intake faces on your intake manifold.
If you've had your new HotRod Motor block decked and your heads Milled, don't be suprised if you should need to have your intake milled to fit. By the same hand, you find a really good deal on a Victor Jr. or a old Scorpion for a little of nothing, don't be suprised if its been cut so much you have problems getting things to seal. If thats ever the case, diff. gasket Manufactures make diff. thicknesses of gaskets. Look around and try diff. ones to get things to fit like you want....That is one of my tuning tools....

ALWAYS, ALWAYS, check that intake seal!!!!! If your extremely lucky, you might suck some oil and smoke, or have a ugly oil seepage at the front or rear of your intake. I HAVE SEEN motor get burned down because going lean from a intake leak.
 
Well I guess its my fault for expecting a new intake to be correct in the first place. Live and learn. Needless to say I will not make that mistake again.

I spent some time tonight with the oil stone, things are smoothed out enough that there should not be any more issues with sealing. You can still see a couple low spots around the water ports, but they are not enough that the sealant won't take care of it.

Thanks again for all the advice. I am just glad I caught it now. Its getting close to cruising season and I was tempted to put it off for a while, but now that things are completely apart I will spend some time cleaning/painting/tweaking the things I noticed over the month I actually got to drive it.
 
- the blue felpro gaskets are not for aluminum intakes and will not seal as well, since they have no "give"
- use felpro 1205 - (using the procedure Mike posted.)
I thought this was a bit contradictory, until I realized I had completely overlooked the two lines of FelPro gaskets. The high performance gasket line was the line I was referring to, not the standard automotive line. Apologies for any confusion I caused by this oversight.

every time you pull a motor down, especially when your building a new motor for you T, ALWAYS check how your intake sits on the motor with block and heads, inplace, torqued, use old head gaskets if you got to.
Isn't it amazing how handy a used set of head gaskets can be? Most people rip them off and pitch them. We always kept a wide combination of used gaskets on hand, so we could mock things up.

Keeper, it's human nature to think a new part is ready to wash and use. But the truth is that everything needs to be checked. Just because you buy a set of rings in a box marked .030" doesn't mean anything, until you've verified it. The same goes for a set of bearings. Pull six identical cam grinds, from a single manufacturer, out of their boxes and run them over a Cam Doctor (R.I.P.) and you'll be amazed at how different they are. We never saw a crankshaft from a well-known and very popular aftermarket crank "manufacturer" that didn't need to be ground and I cringe to think of the countless people who bolted those cranks in without checking anything. The guy who ground your crankshaft is a nice guy and has been grinding cranks for decades, but you still need to check his work. The guy who honed your block said he allowed X amount of clearance, but checking is the only way you'll ever know what you really have. And that's not saying anyone would manufacture junk or cannot machine parts correctly. Stuff happens. If both a crank journal and a bearing are at the high side of tolerance, that's your oil clearance being affected. So it is always your responsibility to make sure stuff is not happening to you. Once the sides of your intake have been milled, check to make sure things are right. Assume nothing is right until you've verified it is right.
 
Funny you mention that. When I assembled the engine I checked every journal, every ring, every tolerance I could, even had to open up a couple crank bearings a touch.

I did not think to check the intake, it just never crossed my mind. Combine that with the fact that I thought the blue felpros were the "go to" intake gaskets and well there you have it!
 
We
3000 grit sandpaper. They were .0001 to tight. So I took some oil and 3000 grit and and just "cleaned" the bearing surface a touch.

They were really close, I think it was more for me being anal instead of a real need to loosen them up.

Well, uh, yea, if we're worried about .0001 out of ideal on a main or a throw, thats what the crank polisher is for. 3000 on a soft bearing???? WHOA THERE! WASH THAT BEARING WITH GOOD HOT SOAPY WATER! SILICIA RESIDUE, IF ANY IS LEFT, IS NOT GOOD! That soft babbit surface on the bearing surface is for many things, one of them is to capture grit and dirt/metal particles and embed in quickly. Small grit fragments can become embedded and cause a crank failure! Nothing with grit on a bearing surface!!!!
If your gonna want to 'Polish' off a 1/10 of a thousandth, get a piece of newspaper, and a drop of oil. I have a airgage that can read down to 100 Millionths of a inch.....and thats when I have to use it. I use it for honing precision parts.
Get Everything super clean, and when you think its good enough, wash it agian. All it takes is a little grit, and a whole lotta oil, and you have the makings of a lapping slurry on your hands otherwise known in the machine shop trade as cutting oil.

On the intake thing, if your sitting down on your intake (on the Bottom), shop around for diff. intake sets, not all gaskets are the same. AND JUST AS MIKE TOLD YOU, there are racing gaskets that are thicker and thinner than you might think. I've raised/lowered compression ratios by backing off or tightening on the valvelash and replacing head gaskets.
If your intake is bottomed out under the bottom, go with thicker intake set. IF your gap is getting really too wide under the bottom, run a thick, wide bead of silicone, and let it sit, come back a couple of hours later, with a q-tip and some alcohol, wipe over the top of that silicone seal, run another bead. LIKE MIKE SAID, you might have to play sculptor, its better to have it sitting too high than to have it too low! Popsickle sticks are my favorite, or if I need the extra finesse, a latex glove on my right hand to play in the 'Gorilla Snot'.
When someone is paying me to have a motor built, I don't save money on sealants, gaskets, quality of oils or quality of bearings. Those, I get the best I can buy.
I've seen the INDY 500 get lost because of a $0.35 spring during its final laps. That spring was on a wastegate....
 
I think we need to port match those intake ports to those head ports, while we have the blueing out, theres a few horses to be had there....my grinding hand is starting to twitch!
 
:D

I did wash them repeatedly after.

Yeah the more I look at the heads/intake they could use some cleaning up and matching, but the heads are only 882's and any improvement on the intake will be lost by the ugly runners on the heads!

13%20Mar%202012%20011.JPG_595.jpg


But hey, you never know what will happen while the paint it drying on the engine...lol
 
I have to agree sanding on a bearing is pretty ballsy stuff. Maybe a bit of worn-out and ultra-fine Scotch-Brite while submerged in some cleaning solvent, but I would really be afraid of any remaining silica. Far too easy for it to embed itself into the bearing. A piece of emery cloth and a thong wrapped around the crank journal would have been the way I would have gone after it, if I could not access a polisher. It's easy-peasy to wash silica off that crank journal.
 
:D

I did wash them repeatedly after.

Yeah the more I look at the heads/intake they could use some cleaning up and matching, but the heads are only 882's and any improvement on the intake will be lost by the ugly runners on the heads!

13%20Mar%202012%20011.JPG_595.jpg


But hey, you never know what will happen while the paint it drying on the engine...lol
Plus you'd have to pull the heads& tear them down & reassemble & new gskt's & it's damn near spring &...... :rolleyes: dave
 
Yea Keeper, I hear ya. Give it a few years, you'll be wanting things all fancy and fast. You'll be wanting one of those 377's....
 

     Ron Pope Motorsports                Advertise with Us!     
Back
Top