old round fart
Well-Known Member
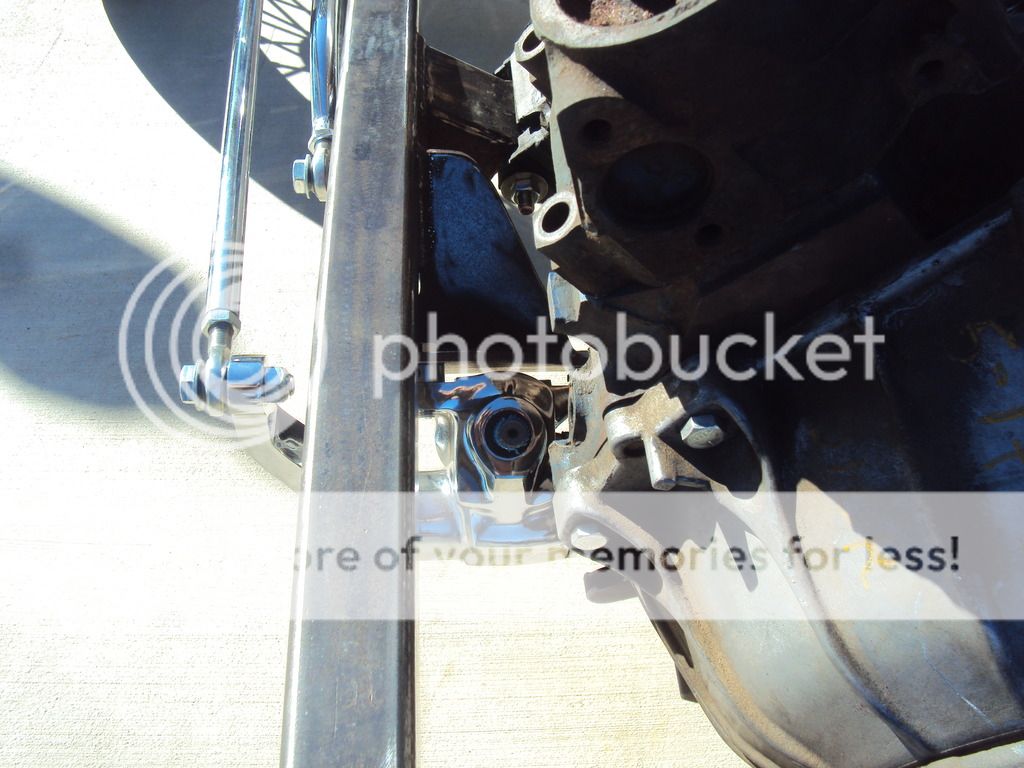
Is that a mustang steering box?


Your chassis looks strikingly similar to mine...Making a little progress. I am still mocking everything up and have the radiator, front shock towers, light stands and front end all put in place. I had to move that radiator tabs forward about an inch to clear the water pump on the 351. I moved the rear panhard bracket out of the kick area and fabricated a bracket that bolts to the 8" diff. Trying to make some room in the kick area, hoping to build a fuel tank that will take advantage of that added space for a couple more gallons in the tank. The shocks will bottom out before the panhard contacts the 3rd member so I don't think it's gonna be a problem. (at least that is what I'm hoping for). I may build a bump stop between the frame rails over the center of the axle housing just for some insurance to keep it out of the fuel tank if something goes wrong on the road. Bent up all the brake lines and secured them under the frame rails. Drilled holes for the wiring that will go inside the frame. Made up a rear "bumper" that will be where I am toying with the idea of some '59 Caddy tail lights and license plate. The rectangular tubing will be tucked under the back of the bed with the round tube ovals chromed up and tucked against the back of the bed.
The next step is gonna be set the body on and bolt it down so I can start working up the steering column. I'm a little worried about clearance around the bell housing for some steering u-joints. I may have to move the vega box a little bit outboard to make it clear.
I'm open to comments and suggestions.


I originally imagined it with MASSIVE tires on the back and found these where I got the front wheels and tires so I couldn't pass them up. I may go with some 14's in the back later on... but then I may have to cut a notch in my garage door to get it in next to my "65 F100. LOLI really like chassis shots and SHINY stuff....
Works for me.
Any chance you can put another 6" on each rear tyre????


I cut a piece of 1/2" plywood the shape of the dash, got the steering column and drop where I wanted it while the plywood was clamped in place. Cut a piece of 1-1/2" aluminum angle about 4" long and drilled it for the column drop bolts and a couple holes for some 1/4" bolts on the other side of the angle. Bolted the angle to the column drop and marked the plywood for a couple holes. Took everything back out, drilled the holes in the plywood and bolted the angle to the plywood and tightened them down until the head of the bolt sucked into the plywood making it's own hex shaped "countersink" to keep them from spinning. I took some liquid nails polyurethane adhesive and glued the plywood to the back of the dash and clamped it in place overnight. Repeated the process for some angles on a piece of 3/4" plywood on the inside of the firewall. Cut some 1" aluminum bar stock and bent it into shape for a couple of braces on each end of the dash. It took all the "flex" out of the fiberglass dash and doubles as a column support. I will glass all that plywood into place when I take the body back off and turn it upside down so I can do it standing up.
I cut a piece of 1/2" plywood the shape of the dash, got the steering column and drop where I wanted it while the plywood was clamped in place. Cut a piece of 1-1/2" aluminum angle about 4" long and drilled it for the column drop bolts and a couple holes for some 1/4" bolts on the other side of the angle. Bolted the angle to the column drop and marked the plywood for a couple holes. Took everything back out, drilled the holes in the plywood and bolted the angle to the plywood and tightened them down until the head of the bolt sucked into the plywood making it's own hex shaped "countersink" to keep them from spinning. I took some liquid nails polyurethane adhesive and glued the plywood to the back of the dash and clamped it in place overnight. Repeated the process for some angles on a piece of 3/4" plywood on the inside of the firewall. Cut some 1" aluminum bar stock and bent it into shape for a couple of braces on each end of the dash. It took all the "flex" out of the fiberglass dash and doubles as a column support. I will glass all that plywood into place when I take the body back off and turn it upside down so I can do it standing up.


