Satori
New Member
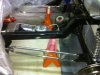
I just put together a quick and dirty web gallery of my project pics. I just threw it together in about 10 minutes to check out the gallery software. I still need to organize them chronologically, but I like this program.
Mike's photo gallery
Mike's photo gallery
")