Ron Pope Motorsports                California Custom Roadsters               

Todd's T

Tjbucket

Member
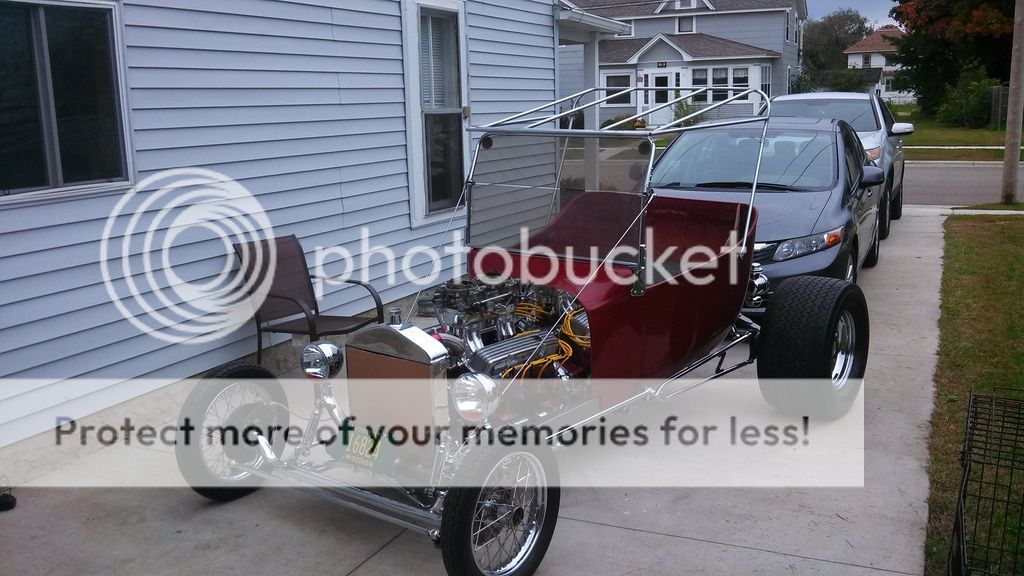
Give me some feedback or criticism...this is my first project, it has been more of a rebuild than complete build. However, some things I have completely have been completely redone. My intent going into it was to do as much myself as I can.....and so far I have. From paint and body work, welding, wiring, bent all new lines brake and fuel and plumbing. Fiberglass and interior. Getting ready to start the seat.....spring is coming and need to get this on the road!!
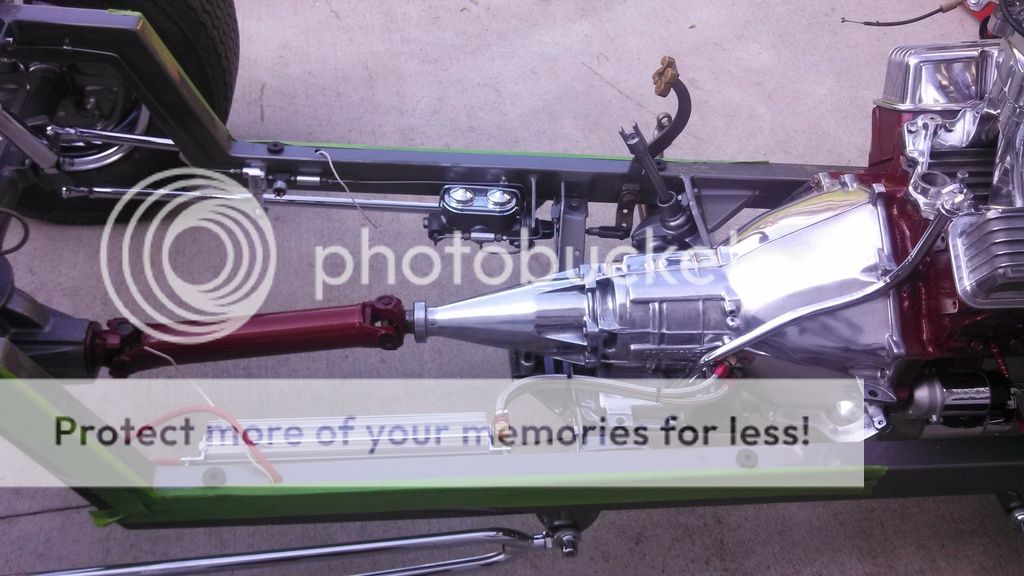
IMG_20150906_160723_188_zpsdxpivmve.jpg~original

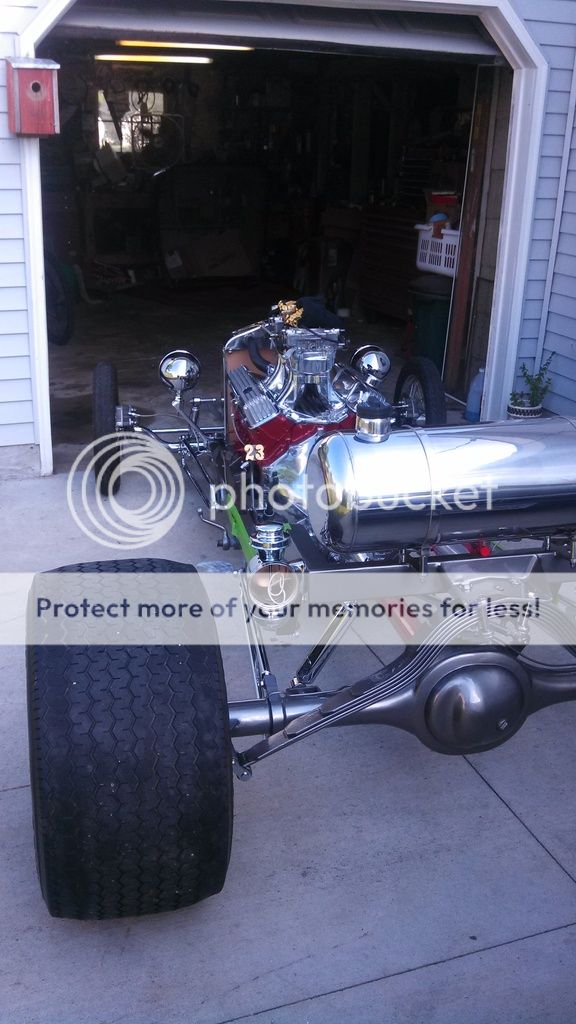
Under the bucket, was getting ready to set the bucket in place and put painters tape on the frame to avoid scratching.
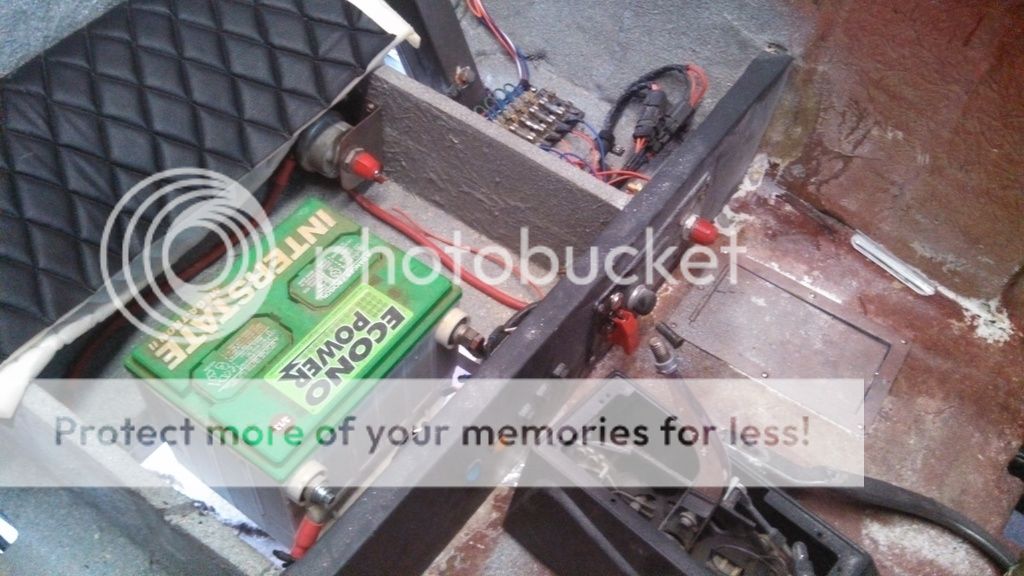

IMG_20151126_095325_524_zpsgezuihfs.jpg~original

Here is my switch panel on the toe kick. Master switch panel with push button start, directional, horn and lighted headlight switches. A second master under the seat.
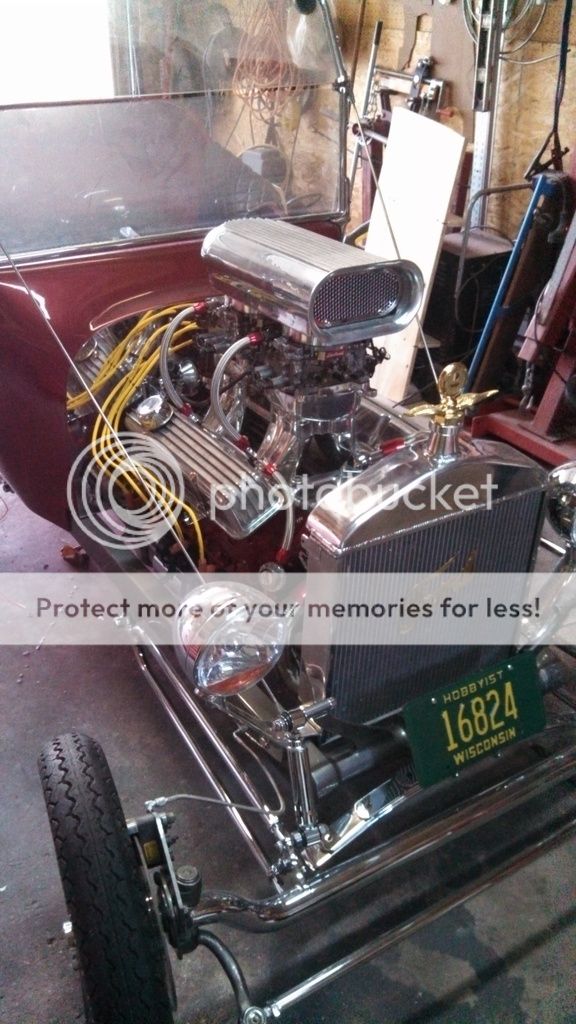


IMG_20151217_152258_333_zps4zle2yad.jpg~original

Tunnel ram (ok, got it not very popular) it, has a nice look but, not the performance. It will get replaced down the road, but cannot fund a new intake right now.....too may other items were needed. The shocks have since been repositioned and the bottoms are now connected to the spring shackle and sit almost straight up and down.
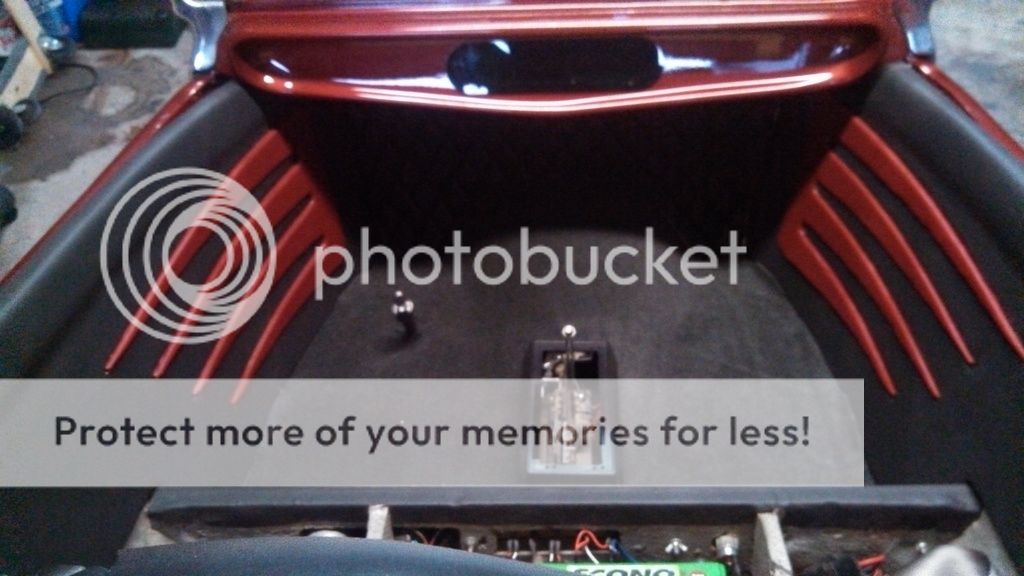

IMG_20151227_163041_865_zpsgnrixjb4.jpg~original

Here are the interior side panels I made.....not fastened yet to the sides so there looks like there are gaps near the dash. Floor is carpeted...not cuts or seams.
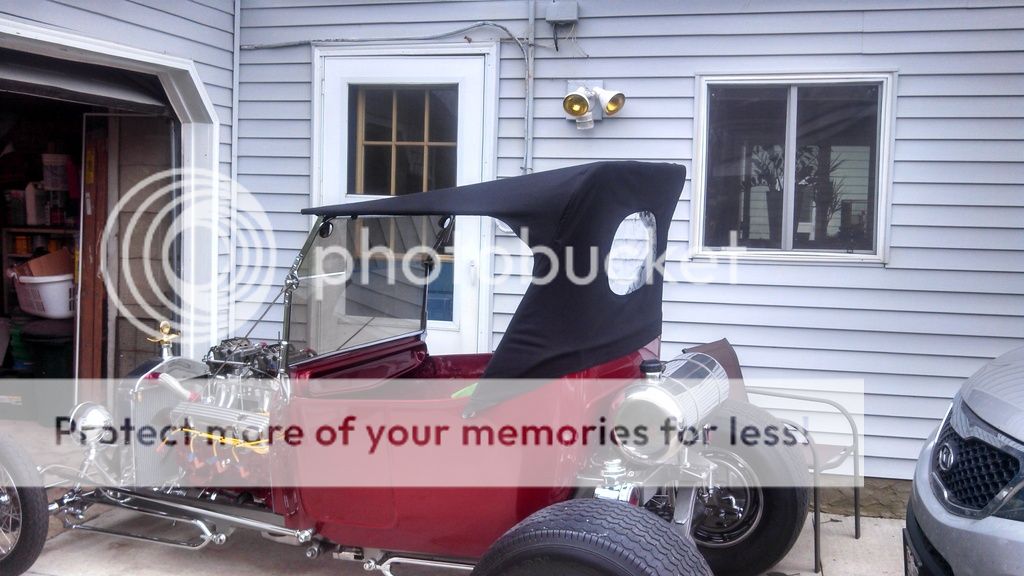

IMG_20151024_163822_993_zpsrlw7yjd8.jpg~original

Here is the top my sister and I made of light weight canvass. It looks taller than what I was shooting for, may need to get a shorter windshield down the road.
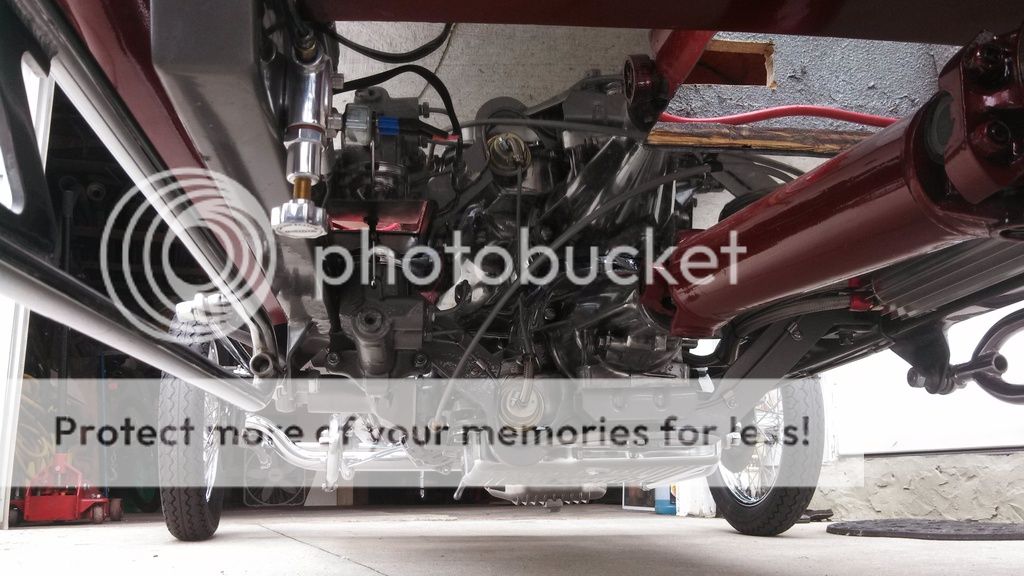

IMG_20151004_121954_553_zpsd39vnjin.jpg~original

This picture looks a little busy.....yes, I covered the bottom of the bucket with a mirror. The hole you see above the drive shaft is where the battery drops down into from under the seat.

IMG_20151004_121708_191_zpse7cnghcw.jpg~original

Here is a shot of the top frame I made up from 1/2 electrical conduit.....cost me $12 verses $200.

IMG_20150906_160824_894_zpsnul4pt45.jpg~original

Here is a rear shot...yeah the tires are not the greatest but, got them on a trade for some other parts. Those along with some other items will be changed out down the road. Ok, it has a buggy spring, I like the look.....we will see about the ride this summer.
 
What's that color on the frame and rear end? I like it.
 
Good question....I went to the local; body shop supply and browsed their catalogs and said I like that one. They are a PPG Omni line of pain base coat/clear coat one of the codes is MBC 906254 not sure if that is the red or gray. I need to find the other receipt. I think that is the red....it is a Jaguar color. I really like the gray it has depth. I'll find the number for you.
 
The color is PPG 906254 called graystone. Looks like the GM code is 16.

Thanks. Man, that's a nice color. I probably see it a hundred times a day on GM cars and trucks. But with a heavy clear, like on your rear end, it has a really rich look.

Hmmmm... maybe my body and frame color.
 
How'bout a tutorial on how you made your interior panels? They look nice.
 
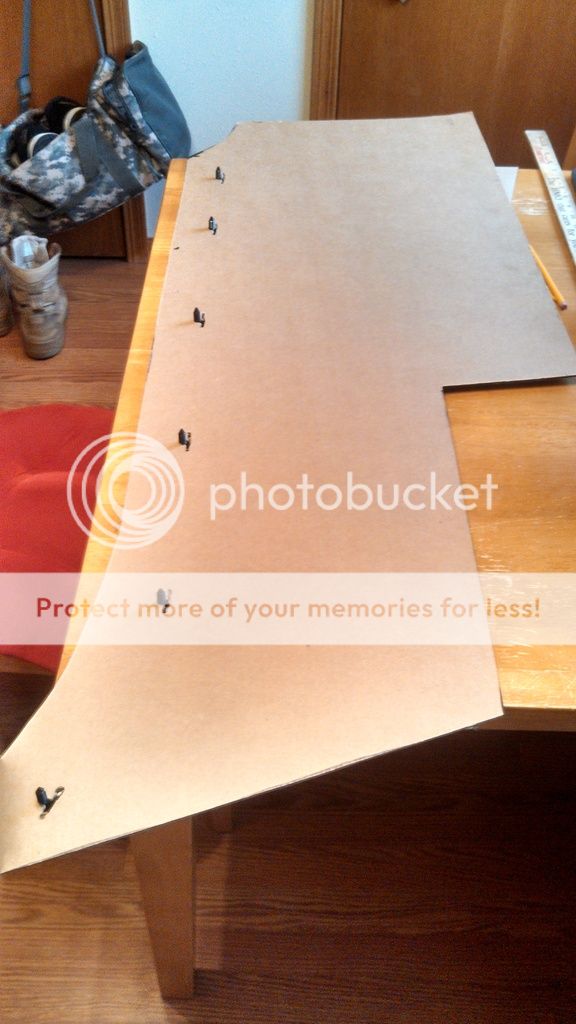
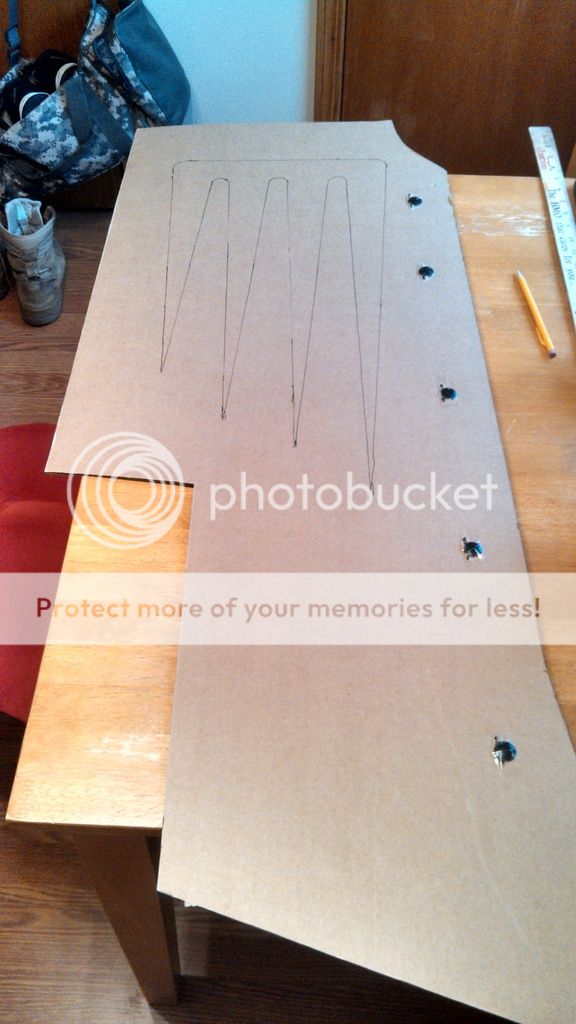
Hummm.....guessing you would like more than I used a lot of glue and swore a lot! wish I would have taken more pictures of the process. The backing is 1/8" chipboard, not plywood. My first attempt I use 1/8" paneling but, it did not contour very well to the side of the body. So, I scored the back to help it bend more and then it just started splitting. I threw that away and ordered some chipboard. It is basically very dense cardboard, would older cars used as door panels....before plastic. I cut those to the desired shape and bought body panel fasteners. Cut T slots in the chip board and inserted the fasteners. The panel is covered first in 1/4" shaping foam, again a very dense close cell foam. Along the top edges I actually have 4- 2" wide layers 2 on the inside surface and 2 on the back surface. then I covered the entire with a piece of the shaping foam, which I rolled over the inside edge and trimmed where it would meet the side of the body....along the top of the panel. I used 3M 90 high strength spray adhesive for all the foam gluing. Once the panel was covered, I have previously made a template from poster board to locate the scallop, played that over the panel and cut out the scallop just thru the foam on the panel, then sprayed the panel with adhesive and covered with the vinyl. I used a pigskin pattern gray vinyl. I wrapped the edges of the panel around the backside and glued that with HH-66 vinyl adhesive. The trick part was once the panel was covered cutting the scallop area. I just basically cut with down the center on the scallop legs and trimmed and glued so there was not excessive material and so it covered the edges of the foam. Next, I cut the scallop design out of the chip board and covered that the shaping foam. Then covered that with the red vinyl and wrapped that sound the edges and glued with the HH-66 glue. Then that insert was glued into the mating area in the side panel. There was a slew of trial fitting before It actually worked because the insert is actually larger once the edges are wrapped with the vinyl and it did not just slip right in, hence more swearing, cutting, swearing and it you take too much then you have a lot of wasted material. Eventually it fit. The insert was glued to the panel with the HH-66 glue as well. I still do not have the panel actually fastened to the body yet, but, what my plan is to use T nuts epoxied to the body and just push the fasteners in, hence the 2 layers on the back of the panel to allow for the height of the T nut. I may have to trim the fastener down a bit in order to seat deep enough. The foam on the back side will also allow to contour to the edge between the panel and body......mine is not a perfect edge and should hide some of the irregularities.

You could also try this method:

Which is where I first got the idea. But after doing a sample piece, I just could not get it right by tucking. I like how mine turned out, a couple flaws but, over all better than I expected. With the additional layer on the insert it gives it another dimension also which I like.


IMG_20151127_112516_525_zpslknzgall.jpg~original
IMG_20151127_112532_042_zpsipjgzxx0.jpg~original

How'bout a tutorial on how you made your interior panels? They look nice.
 
Thanks. Man, that's a nice color. I probably see it a hundred times a day on GM cars and trucks. But with a heavy clear, like on your rear end, it has a really rich look.

Hmmmm... maybe my body and frame color.

I was impressed how the reared turned out......almost looks dipped. For an amateur I was very happy! This was only the second thing I have painted, I did one of my pick-up years ago with single stage paint....well, that is besides my father's pick-up with a brush when I was a kid, not counting that.
 
Looks good. hope when I get to the painting it turns out as good as yours looks. Keep the pictures coming.
 
Works for me.:):D
 
Several set backs since I have had a chance to fire it up. First, my pertronix ignitor took a crap.....replaced seems fine so far, next looks like my transverse spring was too long, but, completely overlooked the pan hard bar and once I removed that the spring settled into place what I think is to be correct. Other issues.....running way too rich, so I am screwing with the carbs swapping out metering rods which I hope will correct that problem and last, looks like I need to swap out the torque converter. Making some calls tomorrow to see what is recommended for my set up. Do and re-do......Weather is warm and ready to put on the road, but want it right. Minor issue is the top I made need to add snaps on the back of the bucket, flaps up when going down the road. I was hoping not to put snaps on as I had a pretty tight fit around the body.....live and learn I guess. Seat is finished, to be honest not real happy, another attempt, but should get me through the year and will have the interior professionally done hopefully next year. Like someone else said "two things I will never figure out, is women and upholstery"......so true.
 
Be aware that the Edelbrock carbs are extremely sensitive to too much fuel pressure at idle and just above idle, if I remember right
it needs to be down around 4lbs or less at idle.
One thing I see in the pics above is that "regulator" in the fuel line, which is actually more of an adjustable restrictor, which is fine
when running at WOT when fuel is flowing, but at idle where there's virtually no flow, the pressure is the same on both sides of the restrictor.
Call Edelbrocks tech line and ask about the pressure, check it at the carbs, and if it's too high get an adjustable diaphragm style regulator like a Holley.

Thank you for the advise.......I am going to try some larger metering rods and go from there.....stock for my carbs are 65/52 ordered 70/52. From what I have researched that will hopefully solve my richness problem . Although, still running rich at idle?? May need to running in the idle screws a bit more. using a vacuum gauge to adjust and from what I have read find max vacuum and turn in a 1/4 turn......I have done that and I, still think it is too rich........keep turning in????? I have edelbrock 1804 dual carbs, yes on a tunnel ram ( not to strike up a sore subject) but what are others using??
 
After the rods, I will try the springs......I pulled then rods out and the springs had no color, so not sure if the color is gone or they are the plain springs? Not sure what the stock edelbrock carbs with for the 1804 set up? May have to make a call to edelbrock......
 

     Ron Pope Motorsports                Advertise with Us!     
Back
Top