Ron Pope Motorsports                California Custom Roadsters               

T Bucket Interiors

Bill Darr does also it sure did help Rick (indycars) at the lake of the Ozarks
I forgot to ask Bill if he has a 5 year free replacement warranty !:rolleyes: What do you think?
 
Thumbs up on the odessy battery. Had one for years. It is dry cell. You could mount it under the dash next to firewall if you wanted.
 
G'Day Guys,
With the Odessy being a Gel Cell it's important not to let them go flat, shortens their life big time. On my Lotus 7 clone I bought a 40watt solar cell and put it on the roof of the shed, wired it thru a 7Amp controller and it maintained the battery between uses,. It overcomes any drain on the battery ( alarm's/ immobilisers etc) while the car is not being used.
Regards,
Mike.
 
Just finished painting the seat base.;)
 
And..... done.

full
 
Slight delay on the stainless steel screws and cup washers. They didn't charge my card until today.o_O Hopefully, it will ship tomorrow. On the flip side, the foam arrives tomorrow.:D
 
Well, using cardboard I made templates for the interior panels and the door. The first thing I noticed, was that I ordered a LOT more material than I'll need. So, I've got enough to screw this up a few times.:D I'll still need 3M Adhesive for attaching the wood pieces to the body, but I'll get that, when I get the Luan or ABS sheet. I'm still not sure what I'm going to do about the corners, but I'll make up my mind soon.

full
 
Nothing like a good nights sleep, to give the ideas a chance to gel. So, here's a thought I had. The hell with trying to cover the interior corners and the back panel. They are pretty much out of view, unless the seat is removed. Maybe I'll just leave them alone. Paint them in truck bedliner and be done with it. I'll have the interior panels upholstered from the front, to the start of the curves of the body. Or just attach the vinyl directly to the body on the curves and the back. With everything black, no one would notice and the people who did, wouldn't really matter to me.

I'll still have the option to cover those areas later. But I kinda doubt it. A "REAL" Hot Rod would have a minimal interior. The idea was to strip shit off, not add it on. So, no interior, except for seats, would actually be the hot ticket. All that puffy, soft stuff was for show cars and "Street Rods". That was also the way "Miss Behavin'" was done and I loved the low maintenance and stripped down look.

So, once I get the rest of my supplies, I'll get after it and post my progress.;)
 
Last edited:
On a side note.... if I didn't have a door, I'd have used bedliner from the beginning.
 
Okay, looks like the seating issue has been beat to death. Thanks to yours truly.:rolleyes: So, let's talk steering wheels. Earlier, I thought I would go with this one from Lime Works, 15" dia, no dish and leather wrapped, but it was $200 and now it's out of stock:
limeworkwheel.jpg

So, I next thought about the Speedway version of the same steering wheel. 15" dia, stainless steel spokes and a 2" dish. $90.
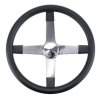
speedwaywheel.jpg

Next, is another Speedway wheel. 13" dia, 3 spoke with a 3.5" dish, chrome spokes and it's $35.
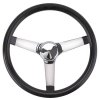
speedwaywheel3.jpg

And finally, the old standby, the classic Grant 3 spoke. 13" dia, chrome spokes with holes and a 3.75" dish. $35.
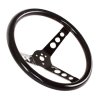
speedwaywheel2.jpg

But let's not forget the Mooneyes metal flake selection. 15" dia, finger grips, 3.5" dish and chrome 3 spoke center. $125
mooneyeswheels.jpg


Now, I've heard that a larger diameter steering wheel is easier to steer, in a car with manual steering. Not sure how true that is, but from a leverage standpoint, it makes sense. I have room for 15", but it may look out of scale in a small interior, like a T Bucket. My old car had a 13" and I remember liking it, but I didn't try a larger steering wheel.

As of now, I'm going with the 15" 4 spoke from Speedway because I like the competition look, the stainless steel spokes and of course, the price. Let's see what you guys have or want and why!
 

Attachments

  • speedwaywheel3.jpg
    speedwaywheel3.jpg
    26.3 KB · Views: 12
Last edited:
Getting back to your interior, why not just leave a "flap" of vinyl or whatever you're using to cover your side panels to go into the corner and just Velcro the flap in the corner?

As for steering wheels, I was thinking of a banjo type wheel
 
Getting back to your interior, why not just leave a "flap" of vinyl or whatever you're using to cover your side panels to go into the corner and just Velcro the flap in the corner?

As for steering wheels, I was thinking of a banjo type wheel

That's a good idea on the flap. Sometimes, a lot of times, I put too much thought into things. Thanks for the idea. Banjo wheels are nice and I'd want a REALLY nice one. So, they're out of my price range.
 
Now, I've heard that a larger diameter steering wheel is easier to steer, in a car with manual steering. Not sure how true that is, but from a leverage standpoint, it makes sense. I have room for 15", but it may look out of scale in a small interior, like a T Bucket. My old car had a 13" and I remember liking it, but I didn't try a larger steering wheel.

I'm using the 13" 3-spoke w/holes, and I find that on a light car like a T-bucket, I have plenty of leverage, and more leg room!

Dash.jpg
 
I run a 3 spoke like yours Spanky but mine is 15 inch..........I am sure I do not need that much wheel but I had it so I used it........
 
The S/S screws and cup washers came in and I scored the rest of what I'll need to do the interior panels. First step will be to layout my wood strips, that the panels will attach to. I ended up with ABS plastic for my side panels. I was looking for Luan, but the employees at Lowe's kept giving me the "deer in headlights" look. I looked on my own and didn't find any. So, plastic it is. It's 1/16" thick and quite flexible, so I'm pleased with it. I wanted 1/8", but it just seemed too thick. I hope this decision doesn't bit me in the ass, later.

And now, the tale of my wallet. What I got today, plus the screws, washers, foam and vinyl comes to..... $276. $65 of that was shipping costs. So, barring me screwing up, I'm well within my budget.:D
 
How do you plan on attaching the vinyl to the ABS plastic panels? Luan isn't good for any thing but dumpster fill.
 
How do you plan on attaching the vinyl to the ABS plastic panels? Luan isn't good for any thing but dumpster fill.

Actually, it's used and was recommended, by a couple people who do upholstery work. But as you'll see in my next post, I think the plastic worked great.
 
This evening, I decided to make a cover for the back of the seat. If you'll remember, there were exposed staples and I wanted to cover the wood. This also gave me a chance to see how the plastic would cut and how I'd handle the foam and vinyl. Before:
full


I measured and marked a plastic panel. Using several shallow cuts, I was able to snap the plastic along my lines. Then, I used that piece to mark my 1/4" foam and cut it. Next, I cut my vinyl 2" larger than the panel. I angle cut the corners, where they would fold over the plastic panel. Then, I sprayed 3M Super 77 adhesive on the foam and plastic panel. Allowed them to get tacky and CAREFULLY bonded them together. I then sprayed adhesive on the vinyl and the foam side of the panel. Allowed them to get tacky and bonded them together.

Next, I sprayed adhesive in a 2" strip along the back of the plastic panel, flipped the material over the panel and pressed them together. Here's a pic of the back of the panel. You can see how I cut the corners at an angle, so they wouldn't overlap.
full


Before the adhesive fully dried, I pressed the vinyl into the edges of the exposed corners. There wasn't a lot of the plastic corner exposed, but I wanted this to look nice. Here's the face of the finished back piece.
full


I placed it on the seat, to see how it came out. I'm liking it.
full


There are a couple dimples, where I pressed on the foam with my elbow, while working. So, I probably didn't have to use adhesive on the foam and vinyl. The dimples may or may not come out, but it was a lesson learned. Tomorrow, I'll screw the panel into place. Then, I'll measure and cut my wood strips for the interior panels.
 
Last edited:
I think you have a future in automotive upholstery!
 

     Ron Pope Motorsports                Advertise with Us!     
Back
Top