This question has probably been asked before, but here goes-would it be practical to add a passenger-side door to an existing doorless body? I realize there would be a fair bit of work needed to the body and the interior, but I think it would be a worthwhile addition to my car (easier entry/exit, fewer spousal complaints, etc.). Any thoughts?


You are using an out of date browser. It may not display this or other websites correctly.
You should upgrade or use an alternative browser.
You should upgrade or use an alternative browser.
Adding a Door
- Thread starter kgrimm
- Start date
benT
Active Member
Here is a link one of my photobucket albums where there is a HRM article from the '66 on cutting in a door on a T. There are obviously several way to do it, but they all are pretty similar. You should try a search as there was a thread a few months back on this site on the same topic
http://s985.photobucket.com/albums/ae336/btgriffin/T Bucket Doors/
http://s985.photobucket.com/albums/ae336/btgriffin/T Bucket Doors/
McDenny
New Member
I am going to be cutting a door into my TP body too, been doing alot of research on here and just reading everything I can before I tackle it. Alot of different opinions on where to cut it, hinges, latches, etc....I guess alot depends on you and what you want. My body is channeled so the the bottom of the door line is actually equal with the floor, so if I cut it on the outside of the contour line, I will have to reinforce the floor, not a big deal, but more work. If I cut on the inside of the contour line, smaller door, and will it look right? I am sure a few others will chime in and you will get all the confidence you will need to do it, post some pics when you start, I plan on posting some, and if you don't like fiberglass work or unsure about it, practice, practice, practice, use some wood and join some pieces together, it can be messy, but you will get the hang of it.
QuadBart
Member
Im putting a door in mine right now.
I used the outline of the door thats molded into the body as my guide for where to cut.
It puts the bottom of the door 2 inches below my floor, buts its nothing a little reinforcing and glass cant fix.
It is a lot of work, its been a slow process for me because I only get to work on it one day a week.
McDenny
New Member
Well, cut my door today, marked it and cut it, now I have to make the door jams and such, which should be real fun considering the curve of the body. I am not so sure how to fill in the gaps between the wood and the body, any thoughts?
Attachments

To get the shape of the body, Trim a piece of corigated cardboard to a rough shape of the body. Now take a small washer and roll it along the cardboard keeping it in contact with the body with a Sharpie inside the hole. The smaller the washer the better. That will give you the shape of the body. Cut your wood rib. I have been using 5/4 deck wood seasoned for a year or so or a close grained pine 2x4. I make the ribs 1 1/4" deep at the top and 1" at the bottom. Make the inside edge a straight cut.
Once you have the shape of the rib, sand the mating surface with 60 grit to remove the mold release. Mix up some stranded body filler and put a light enough coat on the body side of the rib to fill any imperfections. Clamp it in place with spring clamps at the top and bottom. Don't over clamp it to the point where you change the shape of the body. Save your pattern for your door edge.
Since you elected to cut in the center of the revel, add more mud to the gap after it's clamped. After this drys, sand a small, 1/8" or so radius on the body too prevent paint chips. For those who are comtiplating adding a door, cut on the outside of the revel and you won't have to do this step.
For wooding the door, use the same wood as the body rib. Shape the back door rib, if you are using a stock type latch, check the angle of the lip on the back edge. Now shape the back rib in the door to that degree. For the bottom door wood I use a 1x4 trimmed to fit. For the top I use a 1x8. That will give you enough room to mount the latch 2" down from the top of the door. Use a router to clerence the wood for the latch.
For the hinge use a stock one. They can be found on e-bay for just a few $$. Relieve the body and the door ribs for the hinge. The top of the hinge goes 1 3/4" down from the top of the body. Hint; AFTER you have the door all mounted, take the pins out of the hinge and grind 1/16' or so from the bottoms of the the pin barrels on the body side. This keeps the door from binding and the paint from chipping.
Sorry this is such a long post but it is important to follow this protocal. Good luck!
Ron
McDenny
New Member
I didn't actually cut it in the middle of the reveal, I cut it on the outside edge, I never thought of putting a piece and tracing it out, I was going to try to mold a piece to the body, trimming a piece is much easier ") I was wondering how to do it and not distort the body. I am making my own hinges, the door is going to be a suicide door and the hinges are going to be on the inside, not hidden because they take up to much space, you will see some of them, I will either paint them or chrome them. I am wondering about a good latch and do you install a door "stop" or do you let the latch stop it?
I was wondering how to do it and not distort the body. I am making my own hinges, the door is going to be a suicide door and the hinges are going to be on the inside, not hidden because they take up to much space, you will see some of them, I will either paint them or chrome them. I am wondering about a good latch and do you install a door "stop" or do you let the latch stop it?
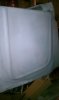
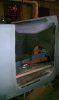
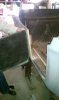
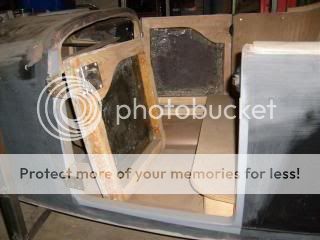
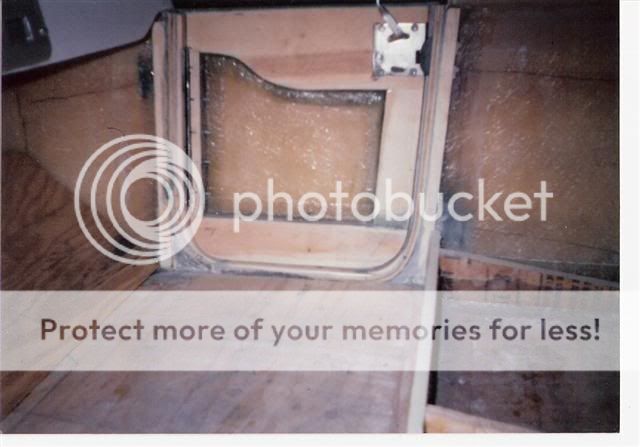
I was wondering how to do it and not distort the body. I am making my own hinges, the door is going to be a suicide door and the hinges are going to be on the inside, not hidden because they take up to much space, you will see some of them, I will either paint them or chrome them. I am wondering about a good latch and do you install a door "stop" or do you let the latch stop it?Here's a couple of door jam pictures. We use steel tube frameworks inside the Door bodies, all the bolts that pass thru the body are backed by steel plates and tied to the frame thru the floor. This way the fiberglass is being sandwiched between the metal and not carrying the stress. Over time this eliminates flexing and cracking.
The riser should support the side of the body that the door closes on , so keep that in mind.
Good luck


The riser should support the side of the body that the door closes on , so keep that in mind.
Good luck
Thanks again for all the input! McDenny, I'll be watching your build closely (it looks like you're doing a great job so far) as my bucket has a TP body as well. I have no idea what's lurking under the tuck-n-roll, so I'm sure I'm in for a few surprises!
Here's a couple of door jam pictures. We use steel tube frameworks inside the Door bodies, all the bolts that pass thru the body are backed by steel plates and tied to the frame thru the floor. This way the fiberglass is being sandwiched between the metal and not carrying the stress. Over time this eliminates flexing and cracking.
The riser should support the side of the body that the door closes on , so keep that in mind.
Good luck
View attachment 5756View attachment 5757View attachment 5758View attachment 5759
Jerry,
CCR sure makes a beautiful T body, I really like all your reinforcing that goes into it.
McDenny
New Member
Well, lets see how to word this....what a pain in the a** Made the template for the body or door jam, not to bad, but being a channeled body, I needed to cut the floor, so the "door jam" is going to go all around the opening, and let me tell you, the bottom part of that door opening goes in several different directions, is it almost impossible to fit one piece of wood there......I would be sanding and shaping for a week. So, the question I have, would be "piecing" it in be considered being a "hack" ? Considering there are several different angles at the bottom of the door, it may be easier to "piece" it in, then glass and fill over it to "shape" it.
Thoughts????
Thoughts????
these are what I have in my computer now.
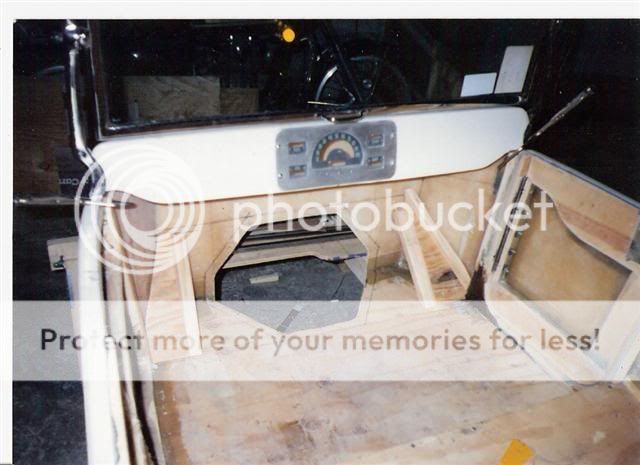
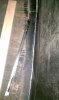
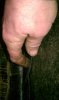
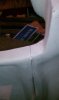
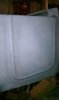
When I add a door, I have the door edge lap the body. After paint I put 2 cupboard bumpers on the door. This helps keep some tention on the latch. It's also easier to adjust the door to the dovetail by removing some material from the bumper. If you look close you can see the door edge in this pic;

Ron
When I add a door, I have the door edge lap the body. After paint I put 2 cupboard bumpers on the door. This helps keep some tention on the latch. It's also easier to adjust the door to the dovetail by removing some material from the bumper. If you look close you can see the door edge in this pic;
Ron
Similar threads
- Replies
- 22
- Views
- 4K
