


You are using an out of date browser. It may not display this or other websites correctly.
You should upgrade or use an alternative browser.
You should upgrade or use an alternative browser.
AltBantam
Active Member
DonnyRay. I will be buying it from Aircraft Spruce, which is locate about ten miles from my home. But it can be bought through other aircraft stores, like Wicks, as well as Amazon… though in small sheets. Look up flexible plywood. It’s not a veneer so don’t get to two mixed up.
AltBantam
Active Member
A couple of new cowling extension photos from Tuesday. Life and weather kept me out of the workshop over the weekend. I plan to add a few more horizonal pieces. I also need the weld the frame bracing together to be mounted on the inside of the firewall. I will cover afterwards.
Attachments
AltBantam
Active Member
Every little inch counts. You guys driving t buckets know this well. There is a company who makes a 14" extension for the front of their Bantam bodies. It just looks awkward to me. While the stock Bantams did have extended footwells up front, it was underneath the hood so hidden. The photo below shows a stock Bantam with a flat head Ford dropped in. The red arrow points to where the original under hood footwell was extended. It was cut back for the flat head to fit. Bantam engines are tiny and sit almost even with the front axle. Bantam are very deceptive in their looks. 
AltBantam
Active Member
I haven’t posted in a few weeks but I haven’t done much over these weeks so… I welded the square tubing to the front firewall mounts. This will be used to mount a bracket for the steering column. I made a template for the dash. I mounted the body to the frame on the front and rear of the chassis. I will add an additional mount in the center later.
AltBantam
Active Member
I haven’t worked on the car since my last update, but I have been spending money on it. I decided to go with a Corvair steering box. It’s period correct enough. I have also bought a steering column. It will need to be shortened, but that’s not a problem. Getting the alignment setup will be fun. Once that is done, the brake and clutch pedal will be next. I hope to have some photos to post by next weekend.
AltBantam
Active Member
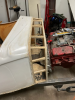
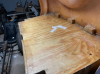
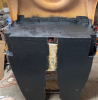
Hey... it's been some time since I last posted. Unfortunately, my 'to do' list around the house came due. So I had to take time off working on the car to do house projects for the wife. I finished them up a week ago. Last week I started back on the body to finish enclosing the rear half of the Bantam body and fiberglassing it. I have included a few photos. The top image shows what the rear passenger compartment looked like before. The Bantam's rear fenders actually extends into the passenger compartment. The hole is easily visible. The next photo is looking down, or in this case horizontally inside of the body. Currently the body is off the frame sitting on the firewall to make it easier to glass in the back rear outside panel. There are three Red letters A, B and C. A is the panel covering the rear wheelwell opening. B is a box made from the same material as the floor so the rear suspension will not hit the floor. C is the floor. The panels and boxes are epoxied and nailed into the floor and one another. The whole thing was glasses in. The rear panel is the next photo. It has a layer of cloth on it. The few pieces of mat in the photo are from glassing in the inside of the fender. The last photo shows that. You can only see the end of the bottom inside of the box to add more room for suspension travel. Max rear travel with coilovers, three inches. There is four plus inches of room for travel so.... The inside panel is glassed to the floor and to the body. The wood is double coated with risen, in case a missed a spot. There's not much room to work there. Once finished, I will coat all of this in a rhino liner like coating for extra protection. Once the body is remounted on the frame, I'll take a photo of the firewall bracing as it stands. The steering column will be mounted to it. Mounting the Corvair steering box, and working out the doors will be next. Mounting the low back racing seats, a rollbar, the driveshaft tunnel and finishing the front cowl extension are also on the list.
Attachments


AltBantam
Active Member
I've seen several photos of that Bantam before. There are several more photos but I can't currently find them. The steering shaft is vertical and basically, the steering wheel is right there in your lap. 'They' look pretty comfortable, but unless they are like five and half feet tall, there is actually less length from the rear of the passenger compartment to the firewall as seen than a t bucket. Width is greater though. That is why I have extended the firewall seven inches on my car. It's not much, not like the fourteen or so inches the original Bantams hid underneath their hoods
AltBantam
Active Member
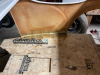
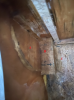
Coated the back of the rear passenger compartment board and the bottom of the floor with bed liner for extra protection. See photo. Sure, paint would have worked, but I wanted something different. Took two tries with two different produces to get the results I was looking for. Ended up using Raptor brand roll-on bed liner. You buckets guys are lucky. You only need to add a floor. The 26'-27' bodies I have seen need a rear panel glassed in. The bantam has that and the fronts of the wheel wells as well. But that's what I get for going with something different, I guess. I need to let the coating dry a few days before remounting the body to the chassis. I plan to build seat mounts next for the two low back "old" school racing seats. I also need to weld the steering box mount to the chassis before pulling the engine for rebuild. The space is not huge between the firewall and the engine(though more than some t buckets I've seen), so I need to set that up first before removing the engine. I hope to get that done before next weekend. It's getting hot again so I will be working in the mornings after I get home from work, if I feel up to it.
Attachments
AltBantam
Active Member
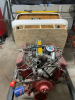
I was hoping to have posted sooner but the heat was too much to work on the car for a week plus... even in the mornings after work. Things I had hoped to do: Seat mounts... ordered metric bolts, 10M. I did not look to determine if there was a maximum length I could use. Ordered 25mm length, which was too long. Reordered 16mm, after measuring, which will fit. I have cut out the steel for the seat mounts. I just need to drill the holes and add hardware once it arrives. I started setting up the radiator mounting. I fabs two brackets to weld onto the rails. 2" x 1/4" flat stock. Added gusset to each bracket. Once I had them clamped into position, something looked off. One side was higher than the other. Made some measurements and one side of the frame was 3/4" lower than the other side. Scratched head. Went here to the forum. Found an older post about suspension setup. I thought I had done it right the first time. The frame was as straight as could be made without a jig. Everything seemed right up front, other then the height difference. Moved the rear suspension to check it. Found the problem. One of my crappy rear tires I mounted while glassing the body has a leak. The rear tire had about 5 psi. Filled tire, remeasured, thumbs up. But that took two days at the end of last week. Welded radiator mounts. No work over the weekend due to the holiday. I plan to mount the radiator this week. The radiator is an all aluminum 32' Ford. They don't make one with "Buick" size inlets, it's Chevy so I will need an adapter from the lower hose. Buick is 1 1/2" on both top and bottom. I have some 3/8" rubber which I plan to add between the steel mount and the aluminum radiator mount. Two 1/4" bolts per side, offset, to hold it in place. Read here on another older post that the radiator hoses do a good job of helping to keep the radiator stable. Hope so because I was not planning to add braces... though the radiator does have mounts in case I need to add them. I had hoped to mount the steering column mount. The column I bought is a standard column, no tilt. I will need to cut the length down to fit, add weld-on u-joint once the column mount underneath the dash is mounted. Headers. I have been searching for something I can make work. I really did not want to have to custom build my own headers. Did that once, not a lot of fun unless you love tedious work. I found a set I think will work with minimum mods. More on that later. Friend at work has a set of SBC headers he is willing to give me if I think they might work. Free vs $400? I will look at his header first and see if that fit my vision. I'm hoping I can pull the engine by or before the first of October. We'll see. I will add updates and photos as I finish each stage.
old round fart
Well-Known Member
If you don’t want a rod from the radiator to the firewall a short rod from the radiator to the frame down low would work and be unnoticeable.
fletcherson
Well-Known Member
I would suggest setting the car at or near ride height on jack stands or similar so it’s always the same while you are mocking up and fabricating. That tire issue would have aggravated me, wasting time... sounds like you are making progress, that’s all that matters. Seems like we seldom meet or exceed our goals, as long as progress happens, you are moving forward.
old round fart
Well-Known Member
I used a Harbor Freight furniture dolly with plywood cradle sitting at axle ride height. That way you can roll it around the shop assuming you did it for the front end with no wheels and tires taking up garage space.
Similar threads
