

You are using an out of date browser. It may not display this or other websites correctly.
You should upgrade or use an alternative browser.
You should upgrade or use an alternative browser.
My T Bucket
- Thread starter Mr T Bucket
- Start date
Like following your build. I'm a former KC area resident. I come to see my brother once in a while. He built a fiberglass '29 roadster. He is now building a '27 with a spirit body on a pete &jakes model A frame. He lives a mile from pete& jakes so they get plenty of his money. I'm using ford 302 in my project. I like the roller blocks and the cheap chinese aluminum heads from e bay.
Mr T Bucket
Member
I had the opportunity to buy an original '29 Model A roadster body from a friend's dad. Probably would have been around $200. Should have jumped on it, but I was still living at home and would have had absolutely no place to put it.
Thanks for the compliments, guys!
I should add and edit to the issues I was having with the timing gear and cam pin. The pin engaged the gear just fine. It was the fuel pump eccentric that it wasn't engaging correctly. The bevel on the end of the pin was all that was engaging the eccentric. We're talking about an 1/8" short. While the tension of the cam bolt and the sliver of pin might have been enough to keep everything in place, it bugged me until I fixed it correctly.
Last edited:
Mr T Bucket
Member
Once I got the one side done, I repeated for the other side, and then tied them together at the top.
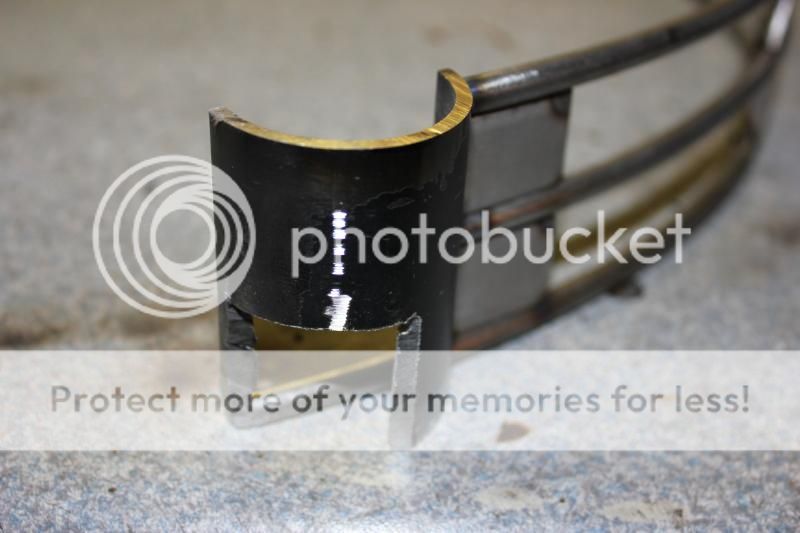
Notching the pockets to clear the tanks.
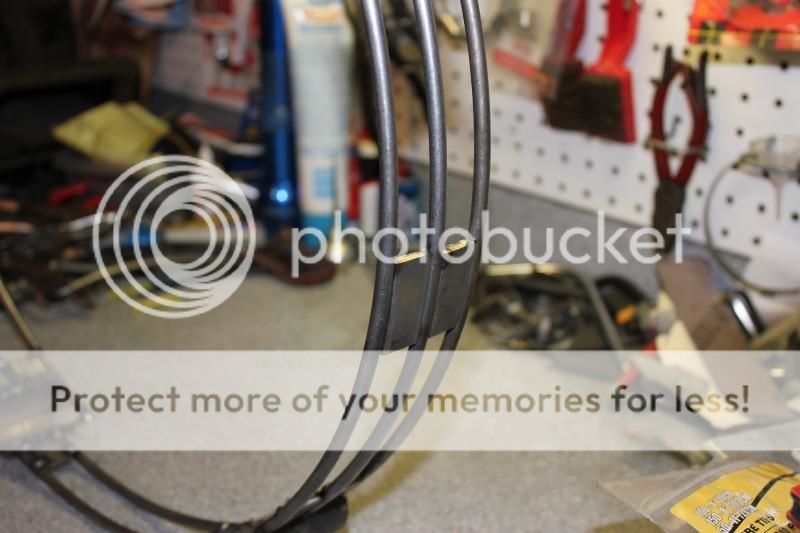
Tie the bottom together.
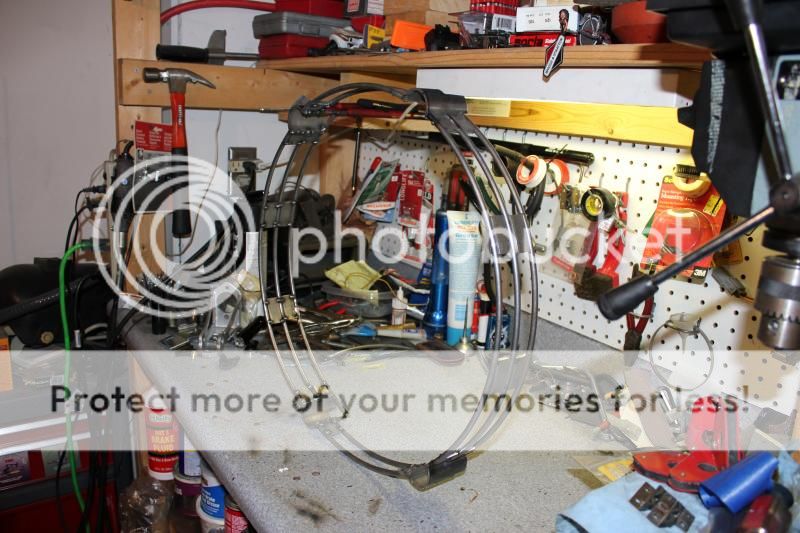
It should look something like this:
Test fitting what we have done so far:
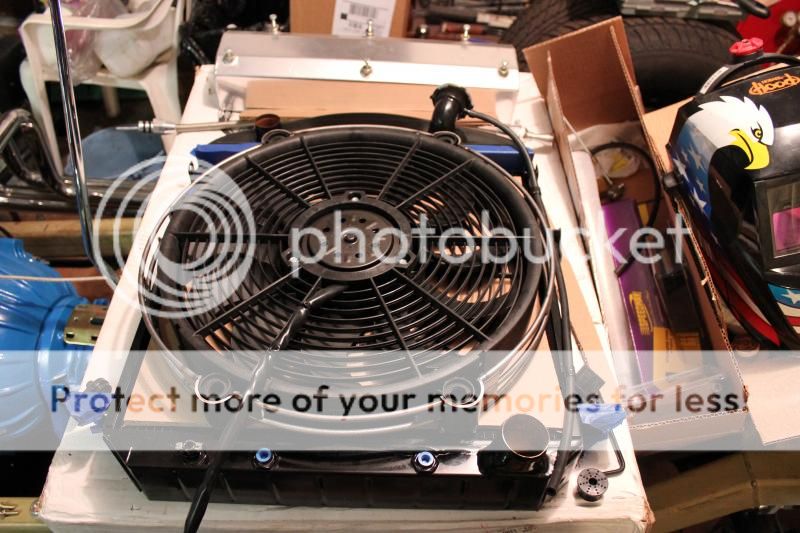
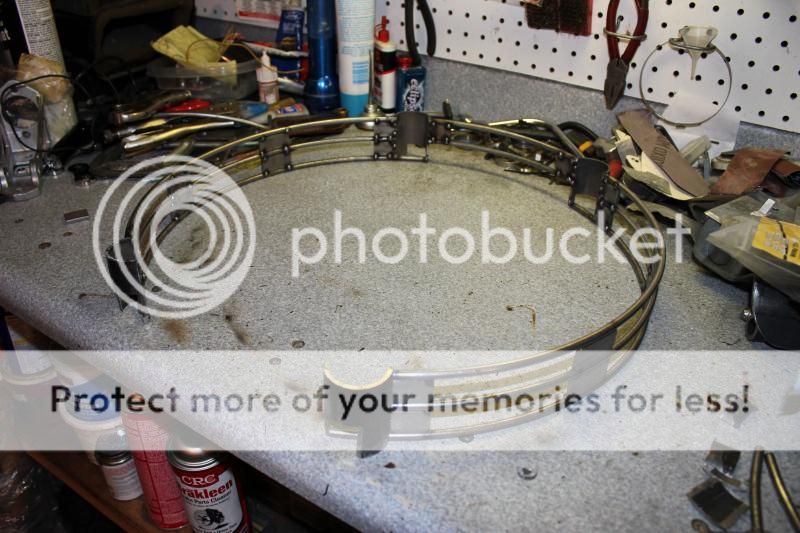
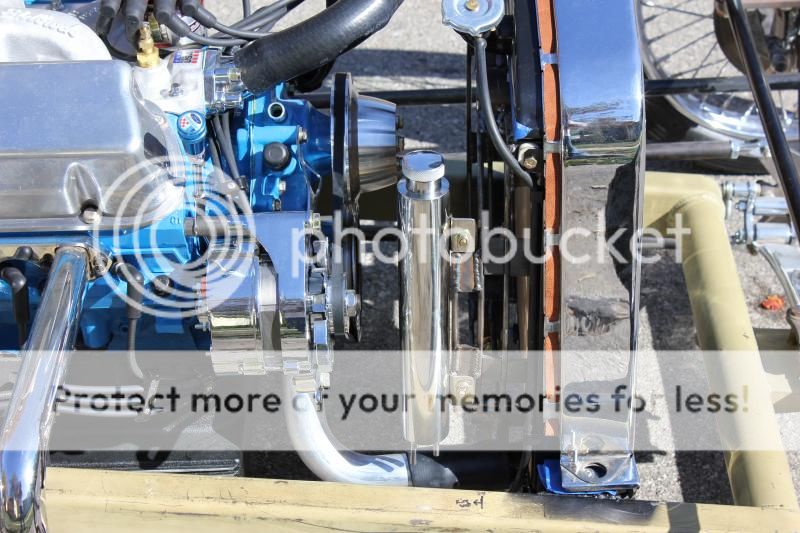
I came up with a solution, though not a perfect one, but I think it will hide fairly well how it mounts to the single mounting tab on the radiator. Also, not shown real well, is an even less elegant solution to the overflow tank. There's a better picture below. I wanted the mounting cage to blend in, but visible at the same time. I could have mounted the overflow right on the side of the grilled fan mount, but that would position it above the frame, and I have plans for that space in the future. So, it needed to be all behind the radiator. The only thing I could do, other than leave it off, was to space it back on another "ring" or tabs off the last ring.
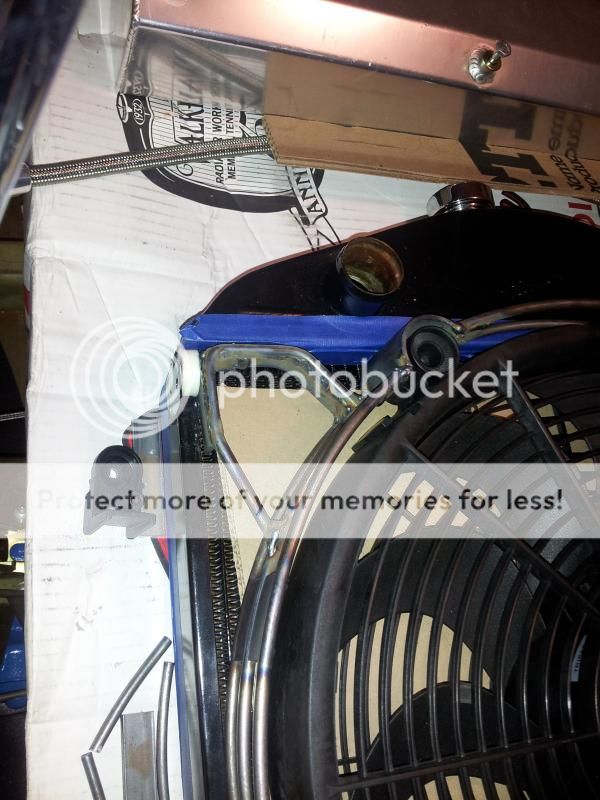
The base for the fan mount....
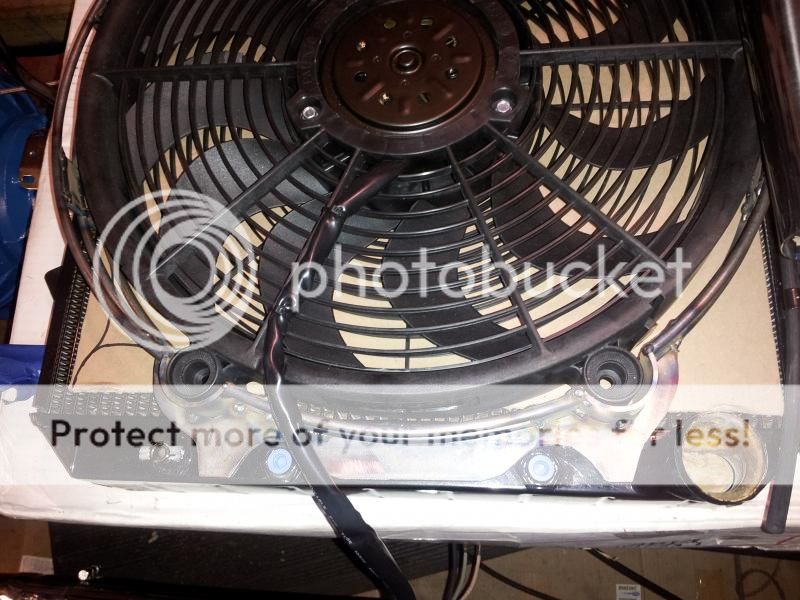
You can just make out the lower legs that vertically come down 90 degrees to the piece that supports the width of the bottom of the fan mount. I also changed valve covers, though these may not be permanent. I lucked out and found a PCV hose sitting on our shelf at work, that is a stock piece for a 5.0 Mustang that only needed minor trimming to work on the T. I'd still rather use the Frankenstein sheet metal valve covers with the exposed bolts, but those will require some tig work before I'm able to use them in the way I want them. The Frankenstein looking units hide the small block Ford nature of my drivetrain, as well as make the engine look bigger. An idea that gives me a warm fuzzy inside. I mean, scroll back up near the top of the page and tell me, those wicked looking things aren't bad assed. Right? Of course right. They don't look like sbf valve covers, do they? These will work for now though.
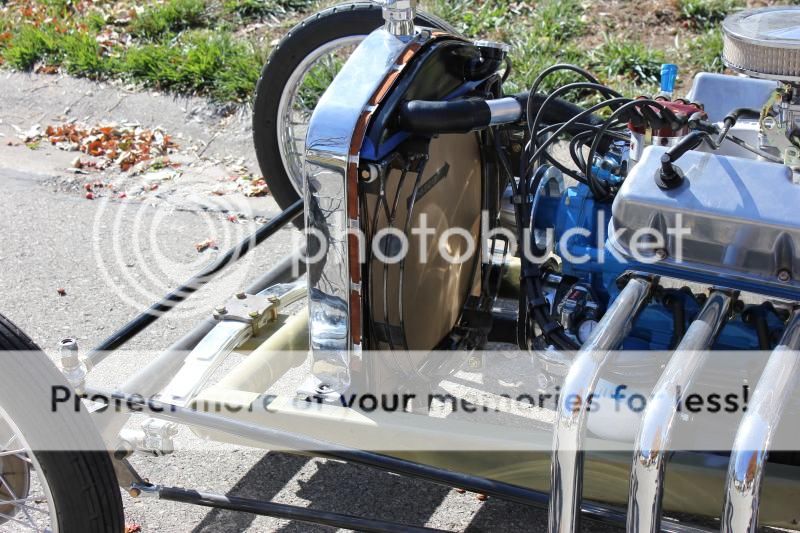
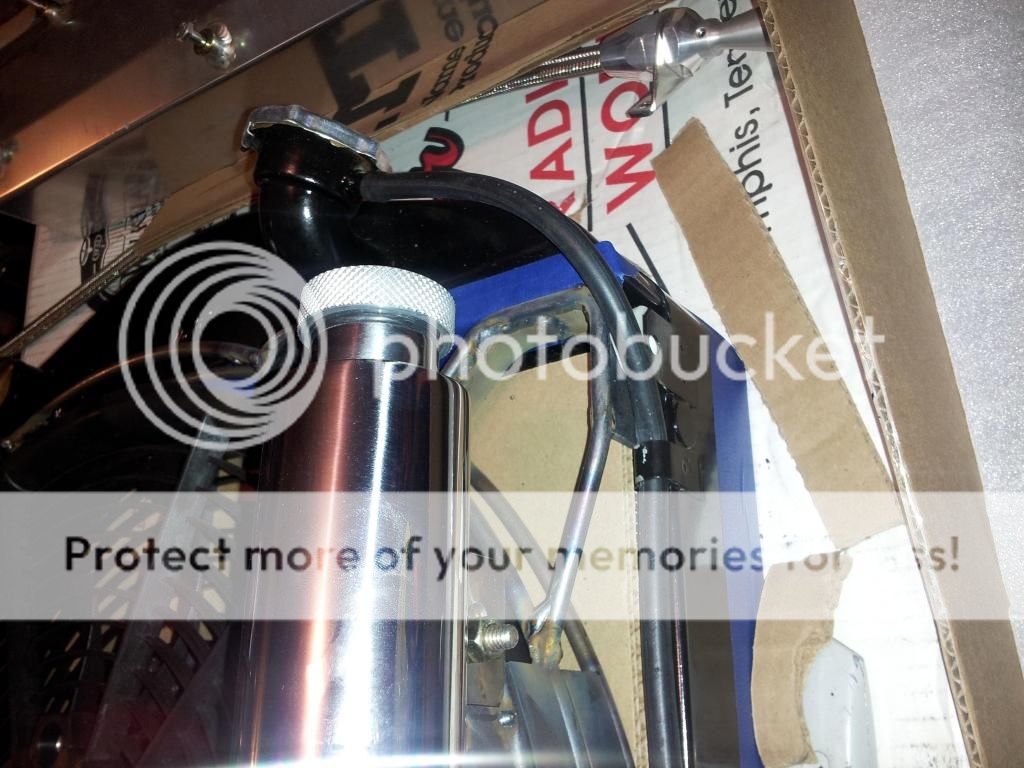
The overflow tank.

Notching the pockets to clear the tanks.

Tie the bottom together.

It should look something like this:

Test fitting what we have done so far:

I came up with a solution, though not a perfect one, but I think it will hide fairly well how it mounts to the single mounting tab on the radiator. Also, not shown real well, is an even less elegant solution to the overflow tank. There's a better picture below. I wanted the mounting cage to blend in, but visible at the same time. I could have mounted the overflow right on the side of the grilled fan mount, but that would position it above the frame, and I have plans for that space in the future. So, it needed to be all behind the radiator. The only thing I could do, other than leave it off, was to space it back on another "ring" or tabs off the last ring.


The base for the fan mount....

You can just make out the lower legs that vertically come down 90 degrees to the piece that supports the width of the bottom of the fan mount. I also changed valve covers, though these may not be permanent. I lucked out and found a PCV hose sitting on our shelf at work, that is a stock piece for a 5.0 Mustang that only needed minor trimming to work on the T. I'd still rather use the Frankenstein sheet metal valve covers with the exposed bolts, but those will require some tig work before I'm able to use them in the way I want them. The Frankenstein looking units hide the small block Ford nature of my drivetrain, as well as make the engine look bigger. An idea that gives me a warm fuzzy inside. I mean, scroll back up near the top of the page and tell me, those wicked looking things aren't bad assed. Right? Of course right. They don't look like sbf valve covers, do they? These will work for now though.

The overflow tank.

Mr T Bucket
Member


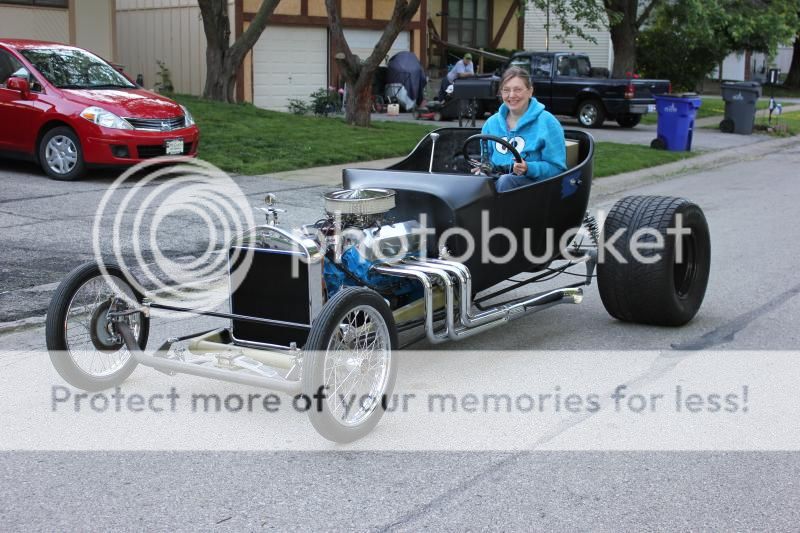
A couple of my pushers are visible in this pic. My buddy (his yellow '70 Superbee) and my wife.

Mr T Bucket
Member
June 2013
Yes, June. Lots of time has passed. Got busy with some other things that took both time and money from the progress on the T. When I did think about the T, it was mostly getting a game plan on the next phase. I did fiddle around with some stuff, trying to get an idea on this or that. Started planning out the plug wires, gauge layout, radiator hoses,....that type stuff.
I'd been mostly ping-ponging back and forth, working on the front end then working on the rear end. Then the front, then the rear. I still hadn't come up with a way to mount the fan to the new mounting device in a way that I liked. That was one of the reasons why progress stopped, but not the only one. I wanted to get back on the rear end and finish the brake line planning, re-do one of the coilover mounts, have the center chunk checked out and get it ready to paint once the chunk is good to go. Finishing the fan mount was first though. But how?
We turned the T around so that the front end was first in the garage. I needed to be able to get the rear axle out and not have to run through an obstacle course on the way, LOL. Snapped a pic during the process: (new, bigger, fuller looking air cleaner)
Right now, she's got more actual miles in the T than I do. Actually it's only about 100 feet, but still......
Chopped off the one coilover mount that I welded on a couple degrees off from the other side. Got a new one on, and boxed in both of them.
Plugged the hole from the original vent. Made my own mounting block for a brake tee and vent mount plus welded the brake hose tabs on. The setup is just like my '69 Charger in that the vent is actually a hollow bolt that holds the brake tee to the axle.
I took my center chunk in to have it "checked". My $100 check-out turned into an almost $600 full bore rebuild. Ouch! Got the axle housing fully cleaned out on the inside, filled it full of old rags and sealed up the openings with some RTV and plexiglass in preparation to have a coworker media blast the whole housing making it 100% ready for paint.
Yes, June. Lots of time has passed. Got busy with some other things that took both time and money from the progress on the T. When I did think about the T, it was mostly getting a game plan on the next phase. I did fiddle around with some stuff, trying to get an idea on this or that. Started planning out the plug wires, gauge layout, radiator hoses,....that type stuff.
I'd been mostly ping-ponging back and forth, working on the front end then working on the rear end. Then the front, then the rear. I still hadn't come up with a way to mount the fan to the new mounting device in a way that I liked. That was one of the reasons why progress stopped, but not the only one. I wanted to get back on the rear end and finish the brake line planning, re-do one of the coilover mounts, have the center chunk checked out and get it ready to paint once the chunk is good to go. Finishing the fan mount was first though. But how?
We turned the T around so that the front end was first in the garage. I needed to be able to get the rear axle out and not have to run through an obstacle course on the way, LOL. Snapped a pic during the process: (new, bigger, fuller looking air cleaner)

Right now, she's got more actual miles in the T than I do. Actually it's only about 100 feet, but still......
Chopped off the one coilover mount that I welded on a couple degrees off from the other side. Got a new one on, and boxed in both of them.

Plugged the hole from the original vent. Made my own mounting block for a brake tee and vent mount plus welded the brake hose tabs on. The setup is just like my '69 Charger in that the vent is actually a hollow bolt that holds the brake tee to the axle.

I took my center chunk in to have it "checked". My $100 check-out turned into an almost $600 full bore rebuild. Ouch! Got the axle housing fully cleaned out on the inside, filled it full of old rags and sealed up the openings with some RTV and plexiglass in preparation to have a coworker media blast the whole housing making it 100% ready for paint.

Mr T Bucket
Member
July 2013
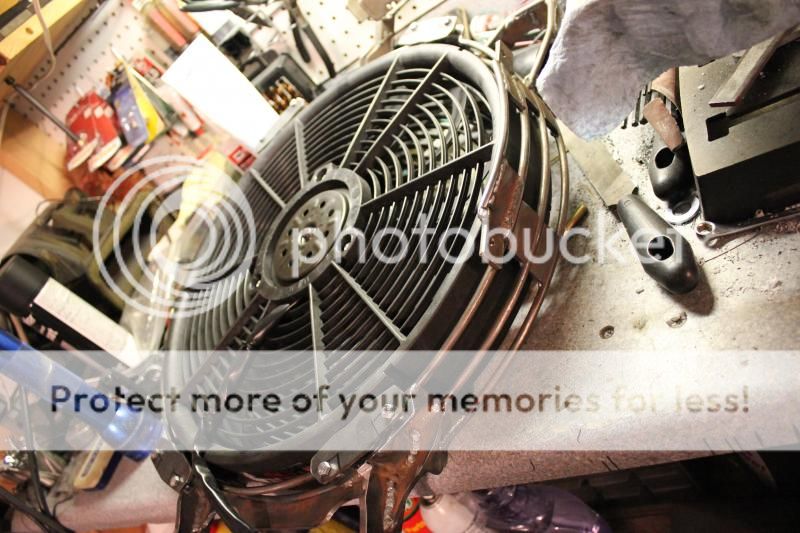
I finally came up with a way to mount the fan into the fan mount that I think I'd be happy with, and not have to use the plastic "L" shaped brackets that came with it.
I took the mounting bushings that came with the fan....
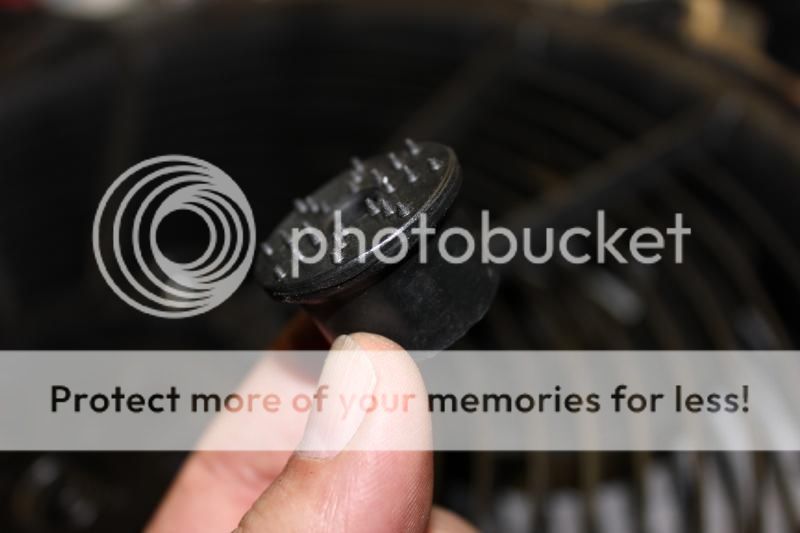
Made my own chuck for the drill press......

And cut them in half.
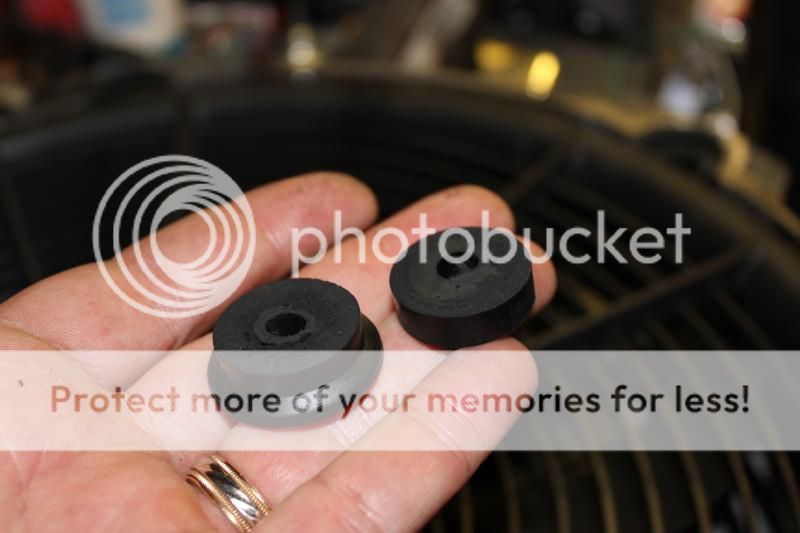
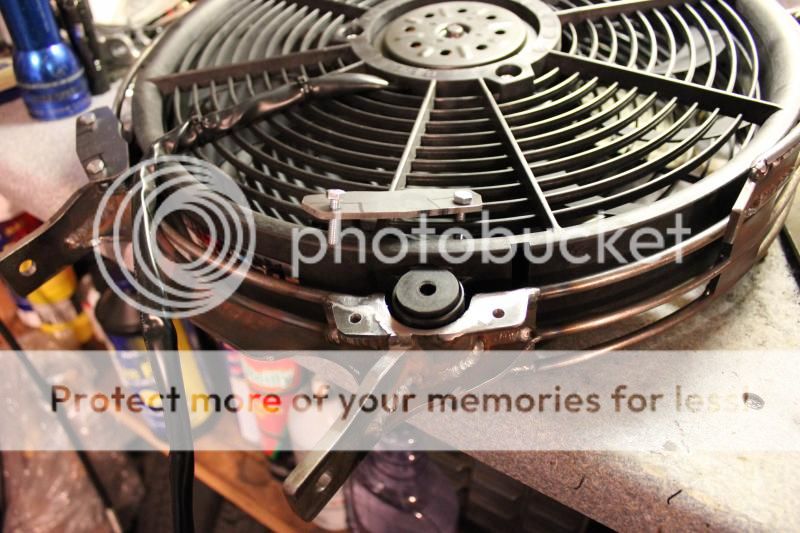
This allowed me to have a rubber cushion on both sides of the fan....
.....and then capture it into the mount. The backside, or the side that is next to the radiator, has a bar (the first ring) that limits the fan from touching the core. One half of the rubber mount rests against that bar. The other side, or the side towards the engine, I made plates to cover or retain the fan in the mount. With everything painted black (the plan), it'll all kind of blend in together. Some nyloc nuts on the plate bolts will allow me to tension the attaching of the plates against the rubber mounts and the fan.
Now it's time to get the fan mount and axle to the blasting guy and then to the bodyshop! So off they went............
I finally came up with a way to mount the fan into the fan mount that I think I'd be happy with, and not have to use the plastic "L" shaped brackets that came with it.
I took the mounting bushings that came with the fan....

Made my own chuck for the drill press......

And cut them in half.

This allowed me to have a rubber cushion on both sides of the fan....

.....and then capture it into the mount. The backside, or the side that is next to the radiator, has a bar (the first ring) that limits the fan from touching the core. One half of the rubber mount rests against that bar. The other side, or the side towards the engine, I made plates to cover or retain the fan in the mount. With everything painted black (the plan), it'll all kind of blend in together. Some nyloc nuts on the plate bolts will allow me to tension the attaching of the plates against the rubber mounts and the fan.


Now it's time to get the fan mount and axle to the blasting guy and then to the bodyshop! So off they went............
choppedtop
Well-Known Member
Nice work that you have done. Very creative.
Lee
Lee
Mr T Bucket
Member
Thanks! I appreciate it.
Wow!!! Has it been since March that I haven't done an update????
October 2013
After what seemed like an eternity, even though I had told our bodyshop manager and the painter that I wasn't really in any hurry, I finally got my stuff painted. I didn't want to press the issue cause I didn't want the painter to mess up the job and I didn't want the manager mad either, but I did have to push a bit. The manager had thought the stuff was done the day I went over to grab my stuff and take it somewhere else. Had a little chat and she assured me she'd take care of it. My stuff had sat since July fully media blasted and clean and had started to rust. To say I was not happy would be doing a disservice to not happy people worldwide. I'd post pictures of the sad state my stuff was in, but I inadvertently deleted all the pics off my phone at this point. Oh well. The painter no longer works for us. He'd been doing side jobs for other people while on our time. He was let go a week or 2 after finishing my stuff.
He'd used some sort of high durability paint left over from a large truck gas tank job. Imron I believe, and the axle did not come out shiny. But a coat of clear and it looked soooo wet! Had another issue with one of the small pieces I had done. When they were brought over from the shop, someone had put 5 small pieces together with a piece of baling wire. They clanked against each other like a set of children's play keys. Ungh I was pissed! Had to reshoot one of them. Just absurd and typical of the lack of attention to detail over there. Sad that I have to say that about our own shop, but it's the honest truth. I will say, that for them to smooth, prime and paint the axle, fan mount, plug wire brackets and 5 smaller pieces that it only cost me $200. A deal for sure, but the aggravation was starting to offset the great pricing structure. But you want to see pics, right?
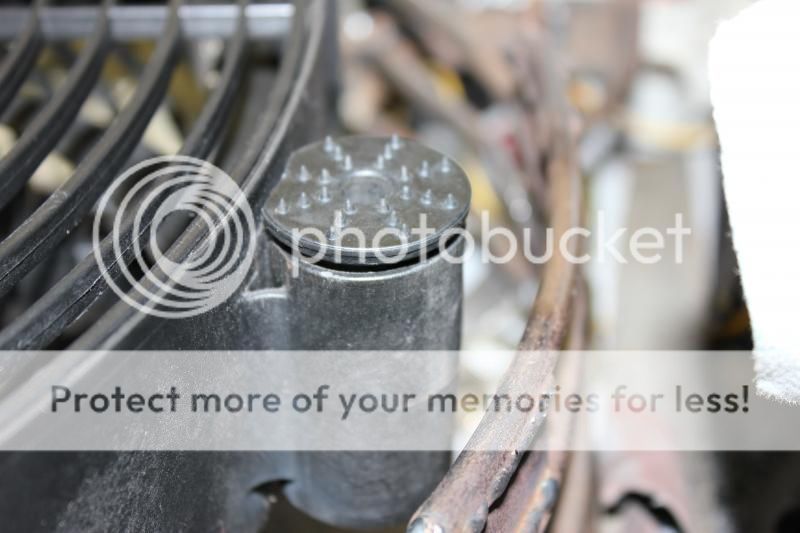
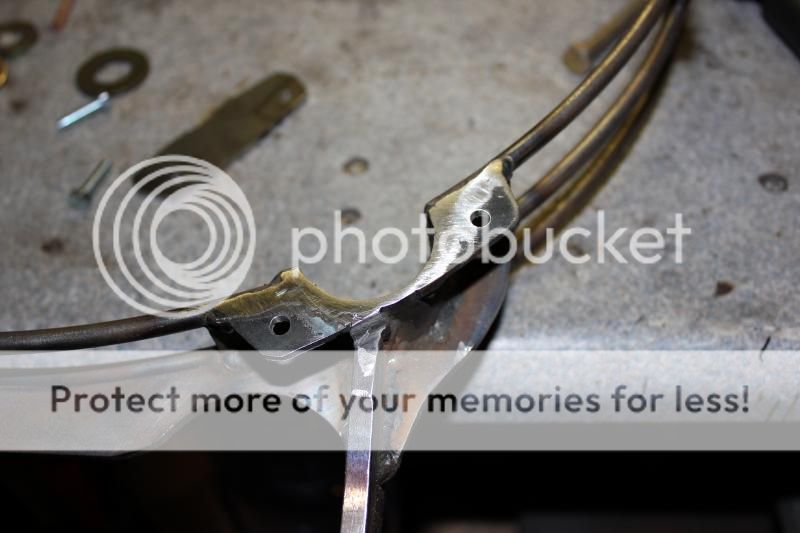
Bare plug wire loom mounting brackets (and Bravo's front paws):

They bolt on at the motor mounts. A cleaner installation would have been between the motor mount and block, with the loom bracket covering most of the motor mount, but I didn't want to raise the engine up any higher than where it's at now.
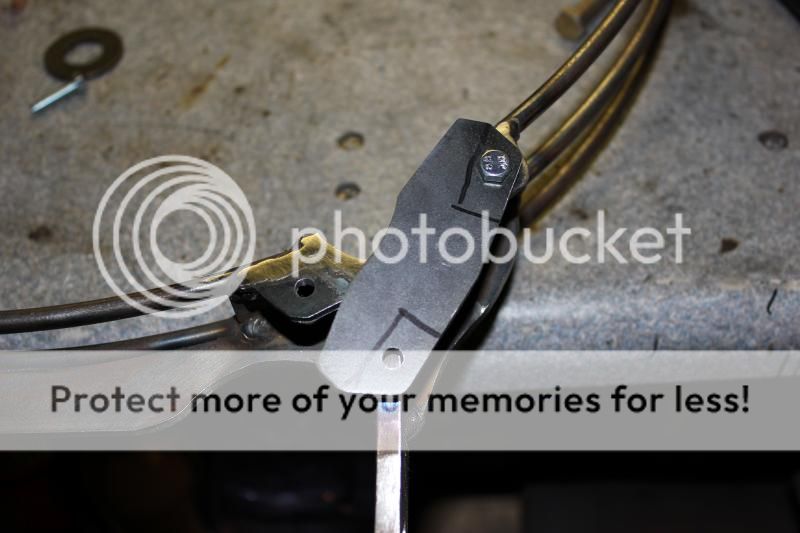
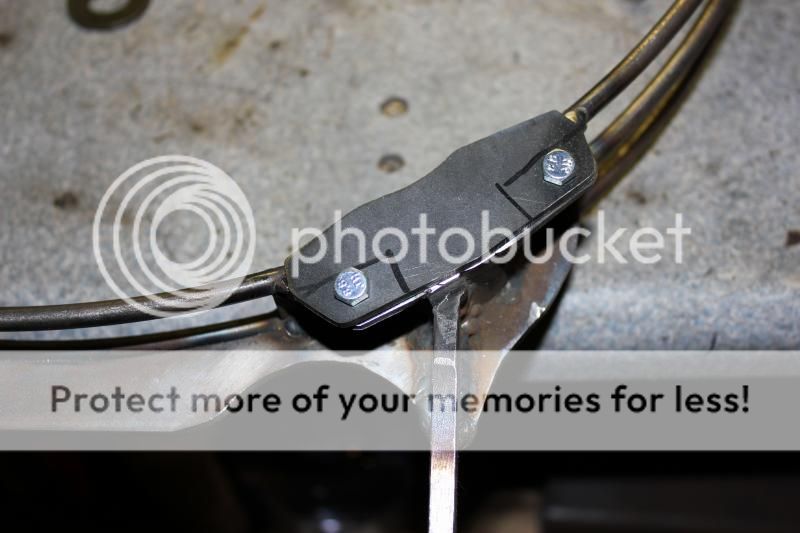
And the plug wires ran with the loom mounted on the brackets:
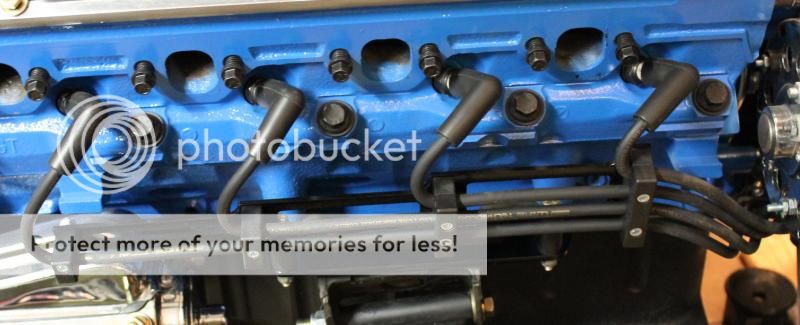
They turned out just like I had hoped. The black plug wires and looms will hide under the headers, but have their own details if someone wanted to get in close for a look. I wanted them this way, just as if you had drawn a picture of a T Bucket. You'd have the wheels, the headers, the air cleaner, the radiator, but you probably wouldn't draw the plug wires, right? I wanted the top of the engine, or at least the headers, to be clean looking.
Wow!!! Has it been since March that I haven't done an update????
October 2013
After what seemed like an eternity, even though I had told our bodyshop manager and the painter that I wasn't really in any hurry, I finally got my stuff painted. I didn't want to press the issue cause I didn't want the painter to mess up the job and I didn't want the manager mad either, but I did have to push a bit. The manager had thought the stuff was done the day I went over to grab my stuff and take it somewhere else. Had a little chat and she assured me she'd take care of it. My stuff had sat since July fully media blasted and clean and had started to rust. To say I was not happy would be doing a disservice to not happy people worldwide. I'd post pictures of the sad state my stuff was in, but I inadvertently deleted all the pics off my phone at this point. Oh well. The painter no longer works for us. He'd been doing side jobs for other people while on our time. He was let go a week or 2 after finishing my stuff.
He'd used some sort of high durability paint left over from a large truck gas tank job. Imron I believe, and the axle did not come out shiny. But a coat of clear and it looked soooo wet! Had another issue with one of the small pieces I had done. When they were brought over from the shop, someone had put 5 small pieces together with a piece of baling wire. They clanked against each other like a set of children's play keys. Ungh I was pissed! Had to reshoot one of them. Just absurd and typical of the lack of attention to detail over there. Sad that I have to say that about our own shop, but it's the honest truth. I will say, that for them to smooth, prime and paint the axle, fan mount, plug wire brackets and 5 smaller pieces that it only cost me $200. A deal for sure, but the aggravation was starting to offset the great pricing structure. But you want to see pics, right?
Bare plug wire loom mounting brackets (and Bravo's front paws):

They bolt on at the motor mounts. A cleaner installation would have been between the motor mount and block, with the loom bracket covering most of the motor mount, but I didn't want to raise the engine up any higher than where it's at now.

And the plug wires ran with the loom mounted on the brackets:

They turned out just like I had hoped. The black plug wires and looms will hide under the headers, but have their own details if someone wanted to get in close for a look. I wanted them this way, just as if you had drawn a picture of a T Bucket. You'd have the wheels, the headers, the air cleaner, the radiator, but you probably wouldn't draw the plug wires, right? I wanted the top of the engine, or at least the headers, to be clean looking.
Mr T Bucket
Member
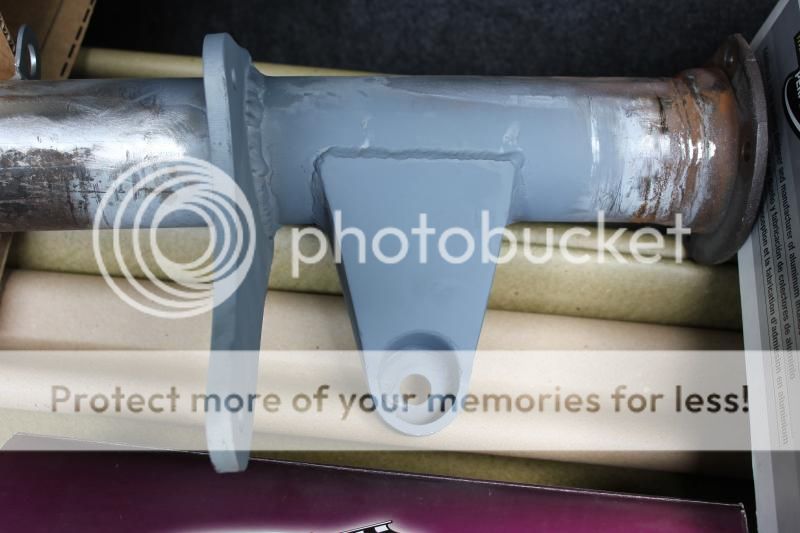
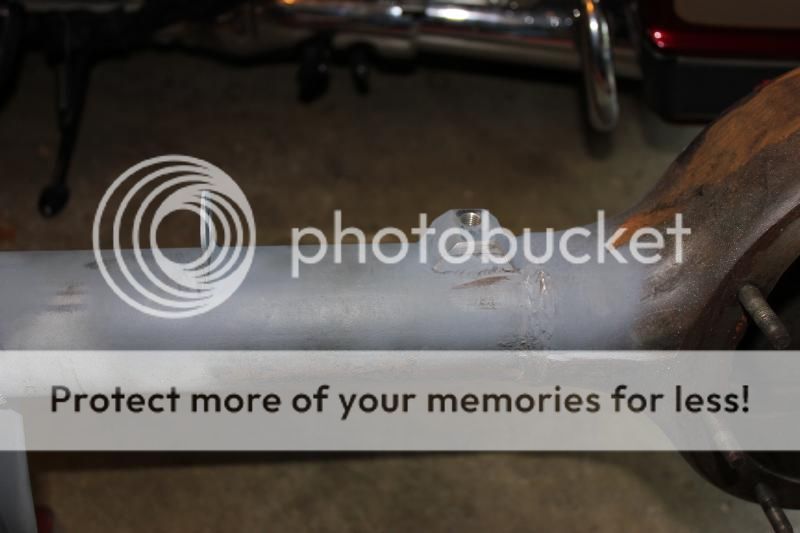
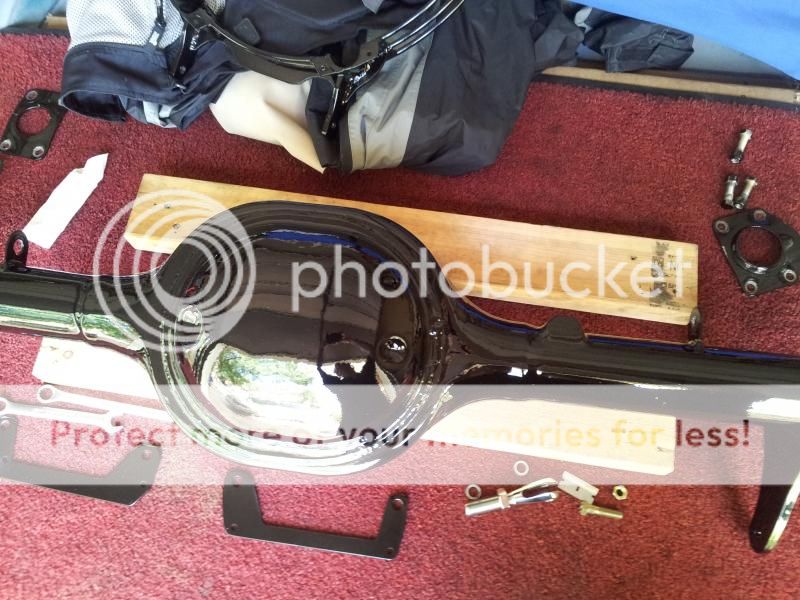
The axle. Still wearing the protecto plate I made to seal up the 3rd member opening:
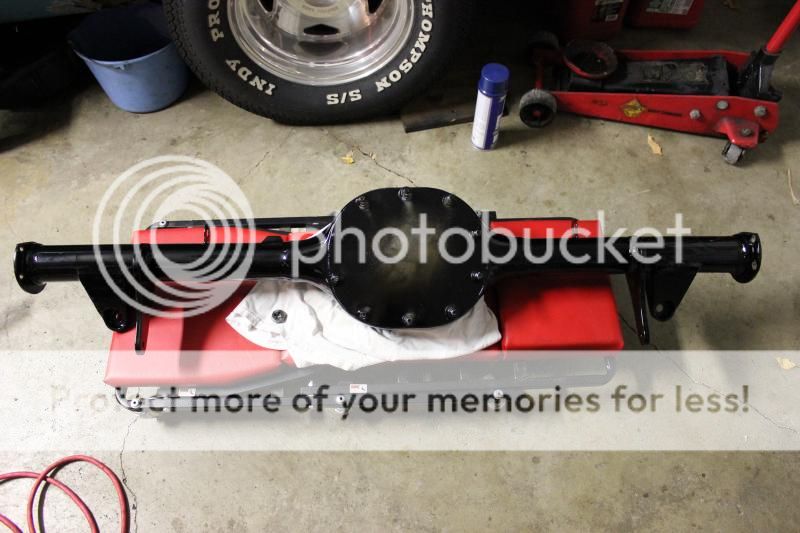
I had removed a dent, though it could have been factory as I've seen other 8" rear ends with the same weird 3rd dimple in the back end, as well as the brake line mounts. It was dead center right above the center line. I pounded it out and they finished it at the shop. It shined up nicely once the clear went on.
After the trouble getting the painter guy to understand exactly what it was I was looking for as far as smoothing (bondo) the seams and welds, he really did do a great job. I don't think it could have been much better, unless I did it myself. I really was happy with the results.
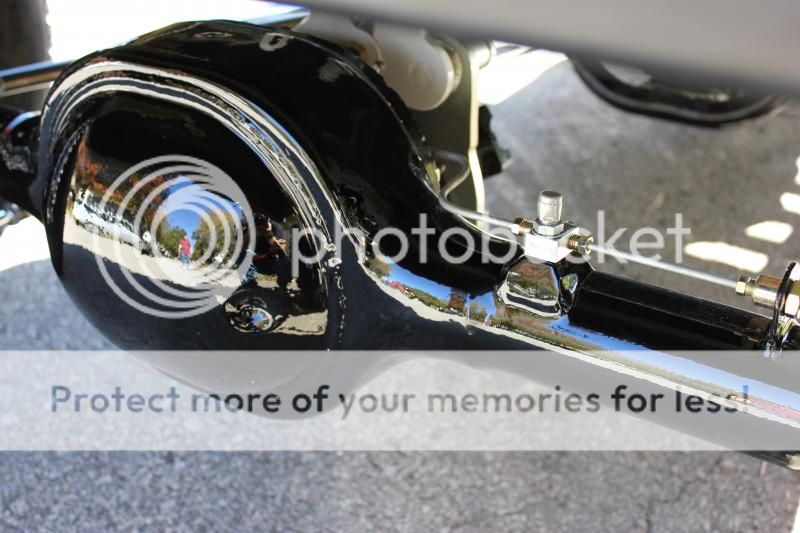
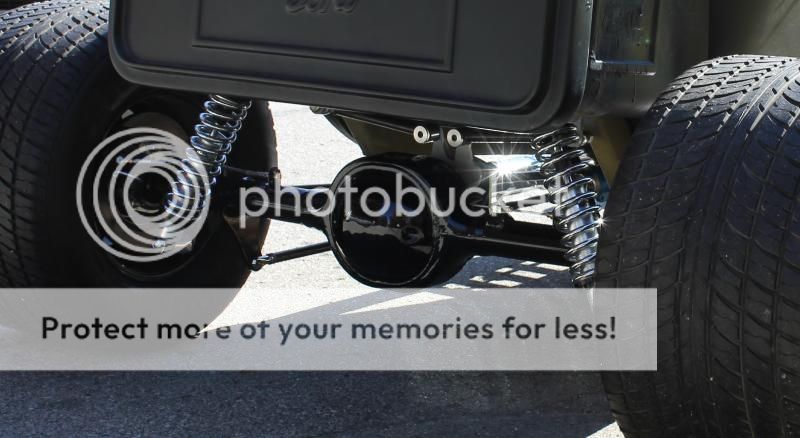
The axle vent is basically a '69 Dodge Charger piece and the brake Tee is aftermarket, maybe Russell, I'd have to check. Have not 100% decided on the routing for the hard line between the Tee and the LH hose. I'm going to look at possibly running it in front of the 3rd member but behind the funky watts linkage (like it shows in the picture) to keep it hidden and the top of the housing clean. Otherwise, it'll have to loop up on top of the housing with a clamp off of one of the 3rd member studs.
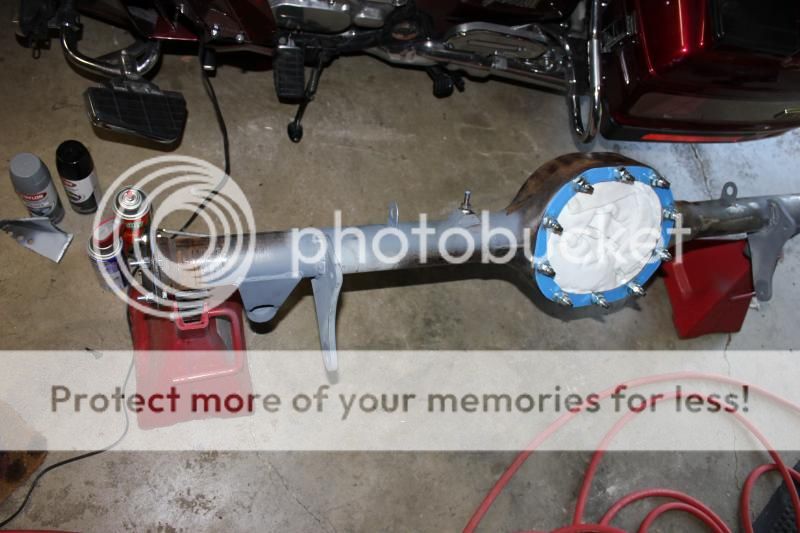
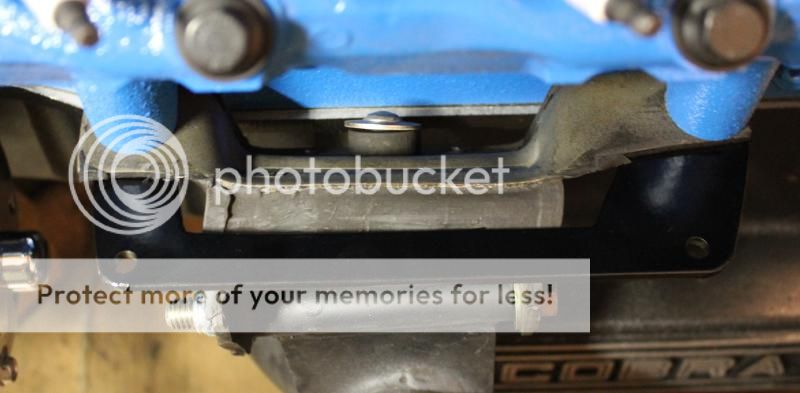
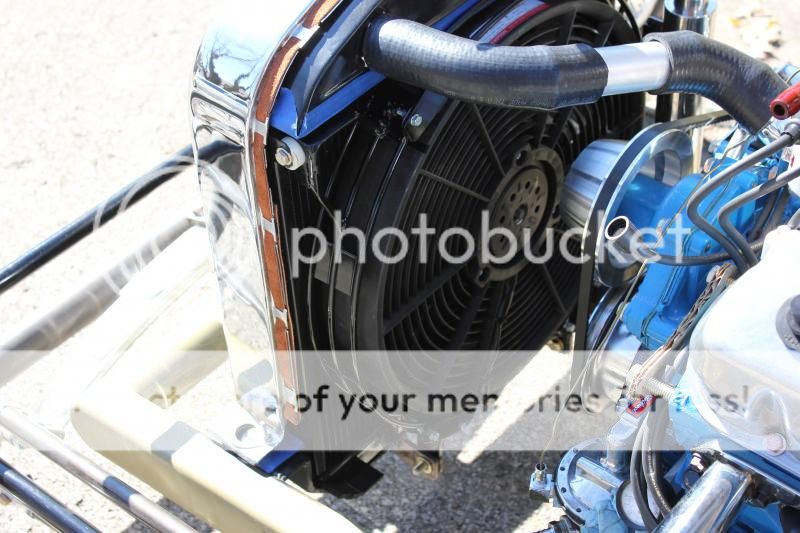
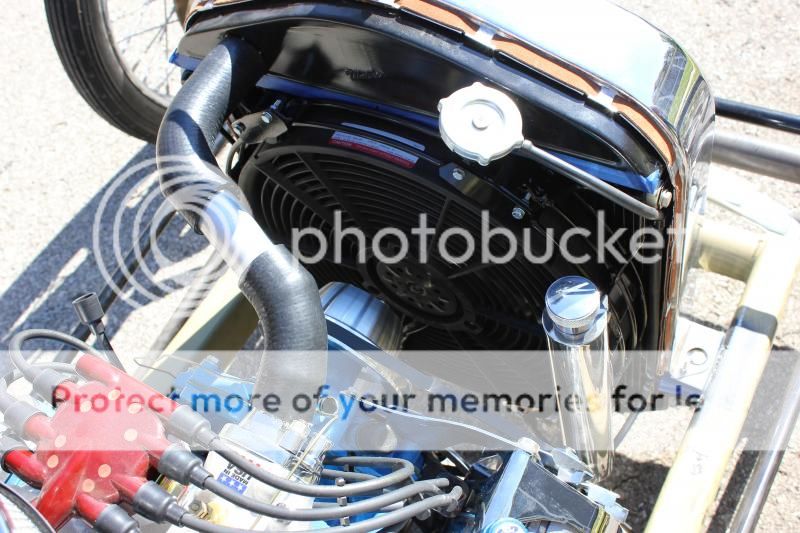
The fan and mount installed:
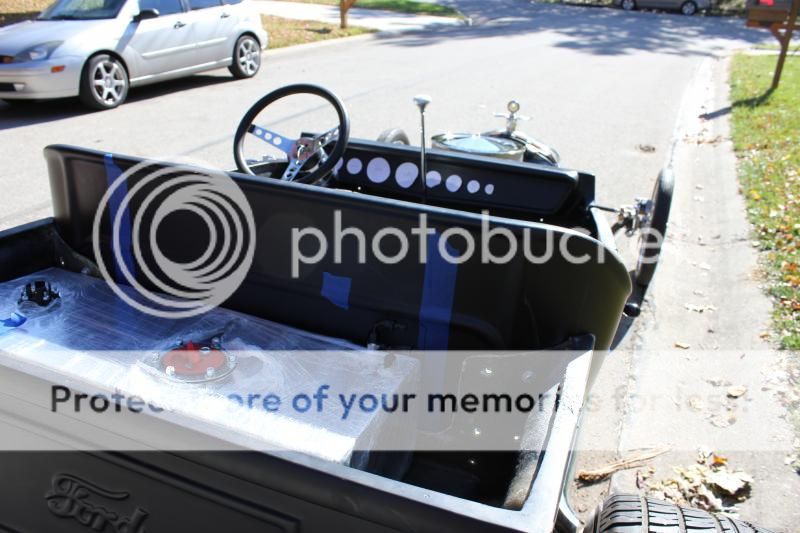
This is the gas tank. Not installed, but gives you the idea.
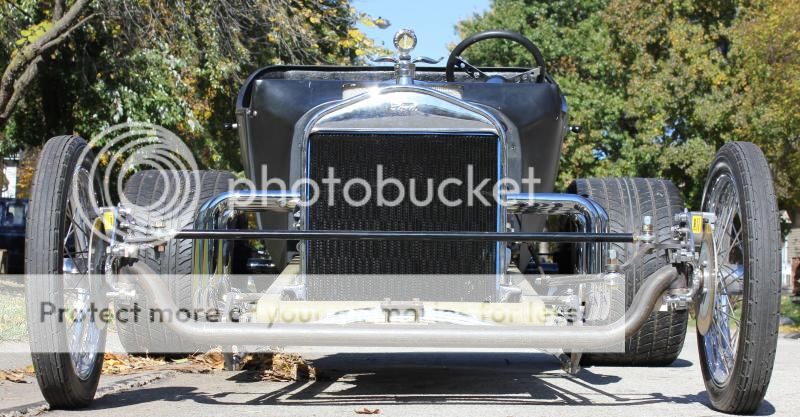
Gratuitous front end shot:
Now that the spark plug end of the wires is done, I need to finish them up at the distributor. Once that's done, then the coil mount and then the fuel line from the pump to the carb.
The axle went together without much fanfare. My sealing job worked well to keep the blasting media out of the housing. I did put a small chip in it while it was on the creeper. I knew I should have put a rug under the ends in case it moved around, but I didn't. And it did. Easy touchup though. I did put a big booboo on it, right on the back face of the housing as we were getting ready to move it out to take pictures. I was sooo careful to roll a small jack out from under it and had the handle in my other hand when I touched it with the other end. Sigh. The paint was soooo thick, I spent the next week or two putting a little dot on the bruise every time I went through the garage in order to fill it in.
It's getting there, guys!

I had removed a dent, though it could have been factory as I've seen other 8" rear ends with the same weird 3rd dimple in the back end, as well as the brake line mounts. It was dead center right above the center line. I pounded it out and they finished it at the shop. It shined up nicely once the clear went on.


After the trouble getting the painter guy to understand exactly what it was I was looking for as far as smoothing (bondo) the seams and welds, he really did do a great job. I don't think it could have been much better, unless I did it myself. I really was happy with the results.

The axle vent is basically a '69 Dodge Charger piece and the brake Tee is aftermarket, maybe Russell, I'd have to check. Have not 100% decided on the routing for the hard line between the Tee and the LH hose. I'm going to look at possibly running it in front of the 3rd member but behind the funky watts linkage (like it shows in the picture) to keep it hidden and the top of the housing clean. Otherwise, it'll have to loop up on top of the housing with a clamp off of one of the 3rd member studs.
The fan and mount installed:


This is the gas tank. Not installed, but gives you the idea.

Gratuitous front end shot:

Now that the spark plug end of the wires is done, I need to finish them up at the distributor. Once that's done, then the coil mount and then the fuel line from the pump to the carb.
The axle went together without much fanfare. My sealing job worked well to keep the blasting media out of the housing. I did put a small chip in it while it was on the creeper. I knew I should have put a rug under the ends in case it moved around, but I didn't. And it did. Easy touchup though. I did put a big booboo on it, right on the back face of the housing as we were getting ready to move it out to take pictures. I was sooo careful to roll a small jack out from under it and had the handle in my other hand when I touched it with the other end. Sigh. The paint was soooo thick, I spent the next week or two putting a little dot on the bruise every time I went through the garage in order to fill it in.
It's getting there, guys!
choppinczech
Well-Known Member
This is one of my favorite builds to read through.
Very nice.
Very nice.
smokeyco75
Member
Looking really good!
Man this is one sweet build! Thanks for sharing. I like what you did with the plug wires and may well steal that idea from you!!
Similar threads
- Replies
- 22
- Views
- 4K
