


You are using an out of date browser. It may not display this or other websites correctly.
You should upgrade or use an alternative browser.
You should upgrade or use an alternative browser.
Big redo of the old bucket
- Thread starter PotvinGuy
- Start date
RIRoadsterKid401
Member
love the build so far! also lovin that stool! great recycling!
I'm back from my trip to Tibet. I was seeking enlightenment and true inner peace. Here is what I found: the cell reception in Kathmandu is really bad. But I did run into the Dalai Lama at Starbucks, and asked for his wisdom. He told me that McDonald's coffee was better and cheaper, and he was only at Starbucks because he had a coupon for a free frappuccino. A wise man indeed.
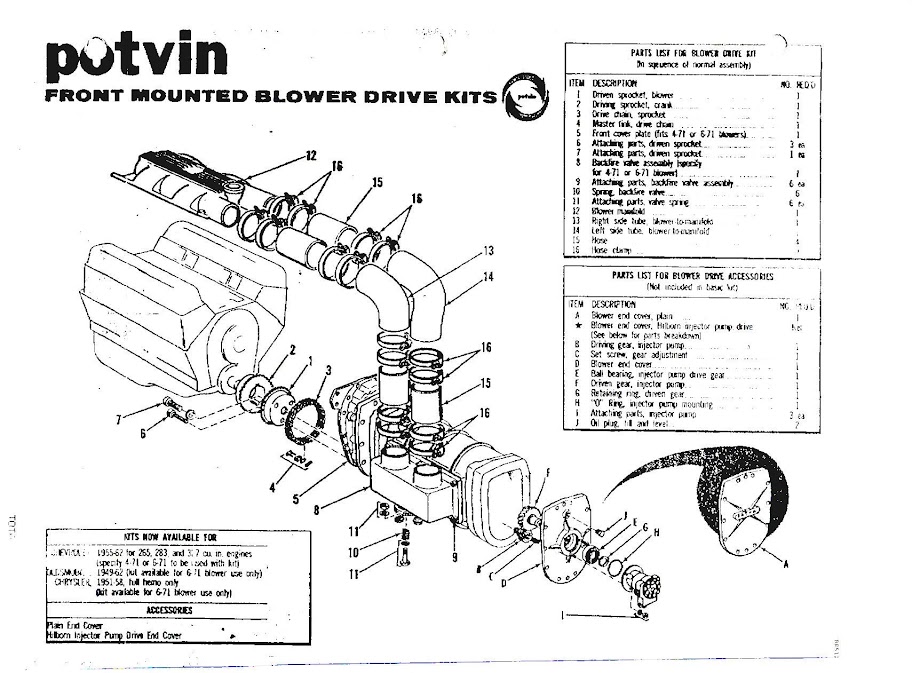
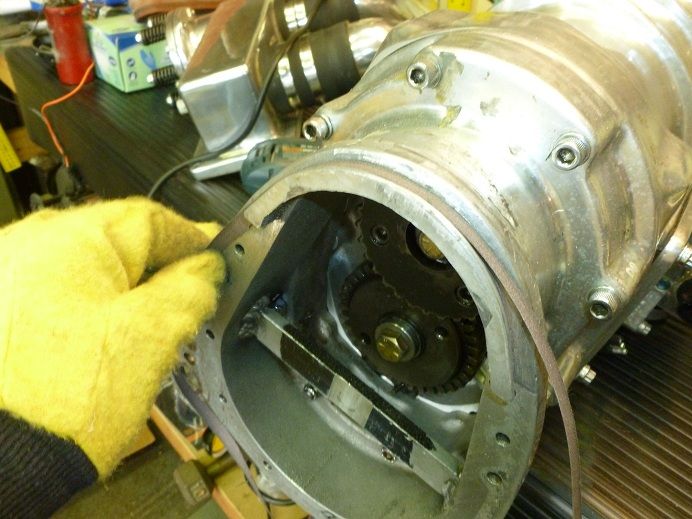
Anyway, now that the engine is positioned and secured I've pulled the blower to massage it a bit. Here's Potvin's diagram of how the whole thing goes together, and the blower on the bench:
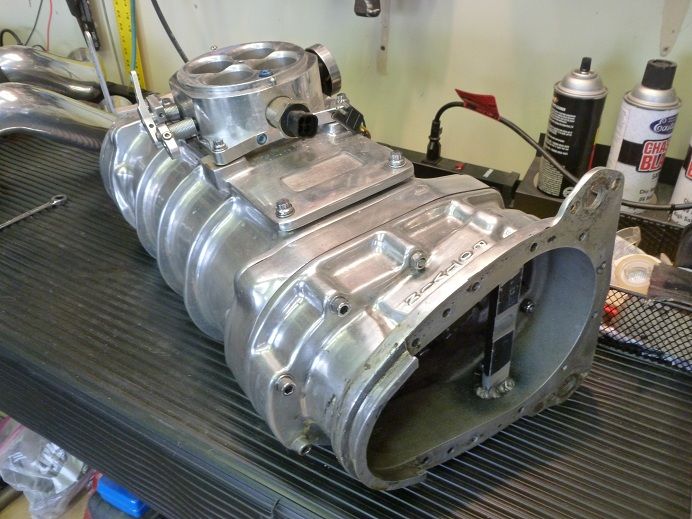
You can see the throttle body, with TPS at top, and the idle air control unit (which I have yet to figure out).
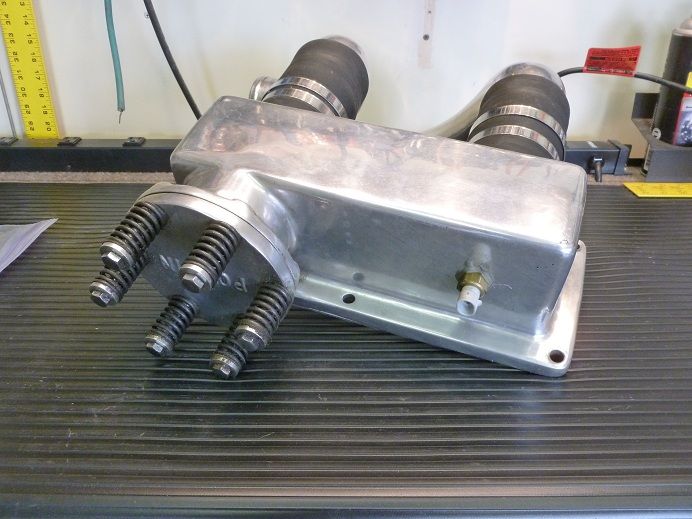
The popoff valve box, with the EFI air temp sensor glued in:
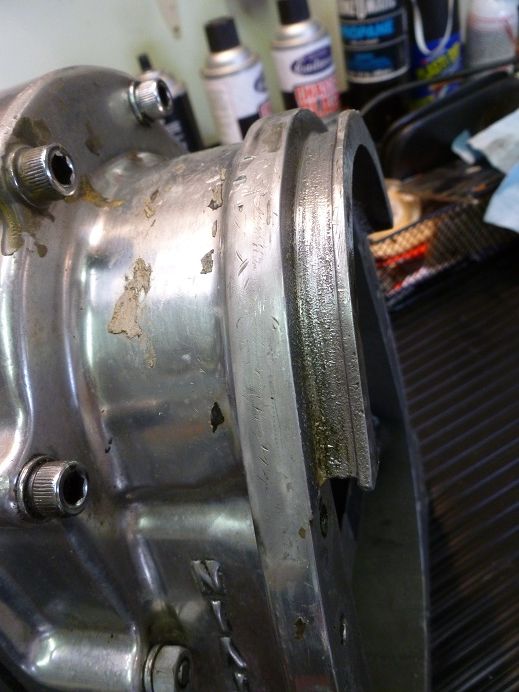
The seat for the oil pan gasket was rough from the original casting, and this might be the source of the oil drip I've seen, so I cut a loop from an old sander belt and used it like dental floss to clean up the seat:
Weather here in MN is really great, so will back out the car tomorrow, do some more interior sanding, and maybe work on the electric shifter.
Anyway, now that the engine is positioned and secured I've pulled the blower to massage it a bit. Here's Potvin's diagram of how the whole thing goes together, and the blower on the bench:
You can see the throttle body, with TPS at top, and the idle air control unit (which I have yet to figure out).
The popoff valve box, with the EFI air temp sensor glued in:
The seat for the oil pan gasket was rough from the original casting, and this might be the source of the oil drip I've seen, so I cut a loop from an old sander belt and used it like dental floss to clean up the seat:
Weather here in MN is really great, so will back out the car tomorrow, do some more interior sanding, and maybe work on the electric shifter.
Yesterday was nasty, so I worked on the electric shifter:
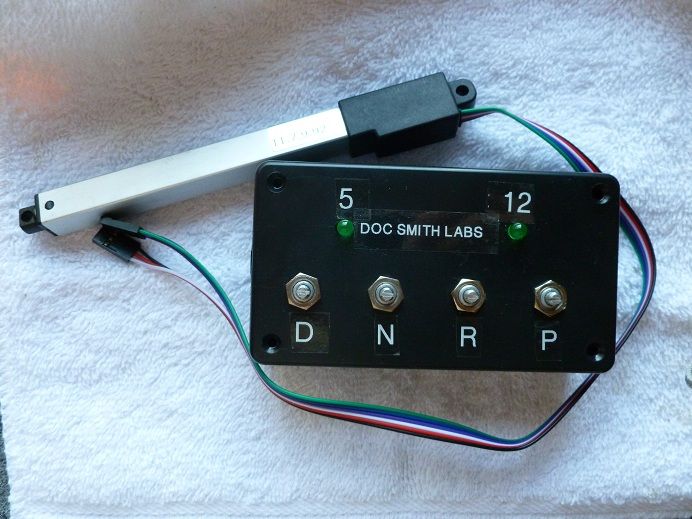
If it works, I may sell them. If it doesn't..back to the drawing board. Retrotek had an electric shifter for a while, but it apparently wasn't a big seller at $1000. I think I can do better. PM me if you would like more info.
Today was great, so I moved the car out and did some more interior sanding, and started on the toe boards:
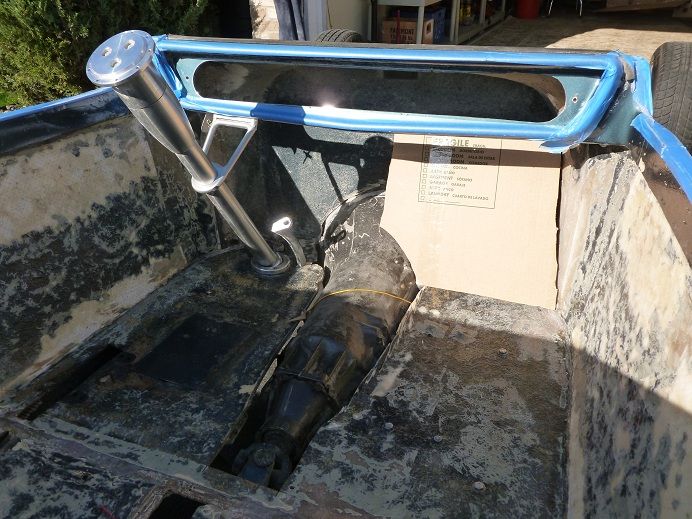
I'm doing one for each side and they'll be removable to access wires and stuff underneath. Probably Velcro them. Without Velcro, glue, and tie wraps my car would leave a trail of parts down the road.
If it works, I may sell them. If it doesn't..back to the drawing board. Retrotek had an electric shifter for a while, but it apparently wasn't a big seller at $1000. I think I can do better. PM me if you would like more info.
Today was great, so I moved the car out and did some more interior sanding, and started on the toe boards:
I'm doing one for each side and they'll be removable to access wires and stuff underneath. Probably Velcro them. Without Velcro, glue, and tie wraps my car would leave a trail of parts down the road.
bigfrank330
Member
Hey PotvinGuy
On page 1 at the bottom I noticed you had wood shims for your motormounts
Do you have a bolt pattern for those??
I need to shim mine and it would be cool if you happened to make a pattern
On page 1 at the bottom I noticed you had wood shims for your motormounts
Do you have a bolt pattern for those??
I need to shim mine and it would be cool if you happened to make a pattern
Hey PotvinGuy
On page 1 at the bottom I noticed you had wood shims for your motormounts
Do you have a bolt pattern for those??
I need to shim mine and it would be cool if you happened to make a pattern
No, I just used the motor mount to mark for the holes:
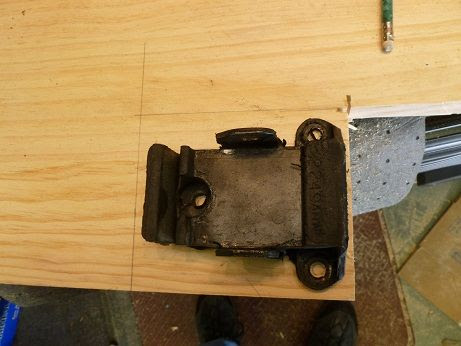
Figured out how far up I wanted to move the motor, and drilled holes for the bolts that hold the wood to the motor. Then I used lag bolts from the motor mount to the wood.
bigfrank330
Member
Hey
I can do that also
Thanks
I can do that also
Thanks
The thickness of the wood comes into play if you want everything to be square. For my 1-1/4" raise, I needed a 7/8" piece. You can cut and try, or draw it out full scale, or use a little geometry to figure what you need. If your mounts are at about 45 degrees like mine, just divide the raise you want by 1.4 to get the thickness. And that number is also how far apart to put the two sets of holes. Ain't math grand?
 .
.When last we saw the seat box, it was just the bottom piece. Now I've added the risers and the top piece:

...and then a steel strap to support the rear of the seats, especially the left seat which is suspended above the battery. And an "audio panel" front which will house 4 speakers, an amp and an iPod Shuffle. The Shuffle will be loaded with all my favorite music, sound effects, and rude noises to play at cruises lacking appropriate ambiance. It will have a pair of handles and be held on with magnetic latches, so things can still be stored behind it.
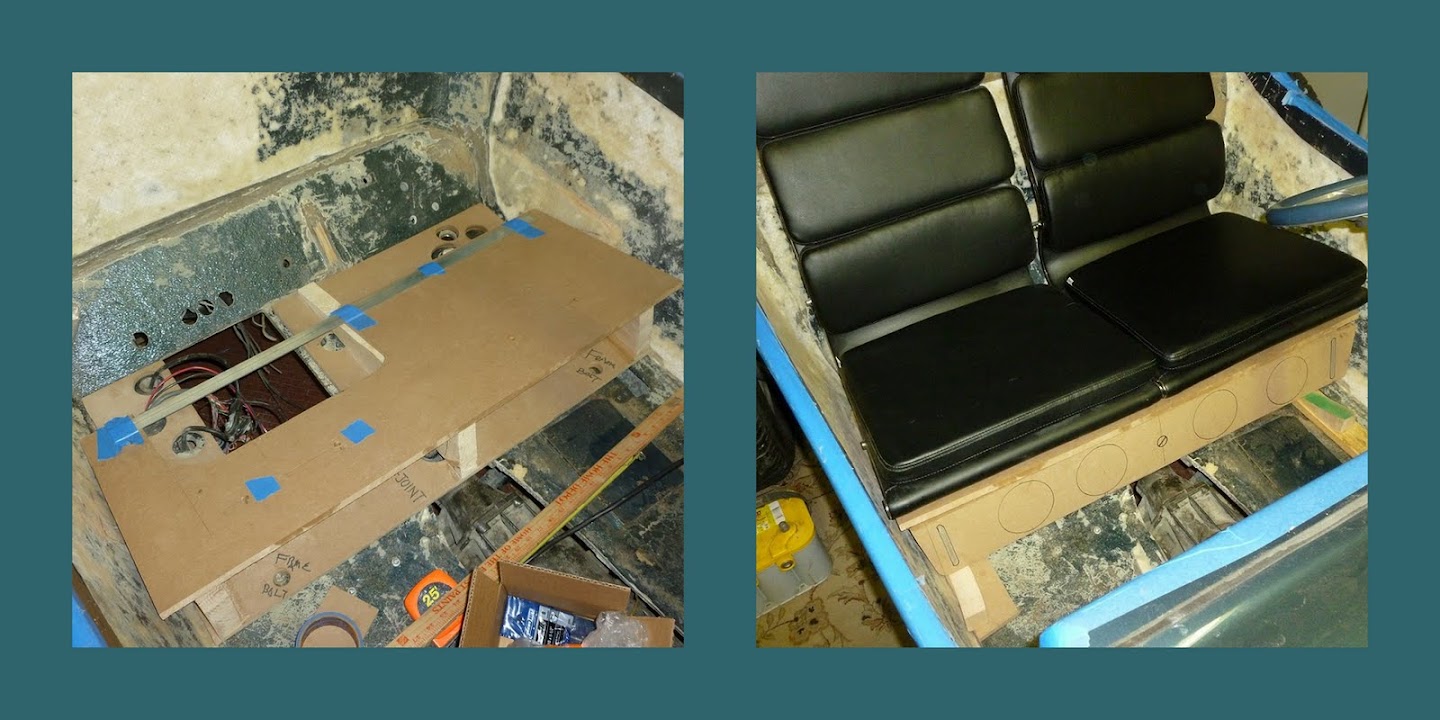
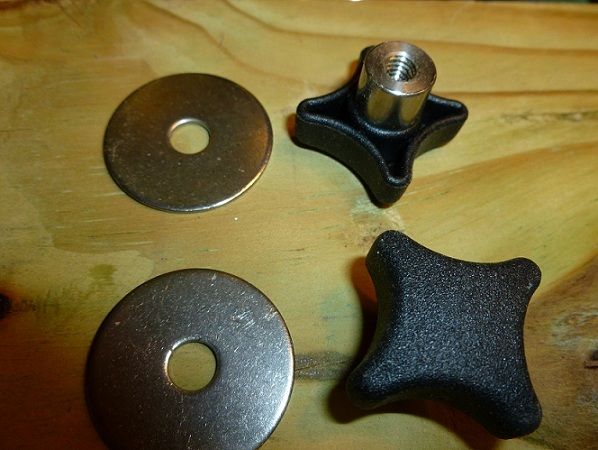
The seats have studs protruding from the bottom (bolts screwed into the mounting holes from the top) which go thru the top piece and are secured with "clamping knobs" from J. W. Winco. These handy gadgets are available in a variety of threads, materials and finishes. Check it out. The knobs make it possible to remove and install the seats without any tools. The fender washers are glued to the bottom side of the top piece for the knobs to bear against.
This all looks simple, but half the wood I bought is now sawdust. Norm always said "measure twice and cut once;" in my case it was "measure, cut, repeat ad nauseam." Stay tuned.
...and then a steel strap to support the rear of the seats, especially the left seat which is suspended above the battery. And an "audio panel" front which will house 4 speakers, an amp and an iPod Shuffle. The Shuffle will be loaded with all my favorite music, sound effects, and rude noises to play at cruises lacking appropriate ambiance. It will have a pair of handles and be held on with magnetic latches, so things can still be stored behind it.
The seats have studs protruding from the bottom (bolts screwed into the mounting holes from the top) which go thru the top piece and are secured with "clamping knobs" from J. W. Winco. These handy gadgets are available in a variety of threads, materials and finishes. Check it out. The knobs make it possible to remove and install the seats without any tools. The fender washers are glued to the bottom side of the top piece for the knobs to bear against.
This all looks simple, but half the wood I bought is now sawdust. Norm always said "measure twice and cut once;" in my case it was "measure, cut, repeat ad nauseam." Stay tuned.
The seats are 1943 Tiera Del Fuega, an obscure car from the Falkland Motorworks. Only 2 were built before the plant was destroyed in the war. Start at page 1, Butch.Did I miss something? What are those seat from? How wide and deep?
Butch, you can see more pics at https://picasaweb.google.com/104971212334307682869/TBucket
I'll measure the seats and get back to you.
I'll measure the seats and get back to you.
RIRoadsterKid401
Member
great pics! love how ur truck bed opens......super trick!
") trick
trickThanks. Those are Dakota Digital linear actuators. I tried just one, but a good wind would make the open lid shake, so I added the second. Only problem is the DD controller doesn't track the two actuators, so if one fails, the other will just bust up the joint trying to open the lid, and they are very strong. That's what happened to me, and we had to make new hinges and lid attachment pads. I made the bug known to DD, but don't know if they did anything about it. Anyway, I built a stand-alone comparator. If the actuators vary by more than 1/8", they are both deactivated.great pics! love how ur truck bed opens......super trick!
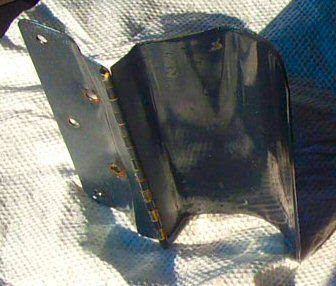
Broken lid hinge
RIRoadsterKid401
Member
has this car ever been located in new england/ rhode island before? the shop owner of the shop i work at, i showed him ur car and he swears hes seen it before aroud here.....
Nope, TX, OK and MN.has this car ever been located in new england/ rhode island before? the shop owner of the shop i work at, i showed him ur car and he swears hes seen it before aroud here.....
Similar threads
- Replies
- 3
- Views
- 3K
- Replies
- 0
- Views
- 893
