The seats are about 20" wide, 20" deep and 26" tall. Link: http://www.samsclub.com/sams/shop/product.jsp?productId=prod1630261&navAction=pushDid I miss something? What are those seat from? How wide and deep?


You are using an out of date browser. It may not display this or other websites correctly.
You should upgrade or use an alternative browser.
You should upgrade or use an alternative browser.
Big redo of the old bucket
- Thread starter PotvinGuy
- Start date
Now that tax season is over (I do taxes for seniors as an AARP volunteer; I also build schools in war zones, and help pretty girls start their cars, even if they don't want it) I can get busy on the bucket. A few pics today and some words of wisdom.
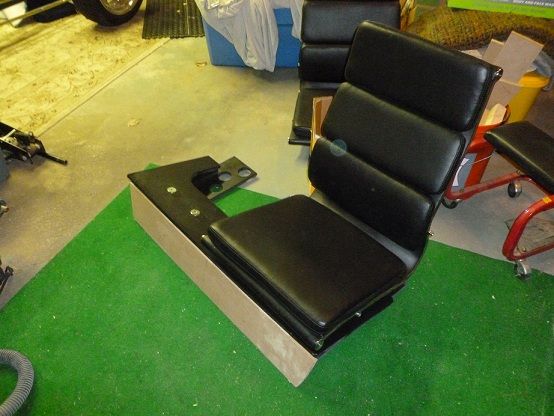
First, fiberglass bodies are not symmetrical (left and right don't match), there is not a straight line in them and the floors are about as flat as my lumpy lawn. I discovered this while trying to build the seat box from nice dimensional lumber. Praised be the belt sander. If you're in the body market, I'd recommend inspecting before buying. My body, from a big name in the biz, has a droop in the middle of the dash, from pulling the body out the mold before it was fully cured. We didn't notice it until after the paint went on.
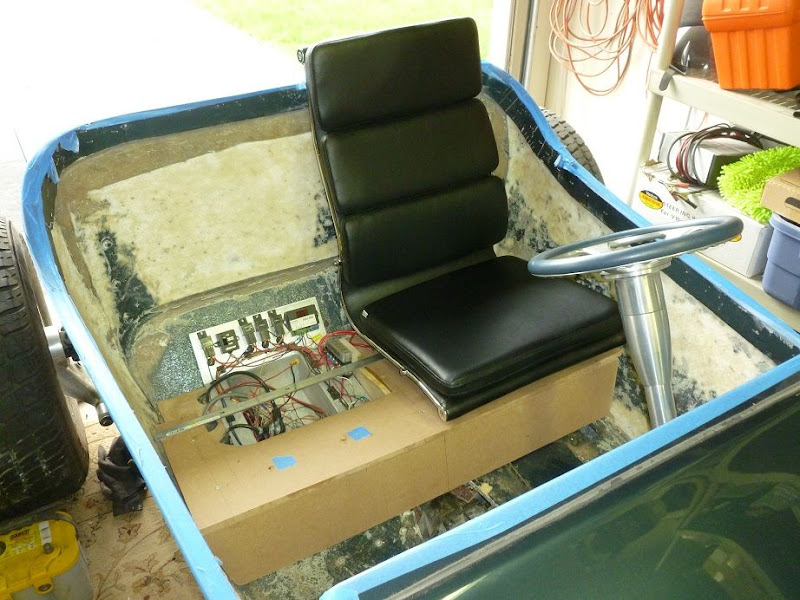
Seat box is finished. The audio panel riser will be next, then prime and paint. I'll glue and bolt the seat box after the interior is smooth and painted.
The seats have chrome frames, but the rest of the interior is satin/brushed. Not a big deal, but I am going to redo them. Rub the chrome back and forth with a Scotch-Brite pad spritzed with WD-40. Scotch-Brite, like sandpaper, comes in many grades, and try some in inconspicuous places until you get the desired effect. Easy does it. Here's a test on one of the seat back braces:
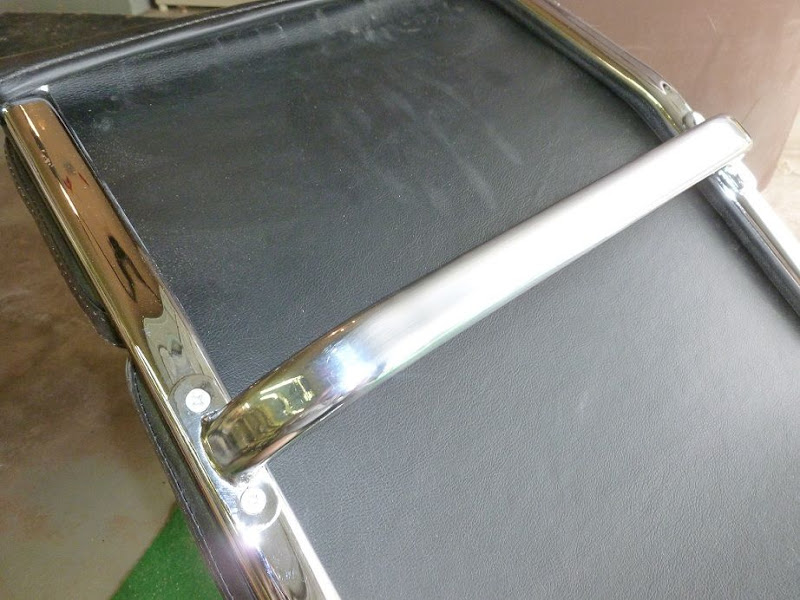
The straight section has been satinized (it's a real word, I looked it up.)
First, fiberglass bodies are not symmetrical (left and right don't match), there is not a straight line in them and the floors are about as flat as my lumpy lawn. I discovered this while trying to build the seat box from nice dimensional lumber. Praised be the belt sander. If you're in the body market, I'd recommend inspecting before buying. My body, from a big name in the biz, has a droop in the middle of the dash, from pulling the body out the mold before it was fully cured. We didn't notice it until after the paint went on.
Seat box is finished. The audio panel riser will be next, then prime and paint. I'll glue and bolt the seat box after the interior is smooth and painted.
The seats have chrome frames, but the rest of the interior is satin/brushed. Not a big deal, but I am going to redo them. Rub the chrome back and forth with a Scotch-Brite pad spritzed with WD-40. Scotch-Brite, like sandpaper, comes in many grades, and try some in inconspicuous places until you get the desired effect. Easy does it. Here's a test on one of the seat back braces:
The straight section has been satinized (it's a real word, I looked it up.)
I'd forgotten that. When we bought this name-brand body 20 years ago, it was about as sturdy as the cardboard box it came in. We had to line it with coremat so it wouldn't flap in the wind.Ha ! The body I used was a "competition " body [read really thin] that had sat in the attic of my garage for 34 yrs.!! Straight anything was just a dream!!
dave
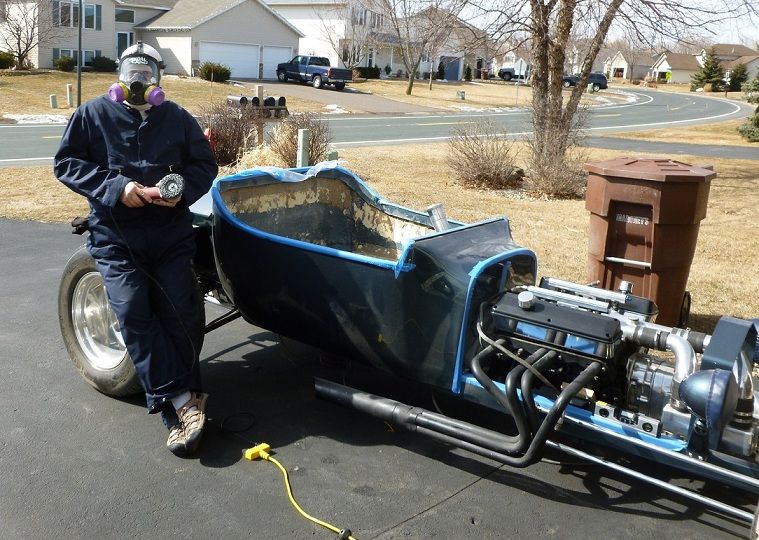
Nice day in MN and I moved the bucket out for more interior sanding. Here's what today's urbane man wears to sand fiberglass:
There was a bump, about half-a-football size, where the firewall, passenger side floor and tranny hump met. I had never thought much about it, assuming it was to accommodate something, maybe a tranny dipstick. When I started trimming around it, it was a solid chunk of resin, one or two lbs, that had been 'glassed over! I can't imagine any reason for it. Maybe a puddle collected there during the molding, cured, and rather than chop it out, they just covered it. Anyone got another idea?
There was a bump, about half-a-football size, where the firewall, passenger side floor and tranny hump met. I had never thought much about it, assuming it was to accommodate something, maybe a tranny dipstick. When I started trimming around it, it was a solid chunk of resin, one or two lbs, that had been 'glassed over! I can't imagine any reason for it. Maybe a puddle collected there during the molding, cured, and rather than chop it out, they just covered it. Anyone got another idea?
Another gorgeous day in MN, where all the women are strong, all the men are good looking and all the children are easy targets when I'm out driving. But today I'm trying to debug my dumb Haltech EFI:

But I can't find it on the bench yet. And once in the car it is a GCB to debug. Stay tuned. Oh, and don't buy a Haltech. They are in Australia, concentrate on rice-burners and their USA tech support is one California jerk who says "find someone who knows something about EFI."
But I can't find it on the bench yet. And once in the car it is a GCB to debug. Stay tuned. Oh, and don't buy a Haltech. They are in Australia, concentrate on rice-burners and their USA tech support is one California jerk who says "find someone who knows something about EFI."
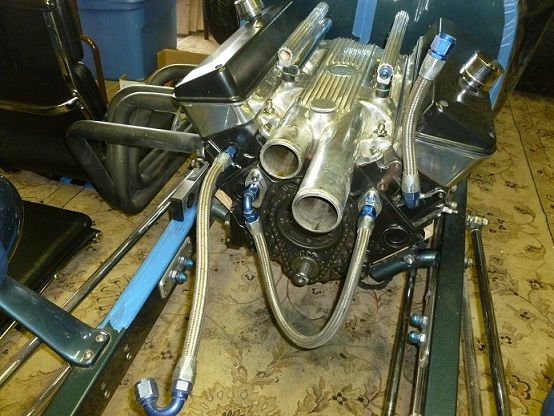
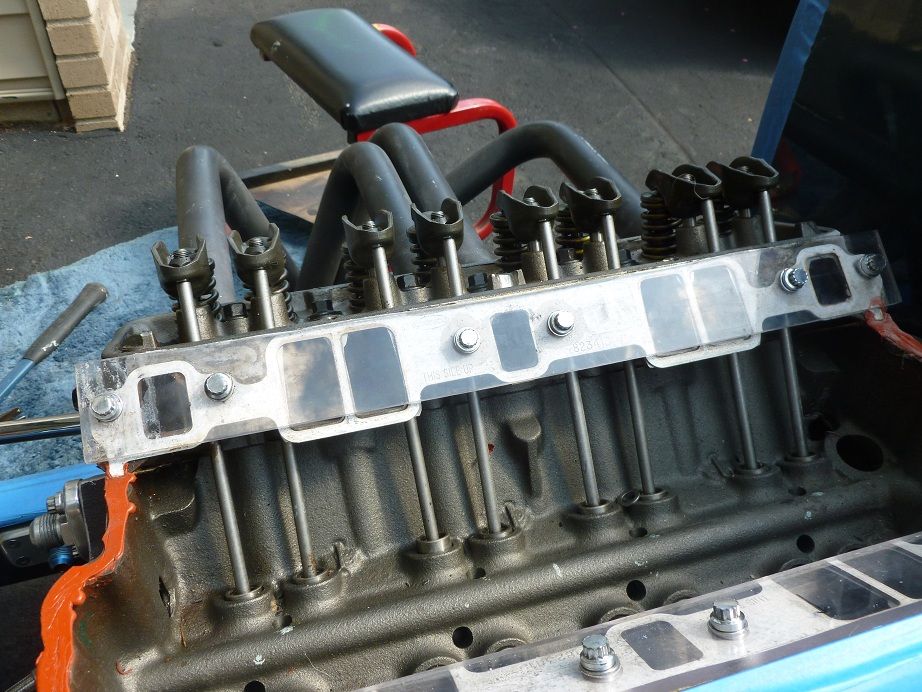
Here is a different way to do water, taking it straight from the heads:
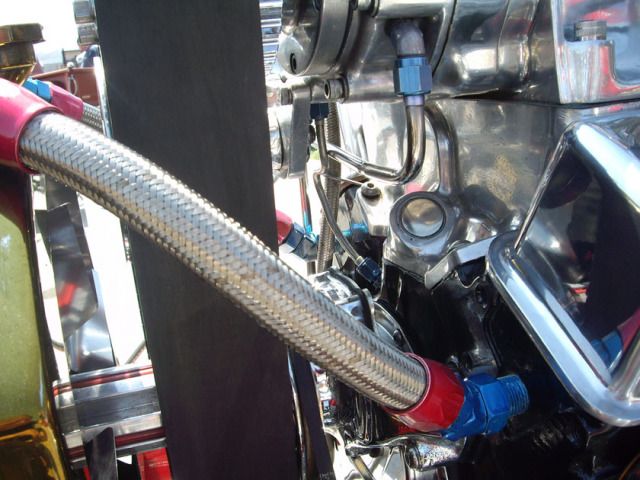
It's sometimes done with blower setups where the water neck is awkwardly placed or absent, which is my case. So first I made holes in the heads:
This was a real trial and error business. I wasn't sure of the internal structure of the head and didn't want to punch into a cylinder! I wanted to tap the holes, but the wall was only about 3/16" thick and there wasn't room to get a tap in deep. So I glued the fittings in. I cut off most of the NPT threads, and roughed up the holes and the fittings for a good grip:
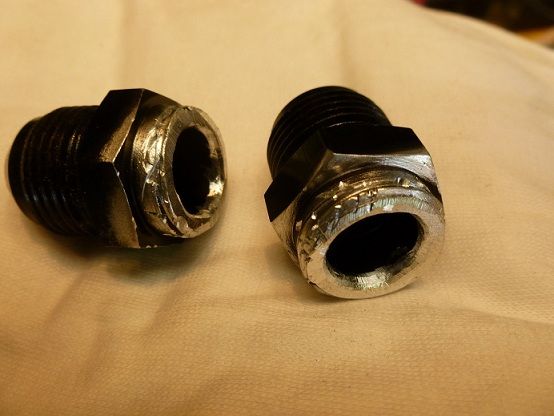
...and used J.B.Weld fast set epoxy.
Now I'll cap the fittings, install the manifold and fill the water jacket and pressurize it with the garden hose to check for leaks...and hope the fittings don't pop out, or water doesn't run out of the spark plug holes...that would spoil my day.
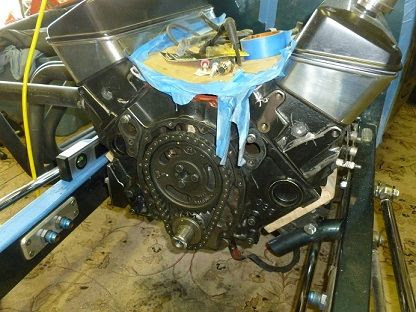
Since I was sitting there with the Dremel, I smoothed the block a little. Just knocked off the rough edges. Then I'll paint it with the Eastwood Chassis Black.
Still sanding on the interior. Once down to the core-mat, I'll skim the flaws with Bondo, then paint it. Then the wiring, and lastly put in the seat assembly:
I keep tinkering on it. Added fender washers where the seats bolt to the box, just to keep the seat frame from rubbing on the wood.
Looking now for some heavy-duty seat belts, like 3" wide, with retro aircraft-style buckles. Anybody know of such?
It's sometimes done with blower setups where the water neck is awkwardly placed or absent, which is my case. So first I made holes in the heads:
This was a real trial and error business. I wasn't sure of the internal structure of the head and didn't want to punch into a cylinder! I wanted to tap the holes, but the wall was only about 3/16" thick and there wasn't room to get a tap in deep. So I glued the fittings in. I cut off most of the NPT threads, and roughed up the holes and the fittings for a good grip:
...and used J.B.Weld fast set epoxy.
Now I'll cap the fittings, install the manifold and fill the water jacket and pressurize it with the garden hose to check for leaks...and hope the fittings don't pop out, or water doesn't run out of the spark plug holes...that would spoil my day.
Since I was sitting there with the Dremel, I smoothed the block a little. Just knocked off the rough edges. Then I'll paint it with the Eastwood Chassis Black.
Still sanding on the interior. Once down to the core-mat, I'll skim the flaws with Bondo, then paint it. Then the wiring, and lastly put in the seat assembly:
I keep tinkering on it. Added fender washers where the seats bolt to the box, just to keep the seat frame from rubbing on the wood.
Looking now for some heavy-duty seat belts, like 3" wide, with retro aircraft-style buckles. Anybody know of such?
Lee_in_KC
Active Member
I have seen them in military surplus stores.Anybody know of such?
Rainy day, so I stayed in and made a progressive linkage for the throttle body:
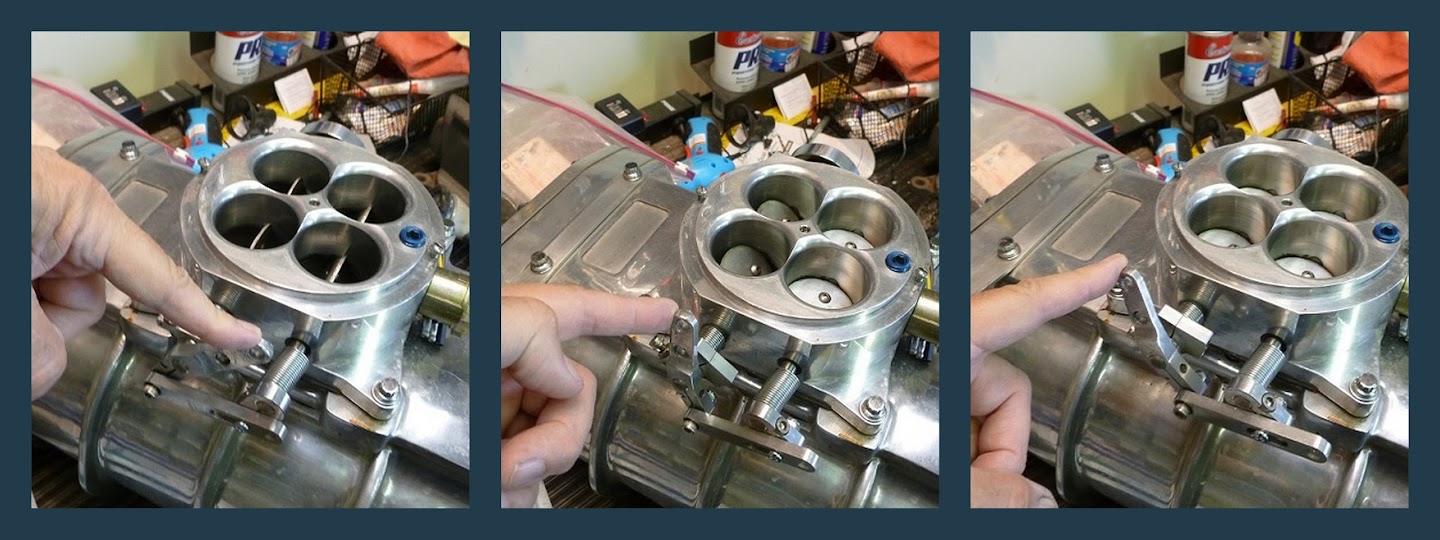
I've only used the first 2 barrels until now, so it should be interesting to see what this will do.
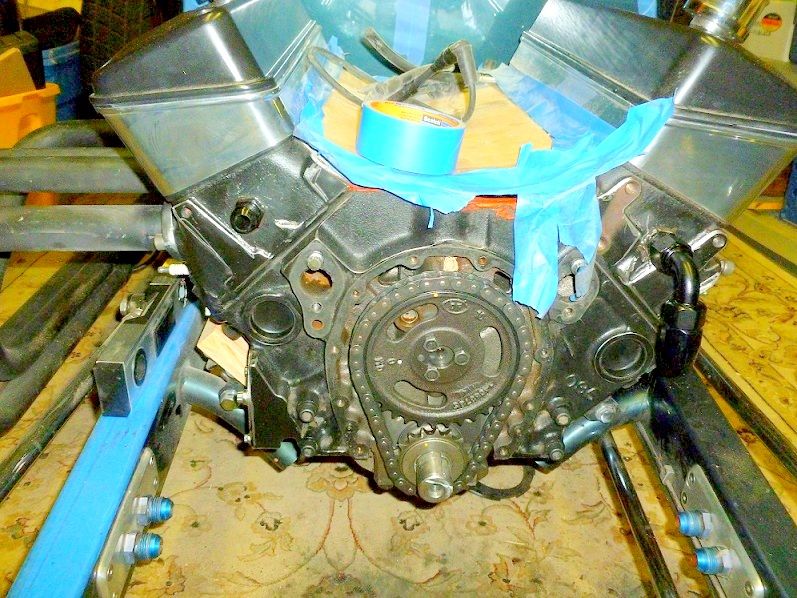
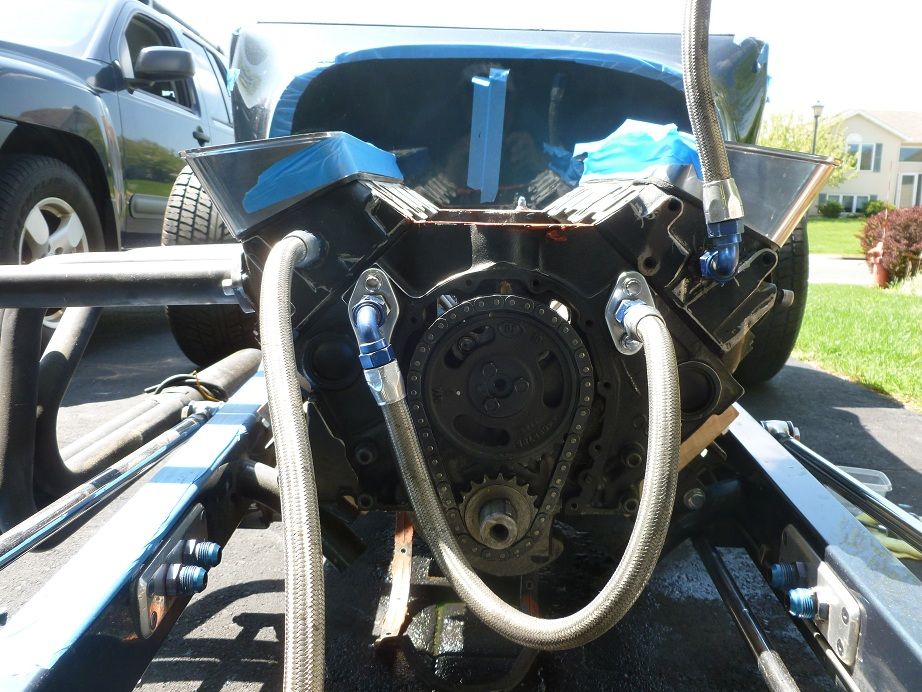
Got the motor ready to pressure test. Will fill it with water, then use an adapter from Speedway to hook an air pump to one of the hoses:
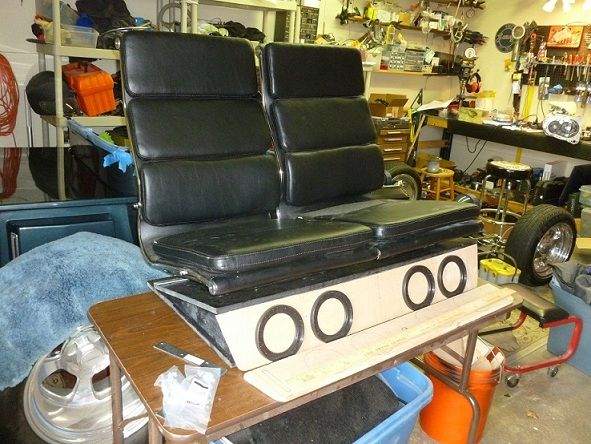
Worked on the audio panel. After this pic, I cut the holes and painted it:
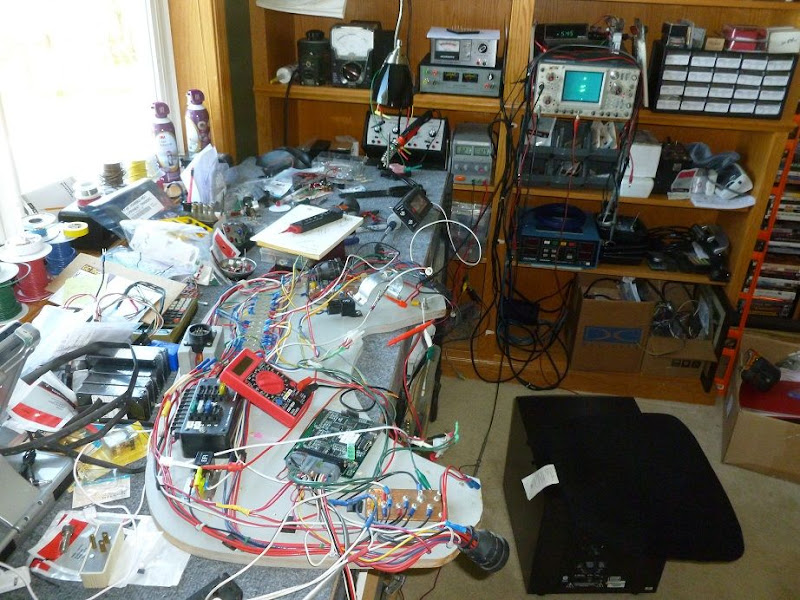
Finally, we got wifey's Ghia out of winter storage and put it in the garage, cutting my work space down to my bench and one folding table:
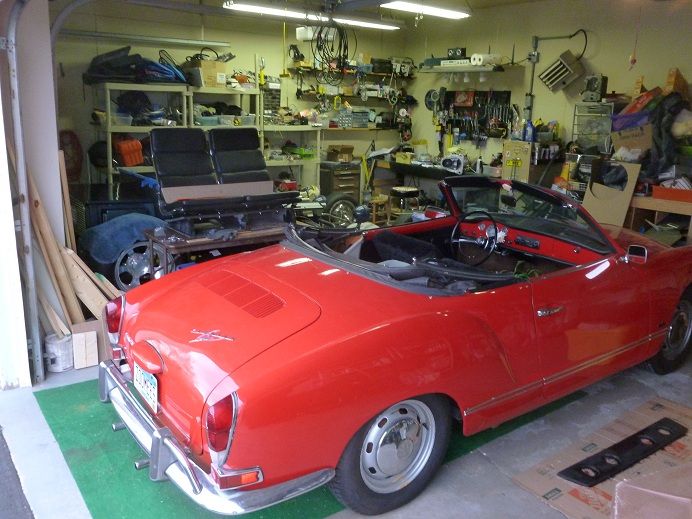
It makes it even more important to keep things organized, and put tools away after use. Oh, you can see the audio panel on the floor by the Ghia. And note if you use acetone to clean your paint brush, it is murder on your nail polish.
I've only used the first 2 barrels until now, so it should be interesting to see what this will do.
Got the motor ready to pressure test. Will fill it with water, then use an adapter from Speedway to hook an air pump to one of the hoses:
Worked on the audio panel. After this pic, I cut the holes and painted it:
Finally, we got wifey's Ghia out of winter storage and put it in the garage, cutting my work space down to my bench and one folding table:
It makes it even more important to keep things organized, and put tools away after use. Oh, you can see the audio panel on the floor by the Ghia. And note if you use acetone to clean your paint brush, it is murder on your nail polish.
I don't use alcohol, it interferes with the recreational drugs I prefer.Man! Just looking at your last picture makes my head hurt. Have you tried a really big Margarita before going any further?
Found them at Wesco Performance for only $25 each.I have seen them in military surplus stores.
Spent the day working on the water jacket test. Poured water into the hose...and it ran out of the front of the motor. Not good. Pulled the intake manifold and found water in the valley. Pulled the right valve cover and found this:
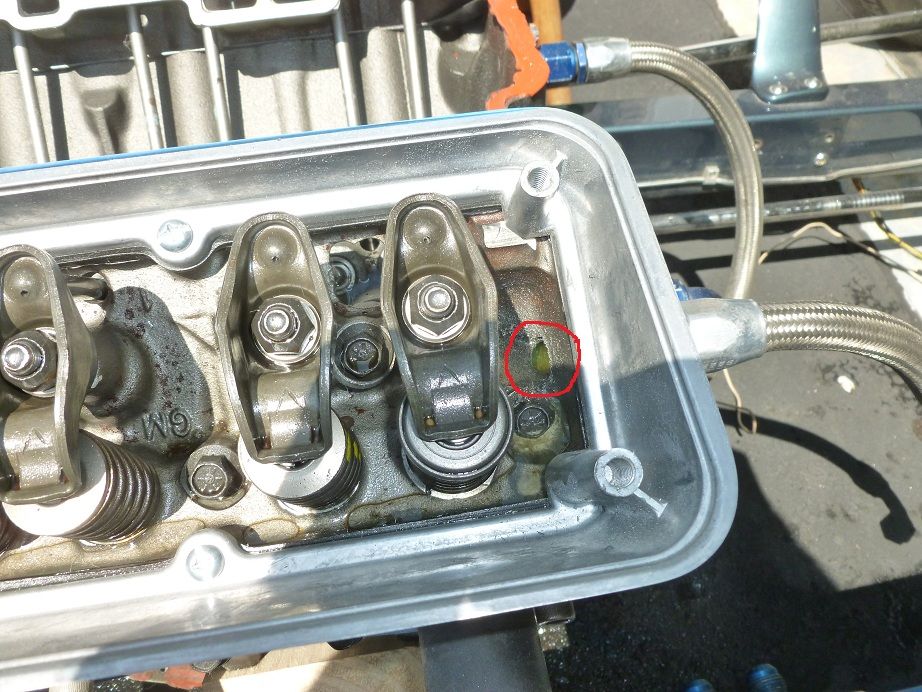
I had drilled thru the jacket and on into the rocker space. Water was running from the head down into the valley, just like the oil does. So I pounded a scrap of aluminum to cover the hole and epoxied it in:
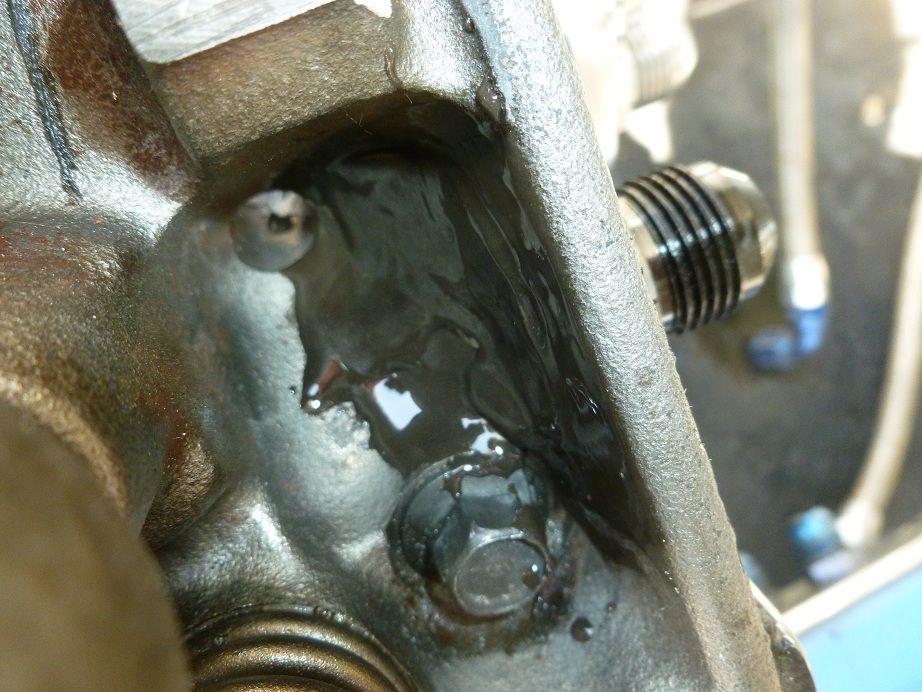
How could this happen? It didn't happen in the left head. Aren't heads identical? Well, sorta. Look:
Note the driver side head has mounts for accessories, and the passenger side head doesn't; well, actually it does, but they are on the backside of the head when it's on the passenger side. The heads are identical, but each head is not symmetrical front-to-back. I can drill into one end OK, but the same location on the other end goes on thru to the rocker space. Live and learn. I decided to test again, but this time I wanted to see into the valley. So I made some block-off plates (from an old plastic windshield; never throw anything away):
But water kept dripping from beneath the gaskets. Tomorrow I will remove the gaskets and try it with just the plates and some sealant. I want to pressurize the system to about 30 psi, twice it's normal operating pressure.
I had drilled thru the jacket and on into the rocker space. Water was running from the head down into the valley, just like the oil does. So I pounded a scrap of aluminum to cover the hole and epoxied it in:
How could this happen? It didn't happen in the left head. Aren't heads identical? Well, sorta. Look:
Note the driver side head has mounts for accessories, and the passenger side head doesn't; well, actually it does, but they are on the backside of the head when it's on the passenger side. The heads are identical, but each head is not symmetrical front-to-back. I can drill into one end OK, but the same location on the other end goes on thru to the rocker space. Live and learn. I decided to test again, but this time I wanted to see into the valley. So I made some block-off plates (from an old plastic windshield; never throw anything away):
But water kept dripping from beneath the gaskets. Tomorrow I will remove the gaskets and try it with just the plates and some sealant. I want to pressurize the system to about 30 psi, twice it's normal operating pressure.
Here's the setup for the pressure test:
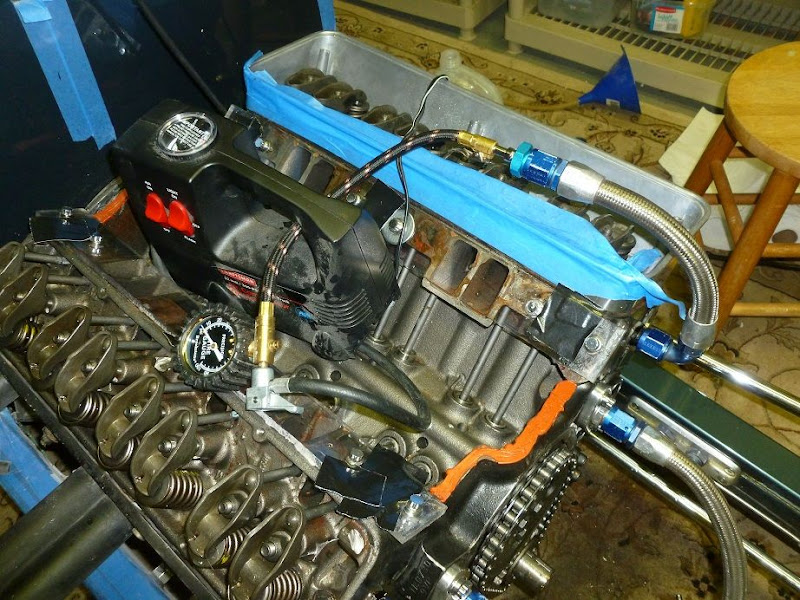
Filled the motor with water, then hooked the air compressor to a water hose with a schrader valve adapter. In order to see the water in the ports I drilled a 1/16" hole in the plate over each port to bleed out the air, then covered the holes with tape. Ran the pressure up and down several times and no leaks. Then I fixated on the gauge and at about 40 psi the tape blew off the holes and I got showered! And now a puzzle: the center water ports had no water. Why is that? I'll reveal in my next post (which could be weeks from now!) if no one can beat me to it.
Filled the motor with water, then hooked the air compressor to a water hose with a schrader valve adapter. In order to see the water in the ports I drilled a 1/16" hole in the plate over each port to bleed out the air, then covered the holes with tape. Ran the pressure up and down several times and no leaks. Then I fixated on the gauge and at about 40 psi the tape blew off the holes and I got showered! And now a puzzle: the center water ports had no water. Why is that? I'll reveal in my next post (which could be weeks from now!) if no one can beat me to it.
I've seen two references to these ports. The one you describe is apparently part of an EGR scheme that directs exhaust under the manifold to heat it. And I've also read that the ports allow hot water to do the same thing. Is it possible that both of these are correct, depending on the motor? Mine is a new crate Goodwrench Gen 1.P.G. , center water ports??? If you're talking about the center ports in the head , those are exhaust ports [for the manifold heat] , better not be any water in there!!!
dave
I.M.O.& experience , gen I sbc , no ,exhaust gas only . What is the casting # of the heads ,882 , 993 ??
dave
462624

Yeah, I read some comments like that. But someone said it was in Lingenfelters book as an OK head. Anyway, it's what comes on the cheapest Goodwrench crate motor. I've been running it for 3 years with a B&M 250 blower, about 5# boost. Now putting on a 6-71 with 10# boost, and will see if I can bust 'em up.
Similar threads
- Replies
- 3
- Views
- 3K
- Replies
- 0
- Views
- 893
