Ron Pope Motorsports                California Custom Roadsters               

Project "Obie" Got it's first parts.

Looking good sorry to hear about your tendon pull. On the model a crossmember I usually attach my taillights on the part that sticks out past the frame. Just an idea. Keep up the good work.


Sounds like a good idea with the lights. It does have a hole on both ends at the top that looked like a good spot. Since it sounds like you have been down the a-crossmember road, I'm using a T style aftermarket 2" spring. I have an original T spring, but it was way too long. It fit the crossmember perfectly, but the aftermarket spring isn't nearly as thick. (5 leaves instead of 9). Any ideas for spacers? If I don't space it down the u bolts won't tighten down on the spring. It sits too far up in the crossmember. It looks like some Of the original spring leaves may fit in the new one so I was considering trying to combine the two.
 
Sounds like a good idea with the lights. It does have a hole on both ends at the top that looked like a good spot. Since it sounds like you have been down the a-crossmember road, I'm using a T style aftermarket 2" spring. I have an original T spring, but it was way too long. It fit the crossmember perfectly, but the aftermarket spring isn't nearly as thick. (5 leaves instead of 9). Any ideas for spacers? If I don't space it down the u bolts won't tighten down on the spring. It sits too far up in the crossmember. It looks like some Of the original spring leaves may fit in the new one so I was considering trying to combine the two.
That is the same type spring I used on the last one. What I did was make a bottom plate for the U bolts to pass thru and just welded spacer on top on it to make up the difference in depth of spring. This will space the spring UP in the crossmember. Don't forget to put a hole in spacer plate for the thru bolt in spring. One I did awhile back, not a T, I welded plates to back and front of A model crossmember and used 4 grade 8 bolts and about the same type plate on bottom of spring instead of U bolts. Works out the same as for holding spring in place, but that one was hidden under a bed, the T was exposed in rear so I wanted to use the U bolts for a better look. Hope this helps, I'll look to see if I have any pics of the rear crossmember of that T.
 
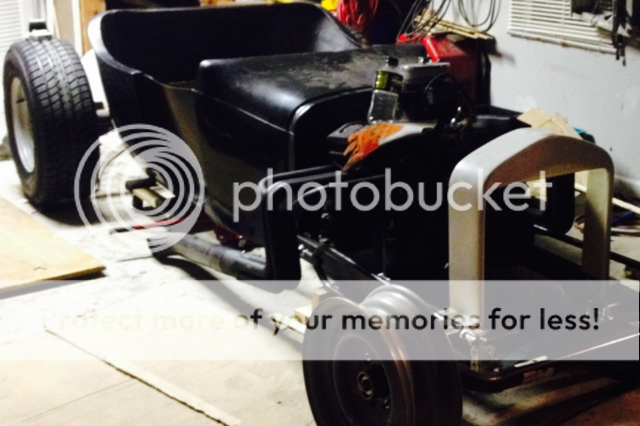
Been a while since I had anything much at all to report but I have finally got the frame squared perfectly and the front crossmember welded in place, and the motor mounts welded in. I still have to build a spacer out of 3" tube about 3" tall to put under the motor mount pad to space the engine up higher. As the frame sits now at the ride height I want (5 1/2" in the front and 7 1/2 in the back), the engine is 1/2" off the ground. I needed to sit the engine in place and get the weight on the spring to see how far the spring will compress, and now that I have the measurements right I know how high to build the engine mount spacer blocks. I have the radiator mounts cut but not welded in place, but hopefully can get the front of the frame from cowl forward finished this weekend, and MAYBE the trans mount finished as well. I almost have the diff torn down so I can clean it up and weld the spring brackets and radius rod brackets on. I've been scratching my head trying to figure out what to do for suspension in the rear, and finally decided on long radius rods from RPM to match the front. Since the frame is so low where the rods mount I've been trying to figure out how to mount them and finally built something I think will work. Hope to have more to report soon.
 

Attachments

  • image.jpg
    image.jpg
    167.8 KB · Views: 142
  • image.jpg
    image.jpg
    199.2 KB · Views: 145
  • image.jpg
    image.jpg
    201.8 KB · Views: 145
The rear never got finished but I did get the radiator mounts finished and trimmed the shell to fit. I put the radiator mount just low enough in the frame so when I mount the radiator inside the frame rails, the top of the tabs sit flush with the top of the frame so the shell tab sits nice and flush on top. Should blend in nicely when the finishing work is done. (Time is still a hard thing to find so I may be posting a lot of small stuff just so I feel like I'm getting somewhere). And no the front crossmember isn't completely welded. All I have at home is an old buzz box so as soon as everything is temporarily stick welded in place it will be going to the shop at my job, ground down and welded with a nice new mig/tig they were nice enough to drop a few thousand on so I can borrow! :thumbsup:
 

Attachments

  • image.jpg
    image.jpg
    162.4 KB · Views: 115
  • image.jpg
    image.jpg
    123.8 KB · Views: 116
  • image.jpg
    image.jpg
    134.7 KB · Views: 118
(Time is still a hard thing to find so I may be posting a lot of small stuff just so I feel like I'm getting somewhere).

Hey, that's OK. The small stuff has to get done, too. Whenever I was building a car before (both my C-Cabs, My Model-A coupe, my stock cars) I always tried to do something toward its completion every day, even if it was just sketching the idea for a bracket or finding/buying something at the parts store or online. It kept me focused and progressing. This time I let myself get completely sidetracked off my roadster and it took me at least an extra 2 years to get it roadworthy. I won't make that mistake again. Keep pluggin' away at it; the little things count, too!
 
Not much update on the T. Another big thanks to RPM for the latest round of parts and dropping them off for me in the way to Ocala, saving me a lot of shipping money. I have way more parts now than I have time to build. The pictures tell the reason for that. The newest addition to the family. Meet Jacob!
 

Attachments

  • image.jpg
    image.jpg
    111.6 KB · Views: 80
  • image.jpg
    image.jpg
    122.5 KB · Views: 79
Clint Eastwood said "a mans got to know his limitations!" That's sort of what I did. I have found my limitations. I put a lot of work into building my own frame, and for the most part have it finished, but not quite at the quality I really wanted for this car. So I got smart and called "da man". aka Ron Pope at RPM and I'm getting him to build a custom frame for me! No waste tho since my son bought an old ford truck cab and actually my frame is a really good fit to build him a little rat truck so it worked out just fine. I didn't quite get my frame as low as I wanted so this will give me a "Obie 2.0". Won't get the frame till August which will give me time to build a good engine trans and rear so I should be good to go when Ron gets it ready for me. I have probably 95% of the parts to build it so I'm hoping to ride by next spring......but.......you ALL know how that usually works!
 
Y'all know how it is, life happens and projects stall, but I'm making a little progress. Little being the key word. Finally got the Gennie wheels and tires in, and my measuring back spacing was spot on as I got them tucked up close to the body like I wanted. I have about 1 1/2" between the body and inside of the tire in the back. Jacked up one side of the rear 3" and it's still away from the body so that looks good to me. Pay no attention to the angle of the engine. Trans is sitting on the ground in the rear , because I have to cut a little more out of the firewall to get it to sit right since I raised the engine up high enough to have the oil pan just a hair above the bottom of the frame, and the trans pan will be the same way. Won't have anything below the frame rails, so NO clearance issues. 4" frame to ground in front and 7" in the back. Installed all four wheels before I mounted the tires, set the car down on the bare rims and the frame is a hair off the ground, so no scrub line issues either. I did decide to swap to coil overs in the rear since I had some issues I just didn't like trying to get it so low with the transverse spring so I chose the safer and stronger route. I'm sure it will hook up better as well when it's play time.

Well I can't get the pics to post so I'll try again later!
 
image1-1.png


(fixed)
 
Last edited by a moderator:
Not much update on the T. Another big thanks to RPM for the latest round of parts and dropping them off for me in the way to Ocala, saving me a lot of shipping money. I have way more parts now than I have time to build. The pictures tell the reason for that. The newest addition to the family. Meet Jacob!


Looks like your Chief Engineer is sleeping on the job!
 

     Ron Pope Motorsports                Advertise with Us!     
Back
Top