Yes, resin, like vodka, goes bad quickly and must be used after opening.I was just looking at my unfinished pile of parts and thinking the same thing... I also need to use up the resin and related material before it goes bad... easy to get pulled away and difficult to get back into the projects at times... there always seems to be something else requiring my time. Congratulations on your new place, good luck getting set up and back into the T.
You are using an out of date browser. It may not display this or other websites correctly.
You should upgrade or use an alternative browser.
You should upgrade or use an alternative browser.
A Bit More Progress
- Thread starter choppinczech
- Start date
choppinczech
Well-Known Member
Hey guys. I haven’t been on here lately but I’m still at it, although a lot slower. The money to play with just ain’t there anymore. I chatted with Spanky last week which inspired me to post an update. I’ve been gathering parts and materials to tackle this fuel tank. The quotes I’ve gotten to have it made are insane. So I’ll have to do it myself.


I have each view drawn out per the mockup and will tranfer templates to the aluminum as I go.


I have some 1/8” 5052 coming and the plan is to kerf all of the bends like this on the table saw just enough to get precise bends and still hold together.

The blade I have is for cutting aluminum and has a nice thin kerf width of just over 1/16”. I’ll tack the needed areas with my MIG (hopefully) and then have someone that’s skilled TIG weld the tank.
I’m also sharing my garage space with this character which makes things very interesting.

At 10 months, he’s full of piss and vinegar and gets into everything I’m working on.


I have each view drawn out per the mockup and will tranfer templates to the aluminum as I go.


I have some 1/8” 5052 coming and the plan is to kerf all of the bends like this on the table saw just enough to get precise bends and still hold together.

The blade I have is for cutting aluminum and has a nice thin kerf width of just over 1/16”. I’ll tack the needed areas with my MIG (hopefully) and then have someone that’s skilled TIG weld the tank.
I’m also sharing my garage space with this character which makes things very interesting.

At 10 months, he’s full of piss and vinegar and gets into everything I’m working on.
Intrepid
Active Member
Not sure if it will bend out the way you want.. It has a tenancy to crack, but it should hold together enough to weld it up.
I would Tig it from the start, If you try to Mig it with a spool gun to start you may end up with a bunch of bubbles in the weld.
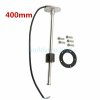
Its going to be tricky, have you thought about baffles and the length of the sender unit ?
I would Tig it from the start, If you try to Mig it with a spool gun to start you may end up with a bunch of bubbles in the weld.
Its going to be tricky, have you thought about baffles and the length of the sender unit ?
choppinczech
Well-Known Member
Not sure if it will bend out the way you want.. It has a tenancy to crack, but it should hold together enough to weld it up.
I would Tig it from the start, If you try to Mig it with a spool gun to start you may end up with a bunch of bubbles in the weld.
Its going to be tricky, have you thought about baffles and the length of the sender unit ?
Yeah I have 3 baffles all together.

My sending unit is 16".

choppinczech
Well-Known Member
Well it's sure good to see you are back !!! It's been a few months(LOL) since you posted regularly. If only 3D printing could be done in aluminum.
I also love the drawings, what software did you use?
That's PowerPoint believe it or not. I love it. When I made the progressively different layers of my scoop plug I could scroll through the pages and see each layer. Like a silent movie.
Funny you should mention 3D printing. My Grandson brought home a Pokemon ball he made at school with 3D printing. It's done in ABS and really cool. I want to make a prototype side mirror and have a 3D company copy it and a mirror image for the other side.
Indycars
Well-Known Member
You are right, that is hard to believe ! You must have many hours in creating that drawing !That's PowerPoint believe it or not.
choppinczech
Well-Known Member
BTDT and always figured in a little wiggle room.So far, so good. With the kerf at this depth the bends gain about 1/32". Not a big deal. But one of my pieces has 6 bends. So I have to account for the increase in length and do tests. What's really nice is the way it holds together.
The way I see it is you don't even have to fill in the spaces when you weld it up.
choppinczech
Well-Known Member
choppinczech
Well-Known Member
In that last photo the tank's on it's back. This is how the pump will sit.


I have NO room for the supply and return lines under my deck lid, so they'll exit the front overhang. As long as everything is sealed up well it should be fine. Fuel Safe has side components on some of their tanks.


And I'm using a Holly Hydramat for the pump.


I have NO room for the supply and return lines under my deck lid, so they'll exit the front overhang. As long as everything is sealed up well it should be fine. Fuel Safe has side components on some of their tanks.


And I'm using a Holly Hydramat for the pump.
choppinczech
Well-Known Member
Sorry, that last photo is the tank on it's front.


