


You are using an out of date browser. It may not display this or other websites correctly.
You should upgrade or use an alternative browser.
You should upgrade or use an alternative browser.
Mike's 27 T Build.
- Thread starter TbucketMike
- Start date
Mine was low to the floor just so I could move it around by myself. When I needed it higher my son and I lifted it onto two portable sawhorses.
Was the body pretty stable on the sawhorses? I was thinking of that also.
ellis8500
Member
Yes, it was very stable since the bottom is flat. I really didn't need the body up that high for most of the work on it. Came in handy for work on the lower firewall and finding the little pinhole spots around the bottom. For the upper work I just let it sit on the frame with the from up on cement blocks.
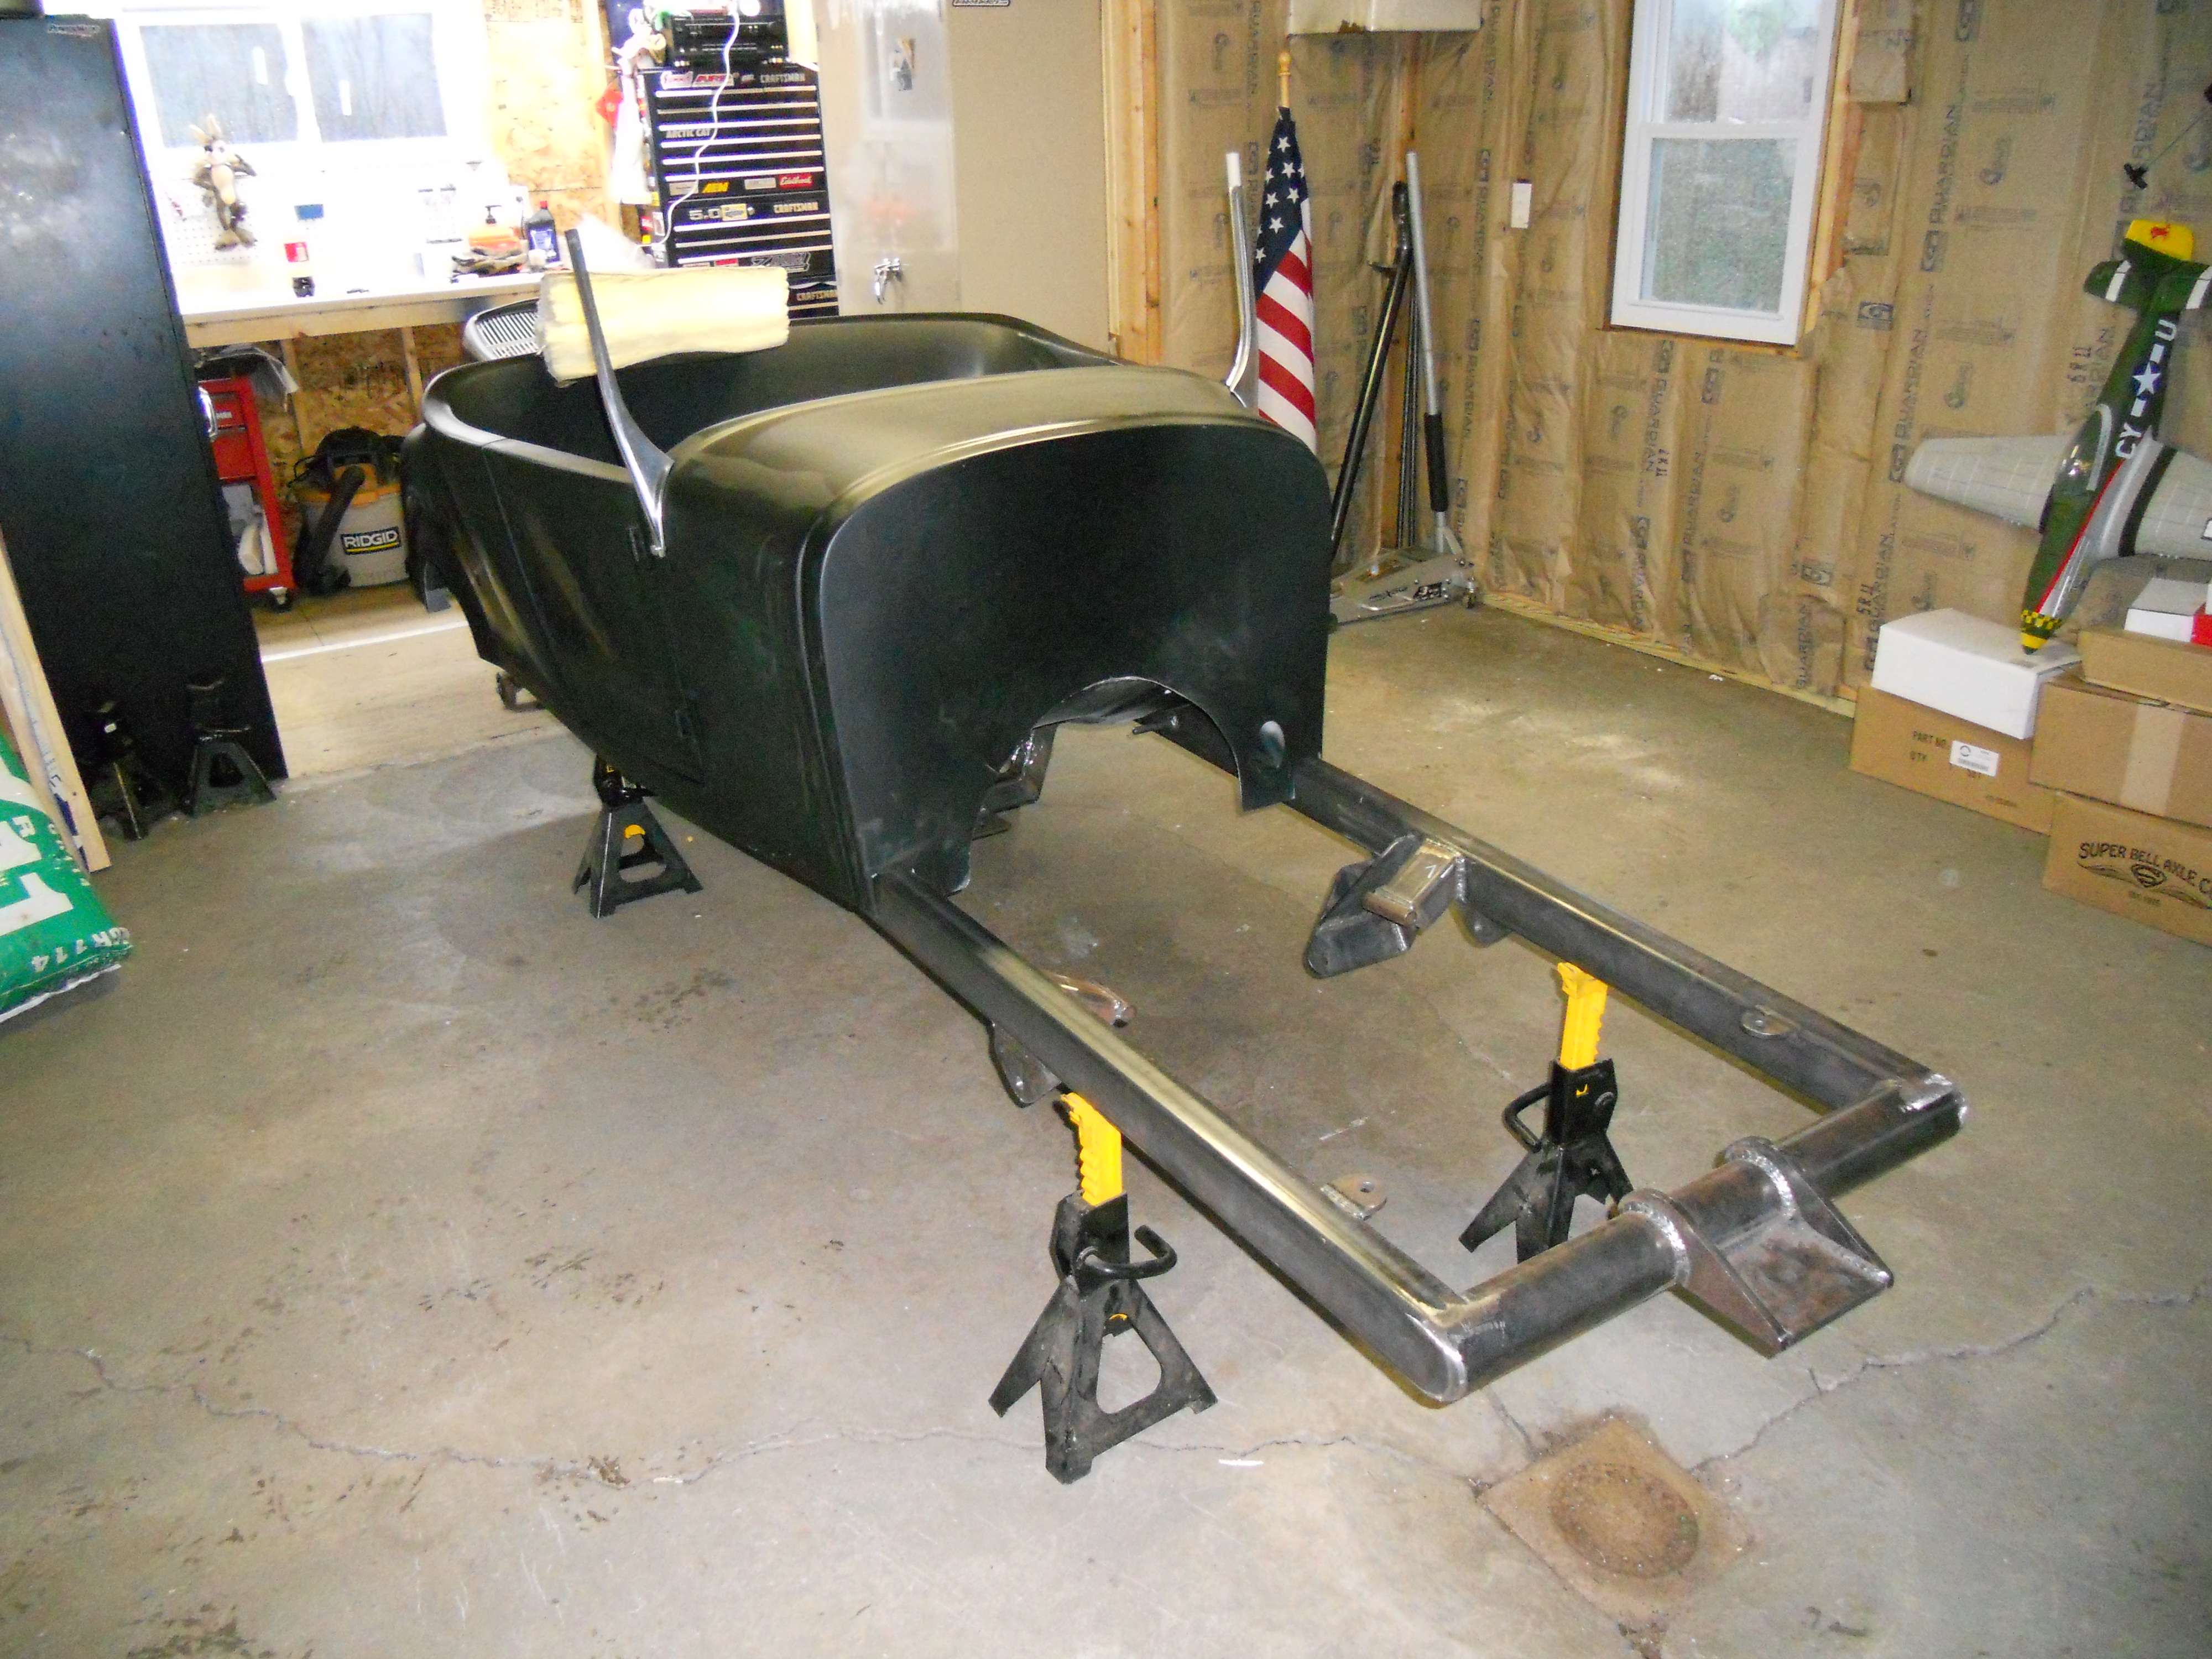
Not much of an update. Still working on insulating the garage but the gas company did hook up the heater so I now have heat!! Got a chance to mount the windshield posts on the car. Drivers side post is perfect but the pass side I'm going to have to do a little body work to make it perfect but that's to be expected I guess. Here are some pictures.
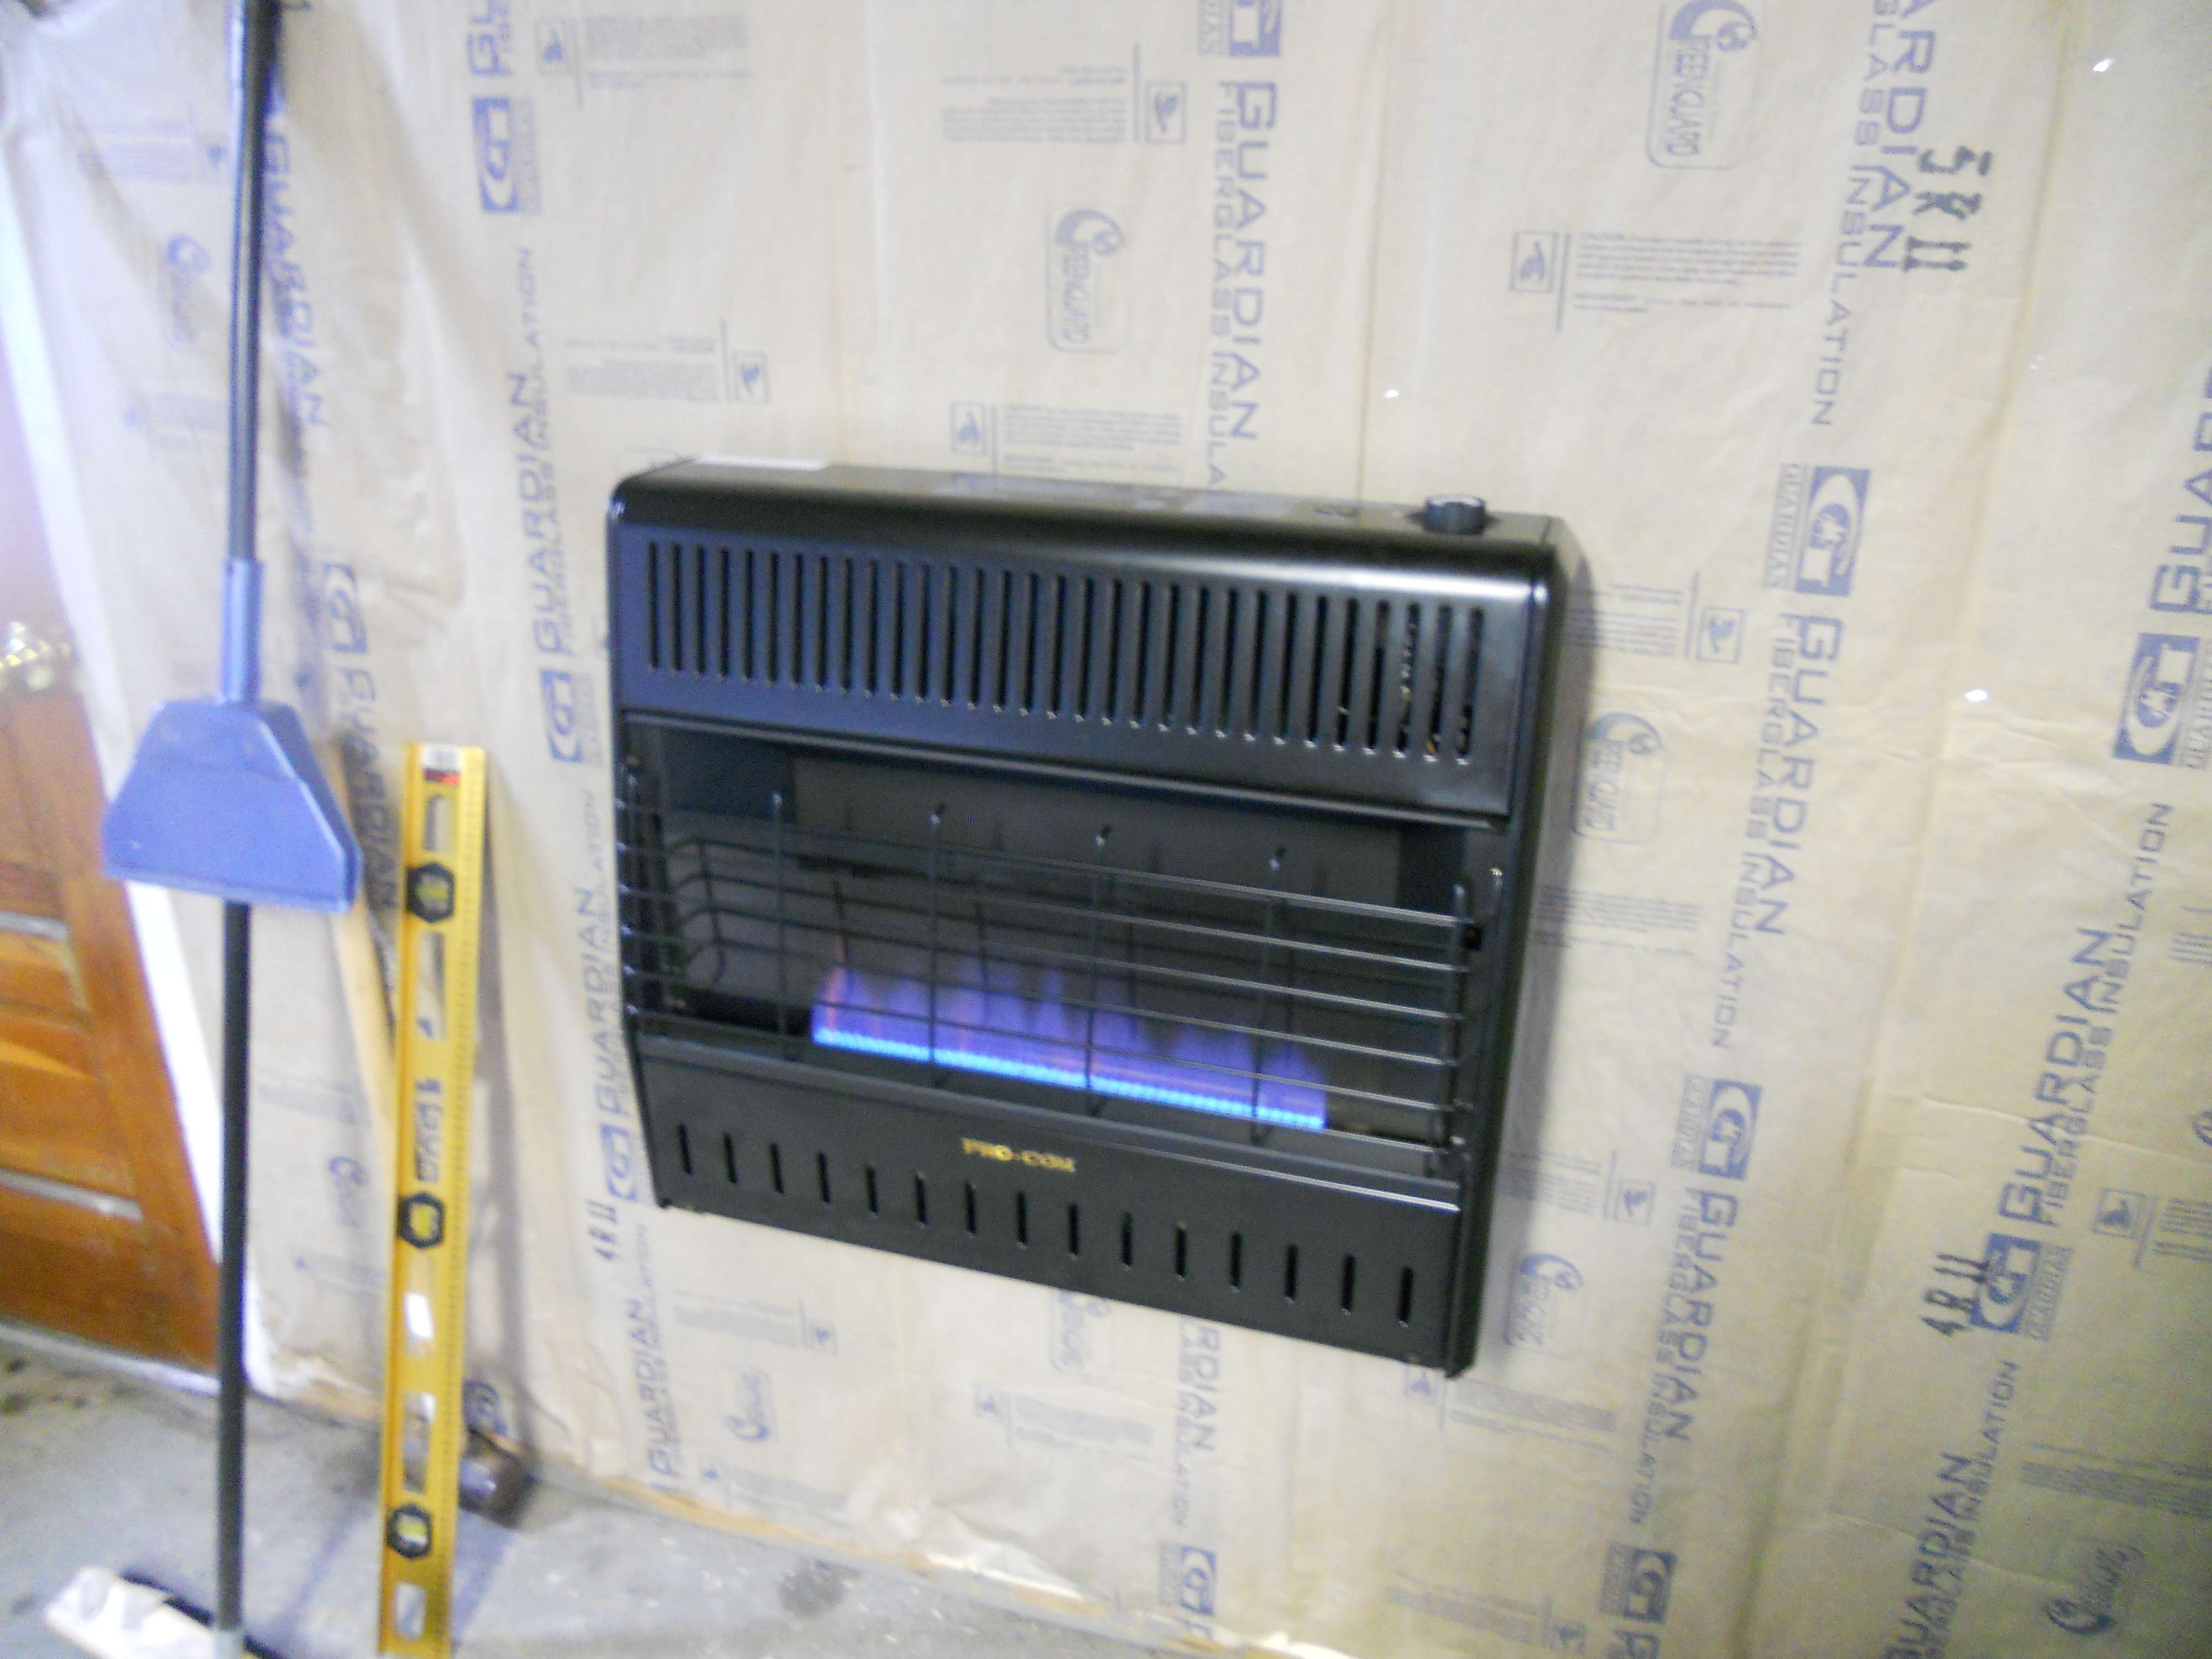
They never said a thing about it and honestly I never thought about it either until you posted. The back of the unit barely gets warm even on the highest setting but to be safe I'll see if I can find somthing to cover up the insulation behind the heater that's fireproof. I would think home depot or lowes would carry something right?I'm really surprised they hooked up a heater like that with nothing covering your insulation!![like fireproofing?]
dave
Starting to lay everything out and began to put the front suspension together. Notice the radius rods and how one pair has an S support welded on and the other pair are plain. Will this look funny on the car? Why would you not but that on all 4 of them?
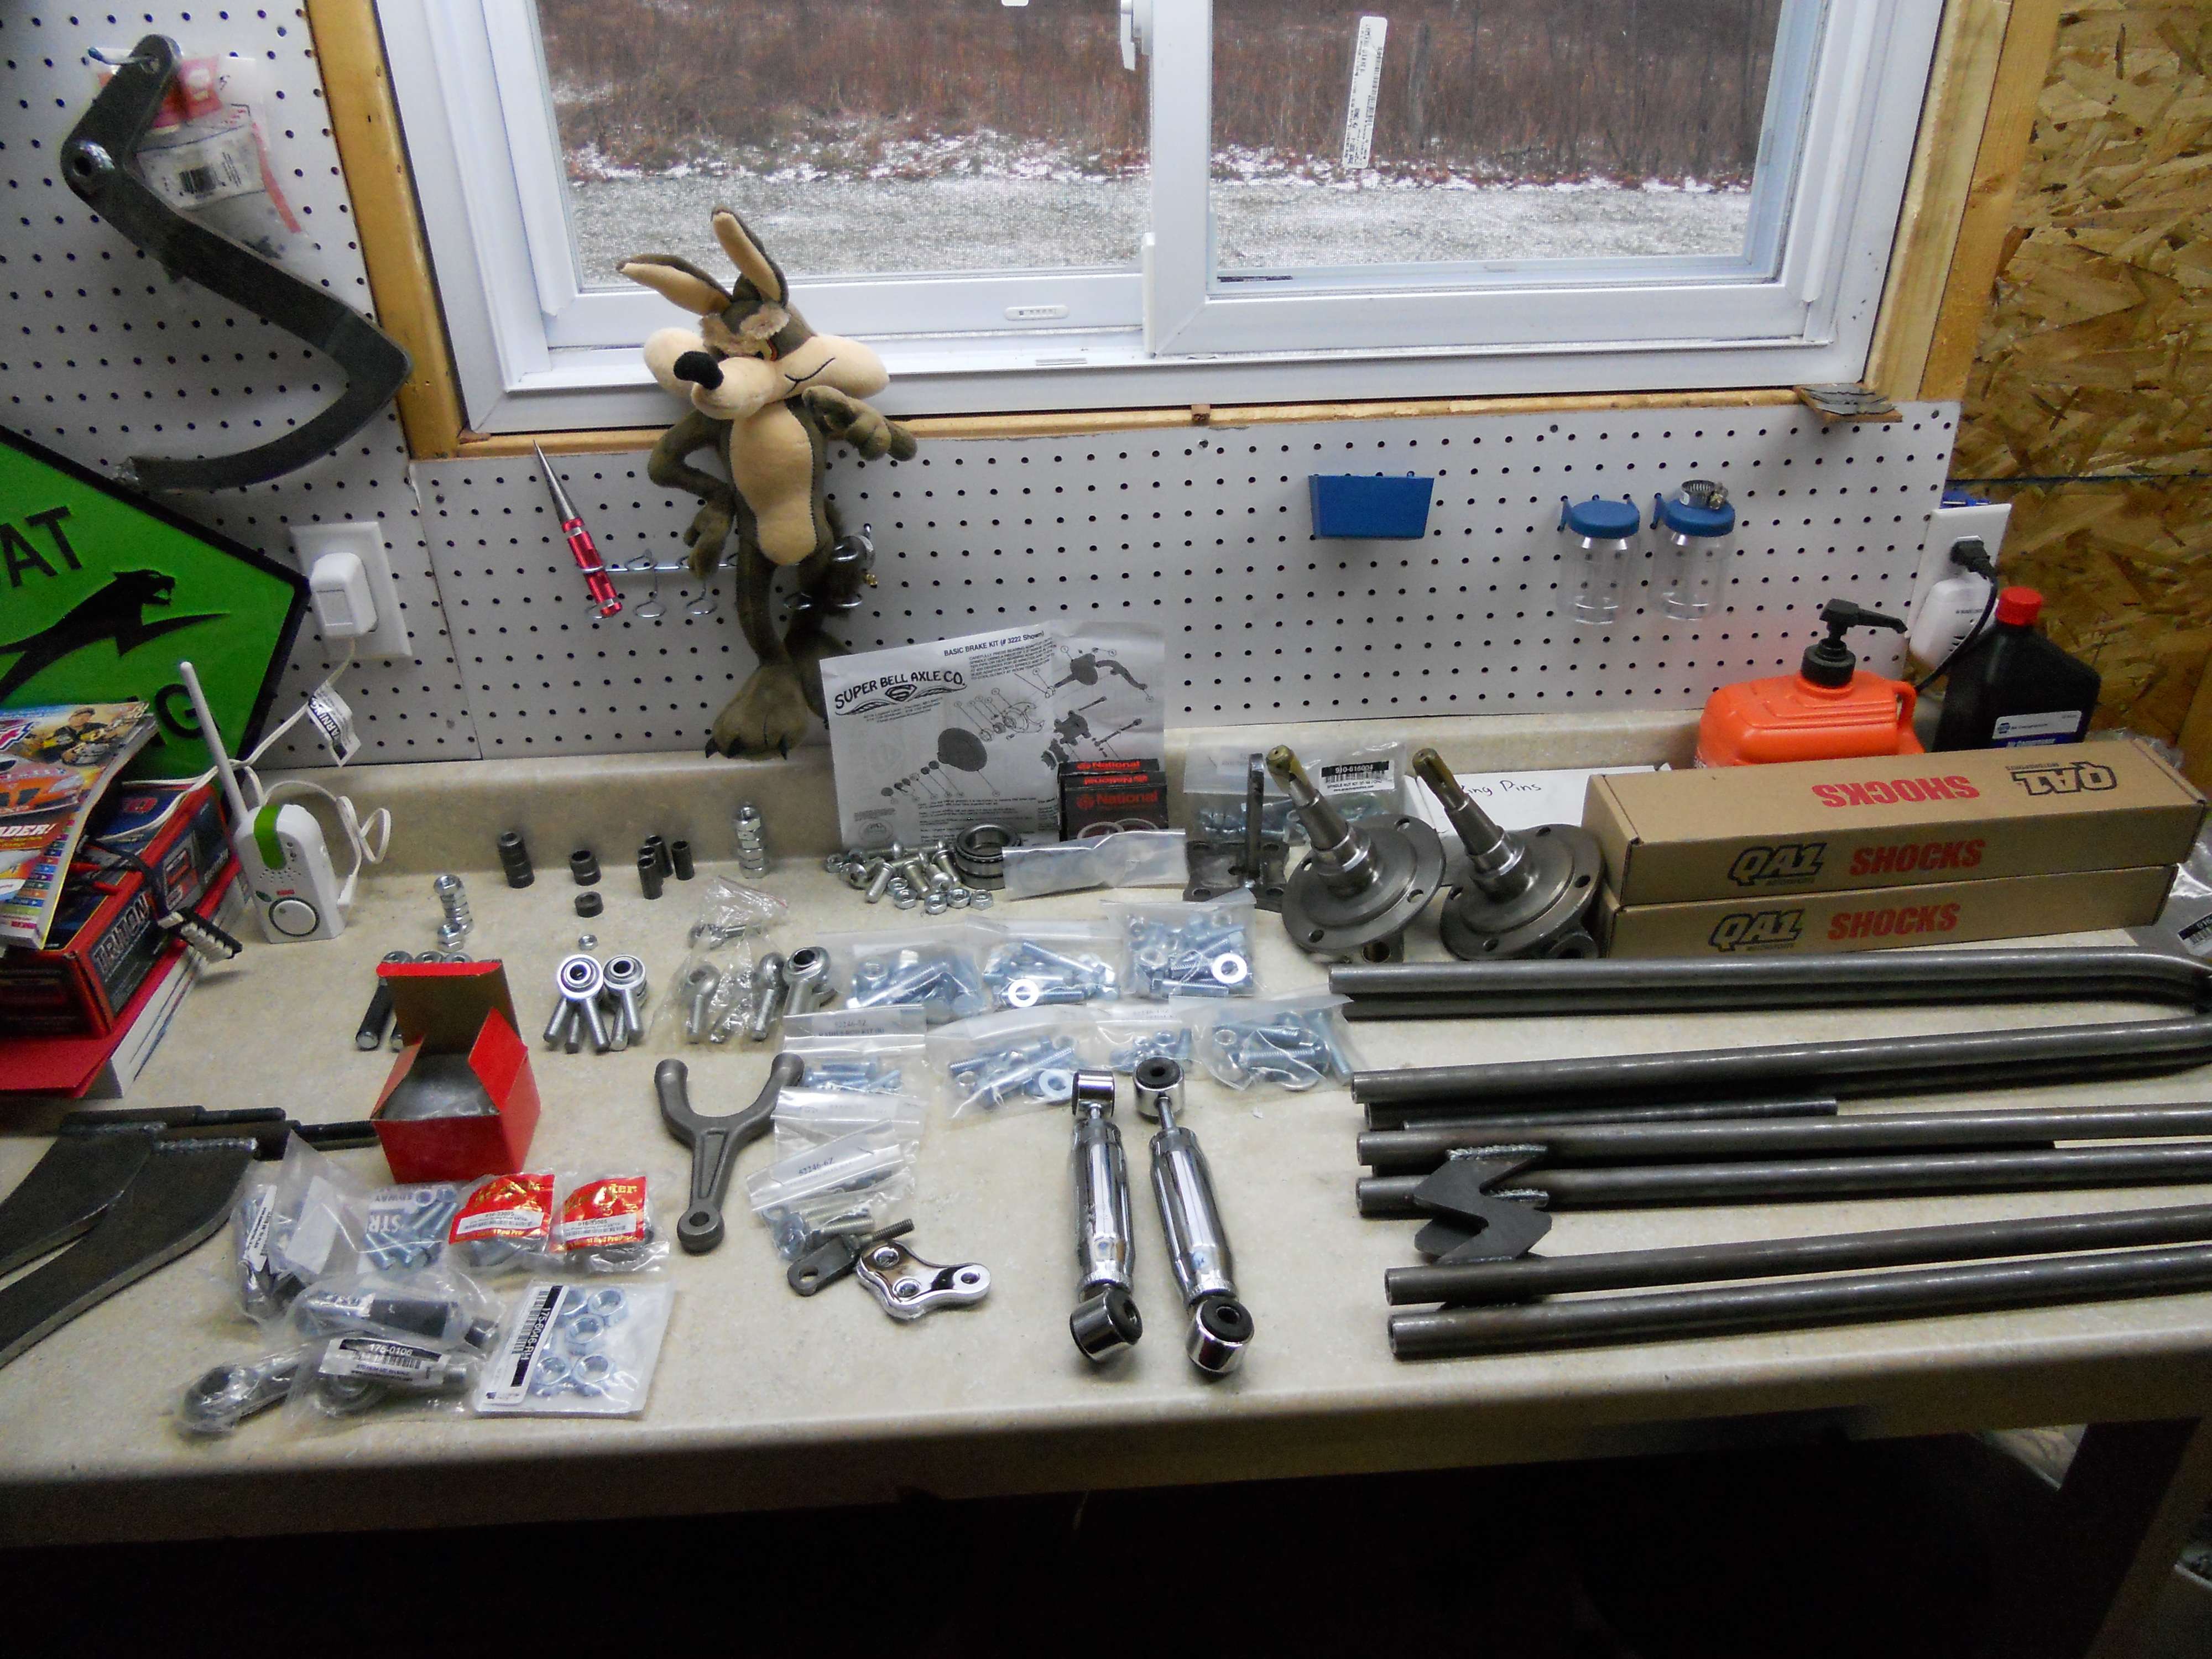
Thanks Ron for clearing that up!! Makes sense! I'm new to this and have a TON of questions especially now that I've started building it. Didn't get a assembly manual with the car then I found Spirit has a manual I can down load and wouldn't you know it my printer is out of ink!!! LOL Just one of those days!The "S" is to help with the flexing when hairpins are used on the rear suspension. With it located as far back as they are you will likely not see them.
Ron
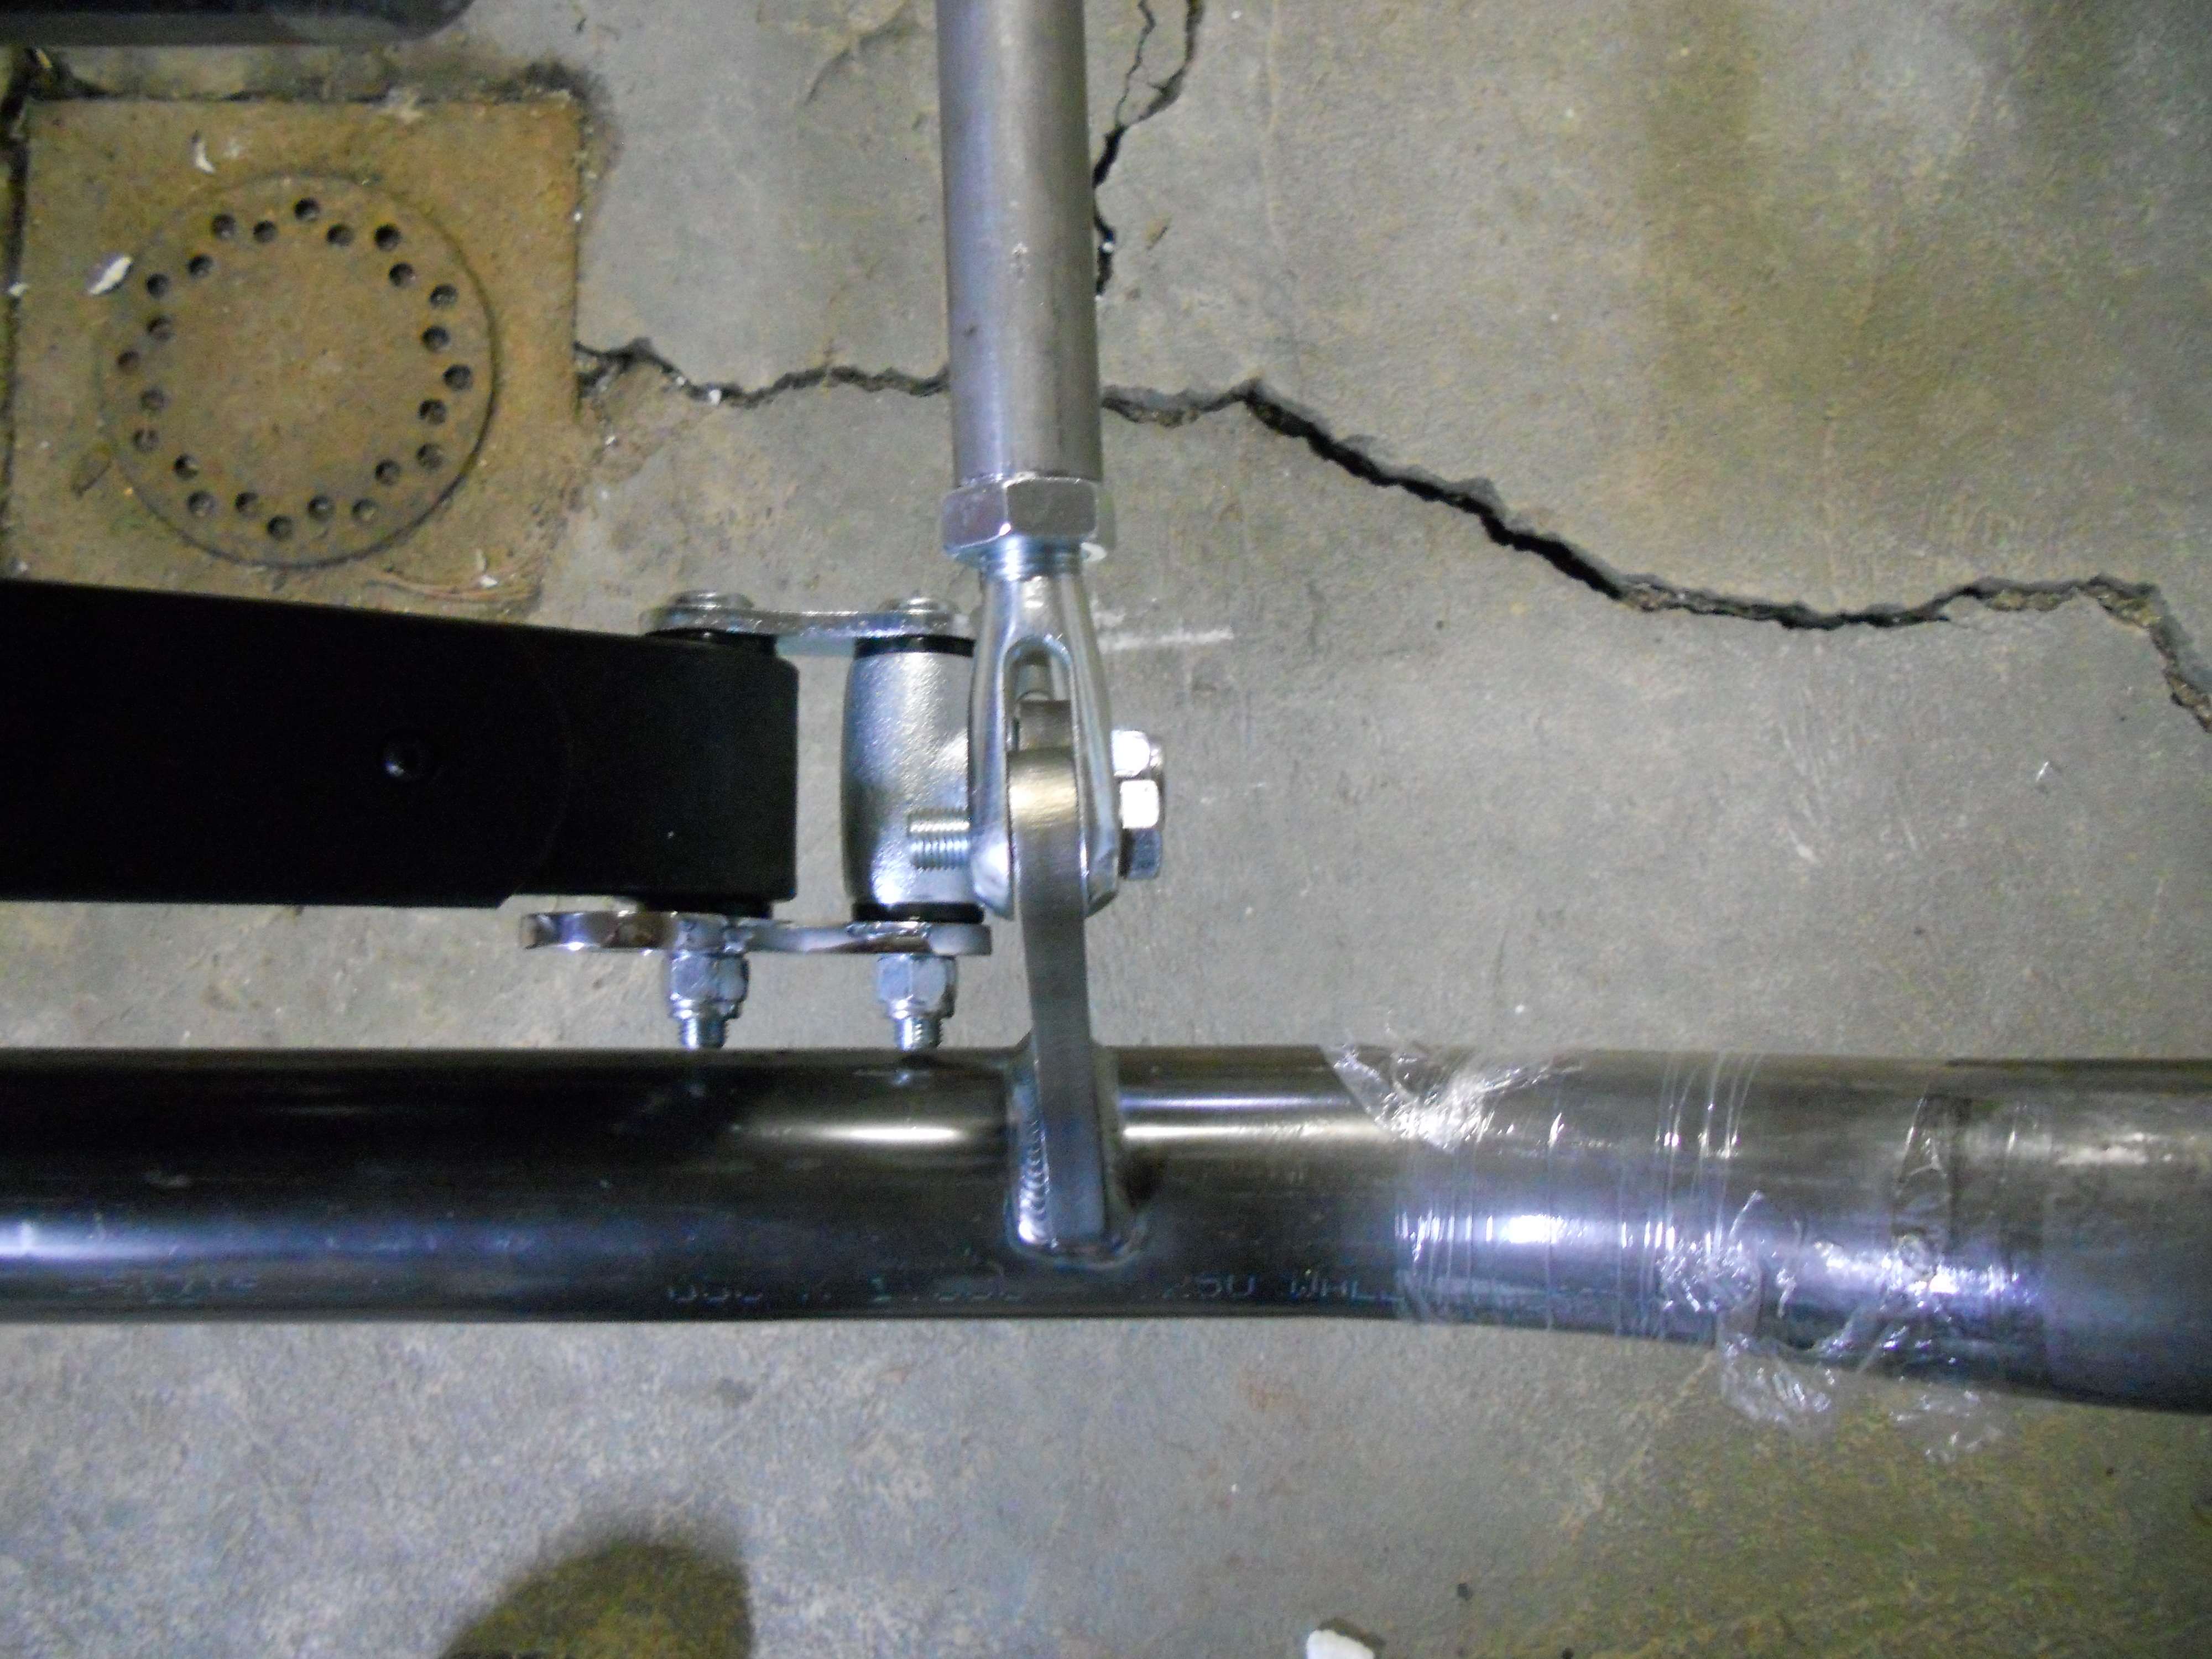
Well putting the front end together isn't going so well. Looks like the Drivers side bracket that's welded on to the axle is angled in more than the pass side. Things look off and don't want to line up. The shackle bolts on the pass side come in contact with the axle but the drivers side shackle bolts clear with plenty of room. The drivers side rear radius rod doesn't want to mount to the outside of the frame bracket. Am I doing something wrong or are things out of whack? I've never put together a suspension like this.
Pass side shackle
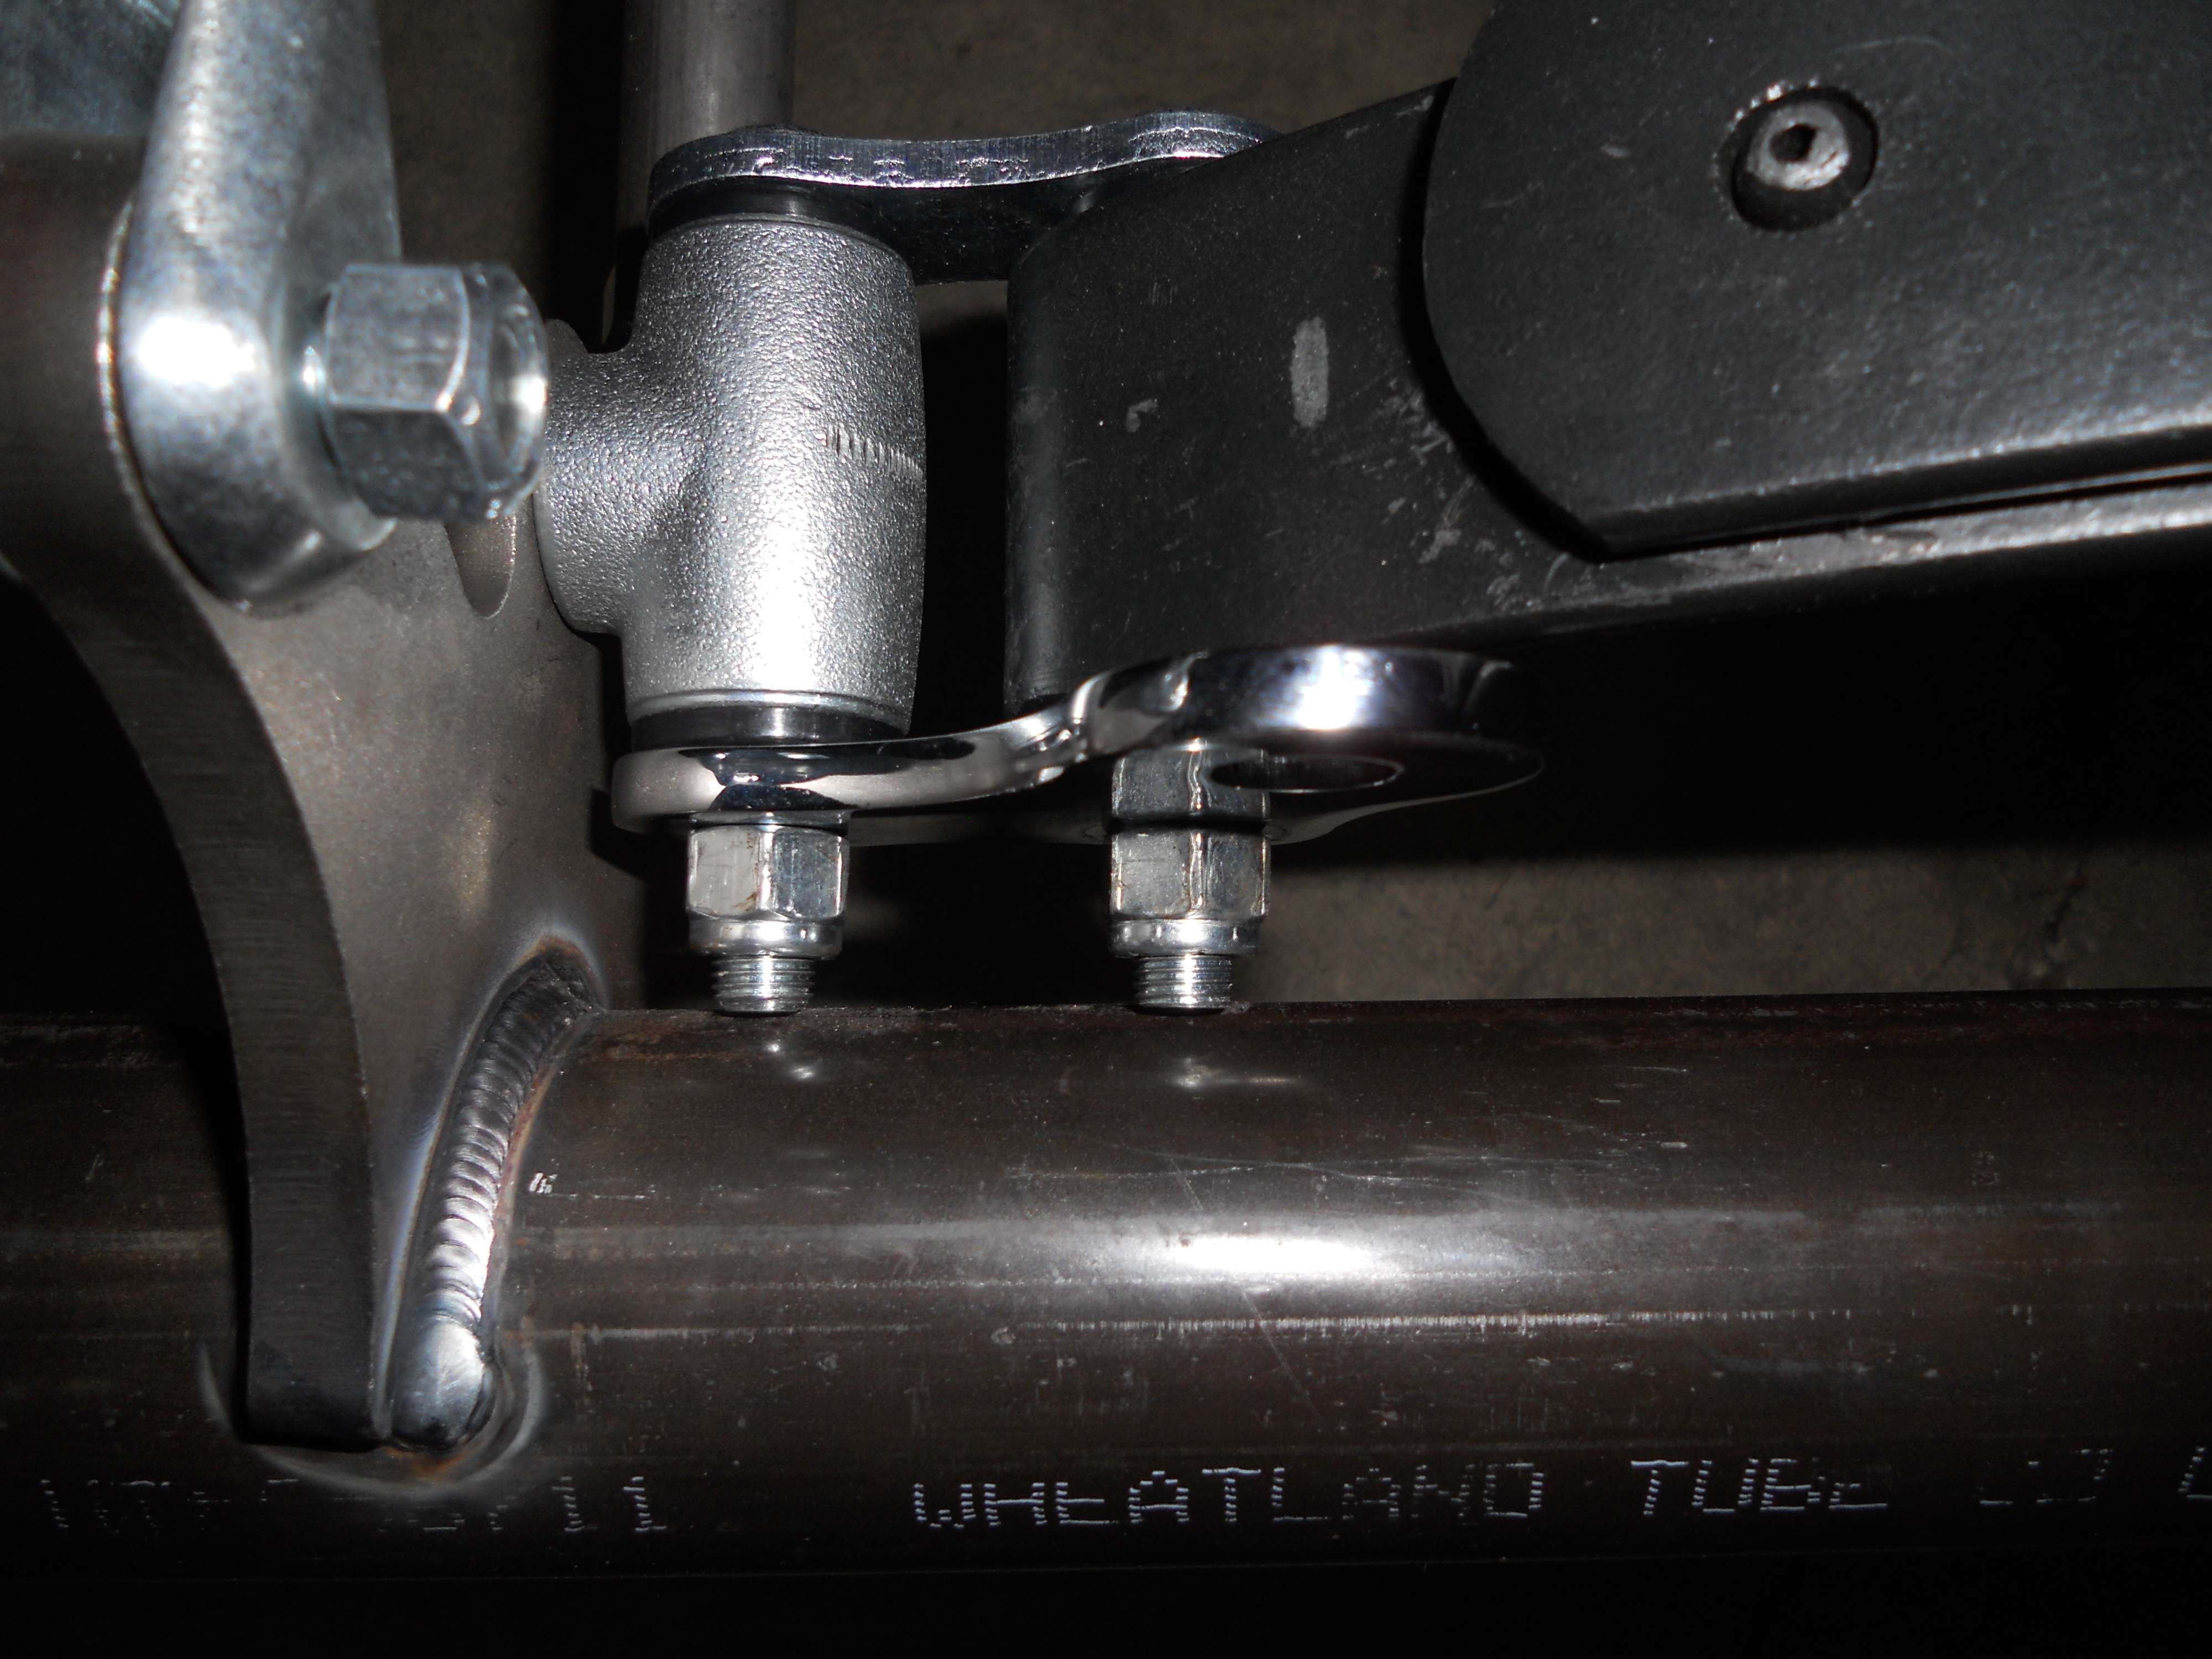
Drivers side shackle

pass side axle bracket
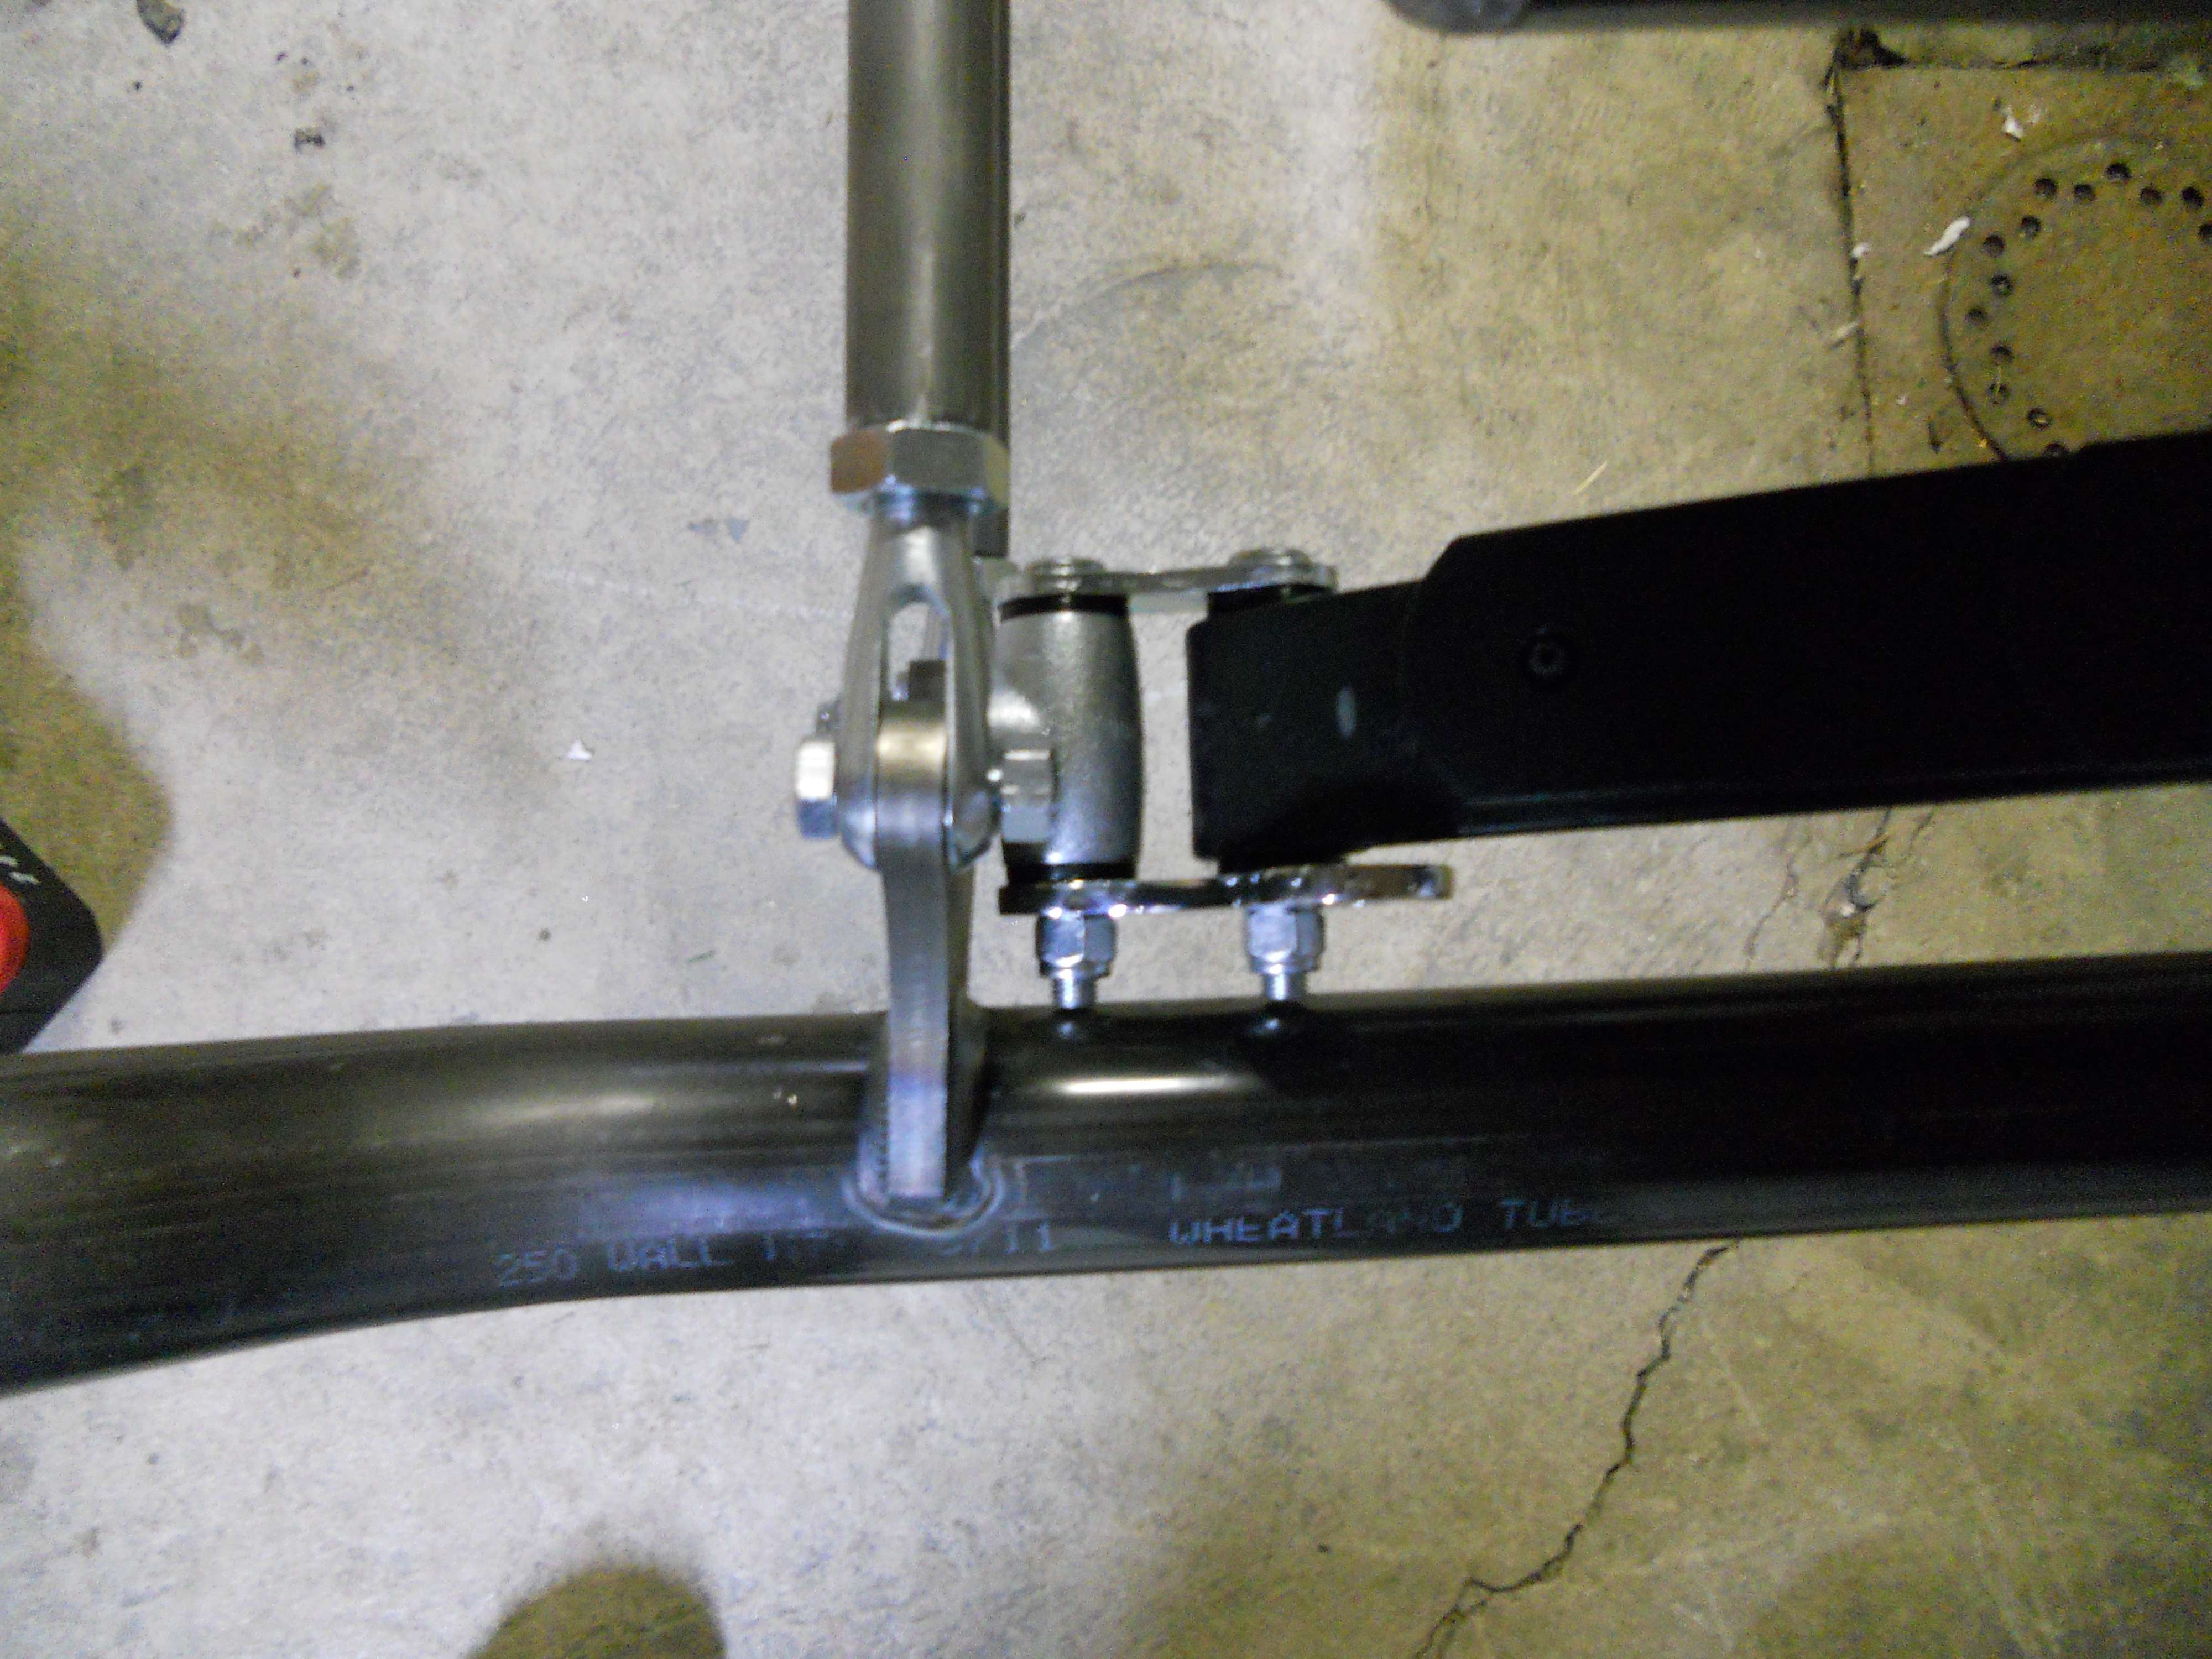
Drivers side axle bracket hard to tell from the picture but it is angled in more than the pass side.
Pass side shackle
Drivers side shackle
pass side axle bracket
Drivers side axle bracket hard to tell from the picture but it is angled in more than the pass side.
There is a problem with the front axle and spirit is going to take care of it. They are sending me another axle and shackle brackets. Thanks guys!
Thanks guys! Yep what I did was I took a permanent black marker and marked all the lock nuts I used while putting the front suspension together so I would know what ones to replace with new. I went and bought regular nuts from napa for the rest of the assembly so the other lock nuts won't get used until the final assembly.
Similar threads
- Replies
- 0
- Views
- 891
