Garage Merch                Ron Pope Motorsports                California Custom Roadsters               

My ProjecTee

If you're going to use material that can absorb moisture, be sure to dimension it so that you can cover it in a layer of fiberglass to seal it, and apply resin to any holes you cut in it. . . . Even still it could become a problem down the road.

One of the materials that are used to rebuild/re-core rotted out boat transoms would be my suggestion.
 
Hi island girl. The m.d.f is used for a buck ( form ). After I've finished shaping it I will paint it with white enamel paint. Then I will apply Vaseline over the paint ( resin release ). After the buck is completely covered with Vaseline , i'll cut out several pieces of 2 oz. fiberglass mat. The fiberglass mat will be placed over the entire buck. I will then add resin to all of the fiberglass mat. When the resin has set , I will separate my new dashboard from the buck. Before I remove my new dashboard , I will sand it ( add body filler to any lows ). It's somewhat labor intensive. I won't make a mold because i'm NOT going to make several dashboards. Just ONE for myself. HTH.
 
Hi island girl. The m.d.f is used for a buck ( form ). After I've finished shaping it I will paint it with white enamel paint. Then I will apply Vaseline over the paint ( resin release ). After the buck is completely covered with Vaseline , i'll cut out several pieces of 2 oz. fiberglass mat. The fiberglass mat will be placed over the entire buck. I will then add resin to all of the fiberglass mat. When the resin has set , I will separate my new dashboard from the buck. Before I remove my new dashboard , I will sand it ( add body filler to any lows ). It's somewhat labor intensive. I won't make a mold because i'm NOT going to make several dashboards. Just ONE for myself. HTH.


Makes sense now, not sure why I didn't understand that to begin with . . . . not enough morning coffee I guess
 
I used pine wood ( earlier ) to make the buck for the rear window recess. I thought i'd give the m.d.f a try on the dashboard buck. The m.d.f is great ! No more pine wood for me !
 
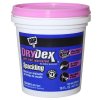
dap-patching-repair-12348-64_1000.jpg I'm using this stuff to fill in the low places on my dashboard buck. I changed my mind about using Bondo ( plastic body filler ). This stuff sands real easy. I still intend to use body filler on the outer surface of the fiberglass dashboard for any low areas.
 
There's a fellow who has a ," how to " video on youtube. He builds a 1926 model t roadster body. He recommended using the m.d.f. So , I gave it a try. As you know ; it's great stuff. Your dash looks great !! We are only limited by necessary tools , necessary materials & a vivid imagination.
 
I'm going to use 22" x 28" white poster board to make my templates. I will cut out 2 pieces of 2 oz fiberglass for every single template. I have to make 10 templates. So , 20 pieces of 2 oz fiberglass mat. I purchased 2 poster boards to make sure I have enough. I'll take some photos tomorrow before I add the 2 oz mat. I promise .28 x 22 poster board..jpg
 
DSCN0610.JPG DSCN0611.JPG DSCN0612.JPG DSCN0613.JPG DSCN0614.JPG Here's the photos I promised. I was busy today making templates ( patterns ). I was fighting against gusting wind most of the day. Light weight poster board & wind don't mix. I'll try to get the rest of the patterns cut out tomorrow so I can start glassing. The gauge cluster was too tall so I quickly added a piece or m.d.f. Problem solved.
 
Glad you like it island girl. I did 50 pct. of the glassing today. Will try to finish the last 50 pct. on Monday. I applied 2 layers of 2 oz. fiberglass mat. I glassed 7 sections ( which involved 14 pieces of mat ).
 
I glassed the top of the dash & the 2 end caps today. It was 106 degrees today. Supposed to be 107 degrees tomorrow. During these high temperature days , I use 25 percent hardener in my resin. I started making another buck. The new buck is for the rear spoiler that will be glassed to the pickup bed's cover.
 
I would need dimensions ( in inches please ). I am really enjoying the creativity. I could give it to you in a rough form & you could finish the cosmetics. P.m me for anything further. I'll help you if I can. I am greatly impressed by your skills. Lookin' forward for anymore progress.
 
DSCN0615.JPG DSCN0616.JPG DSCN0617.JPG DSCN0618.JPG This is the ugly stage of glassing. I have to trim it ( cut away the extra resin & fibers. If you look at the lower portion of the dash , you'll see where I've trimmed . All of the glassing is finished now. I'll take more photos of the dash after it's trimmed ( more presentable).
 
DSCN0619.JPG DSCN0620.JPG DSCN0621.JPG This is my rear spoiler buck in the early stages of development. Looks like a stairway. LOL !! I'll fill the stairs in with plaster of paris.
 
Last edited:
I filled in some areas ( especially the staircase ) with plaster of paris today. I'm letting it all dry over night.
 
My 2 initial cuts were wrong. But , I think I managed to add to the mistake & bail it out. I am now re-inspired & my creative juices are flowing once more. I stared at the big mistake for a long time..... then a light turned on in my head. I think the operative word would be , " EURICA ".
 

     Ron Pope Motorsports                Advertise with Us!     
Back
Top