Ron Pope Motorsports                California Custom Roadsters               

Kaaso's T

Kaaso

Member
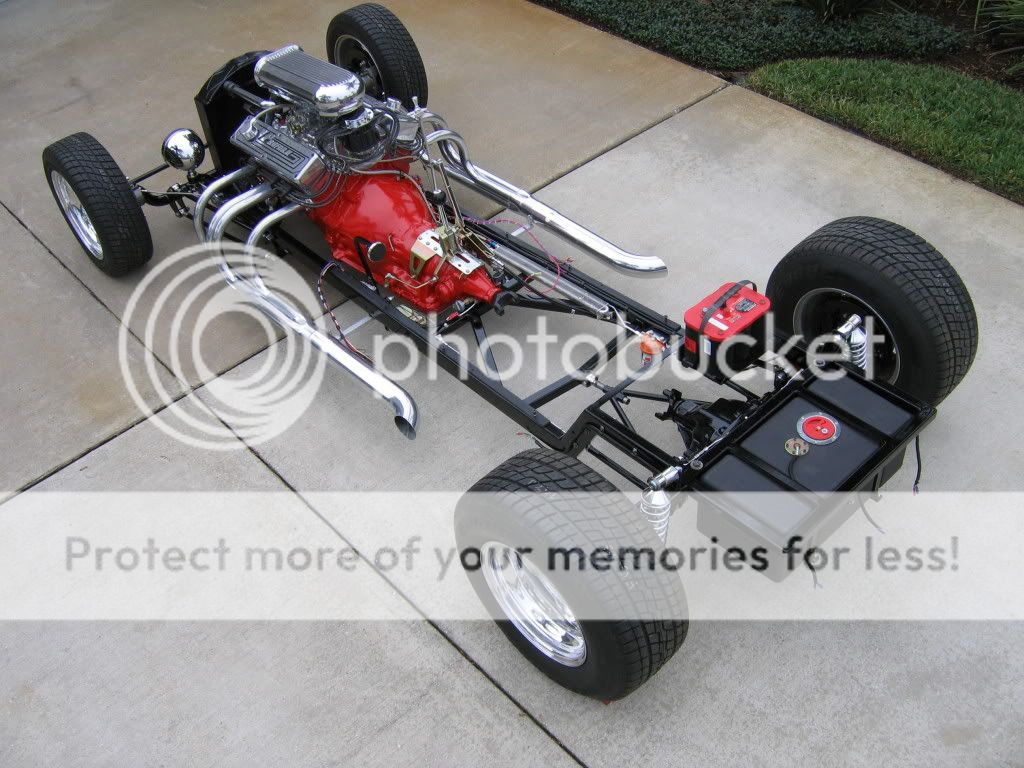
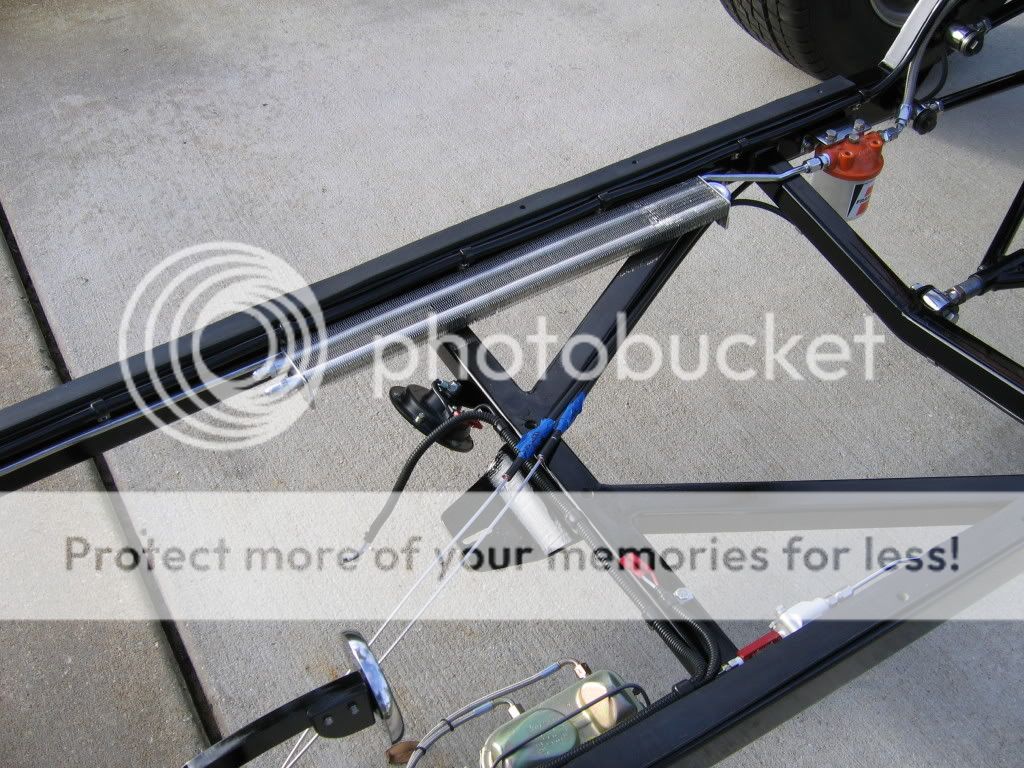
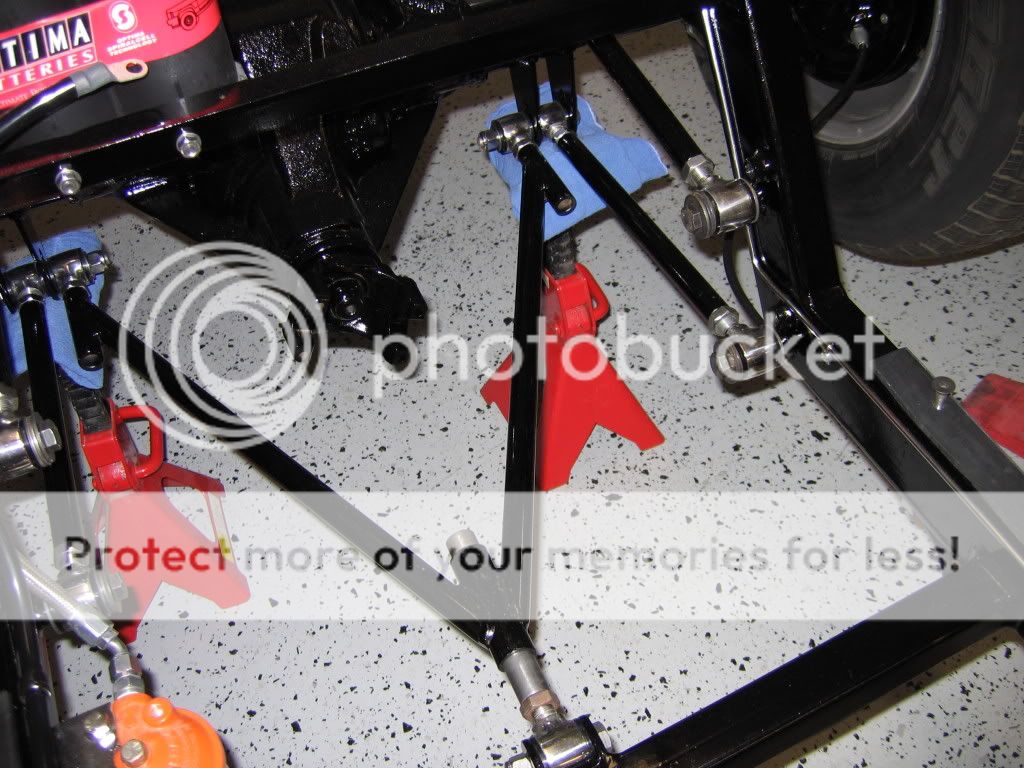
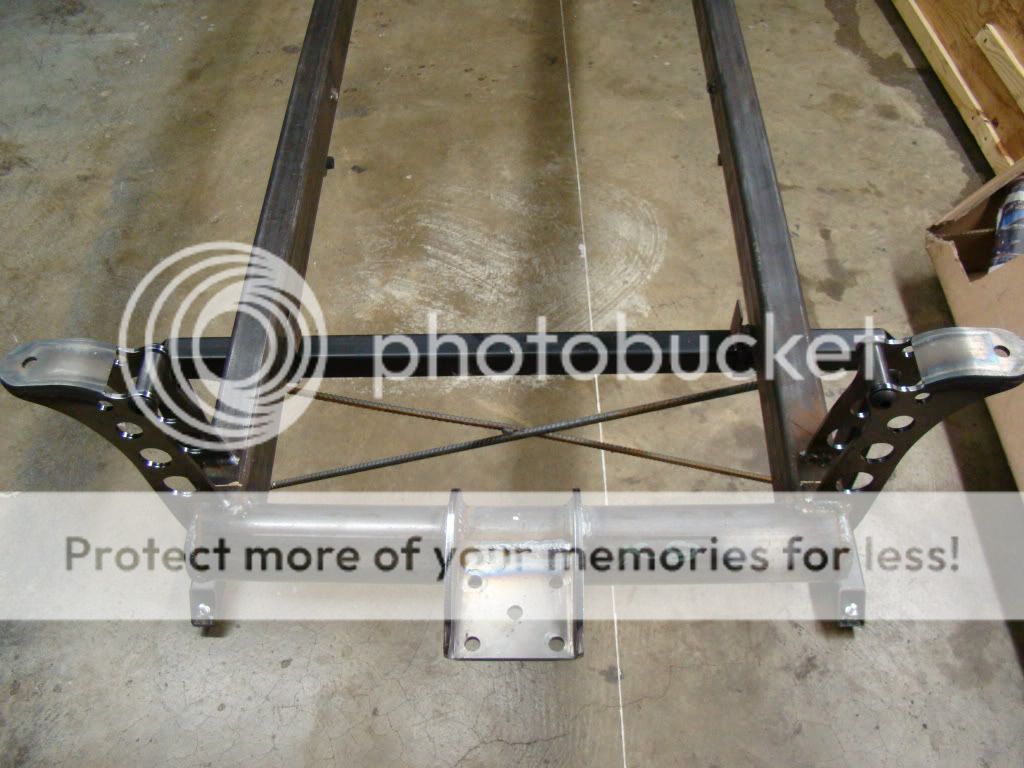
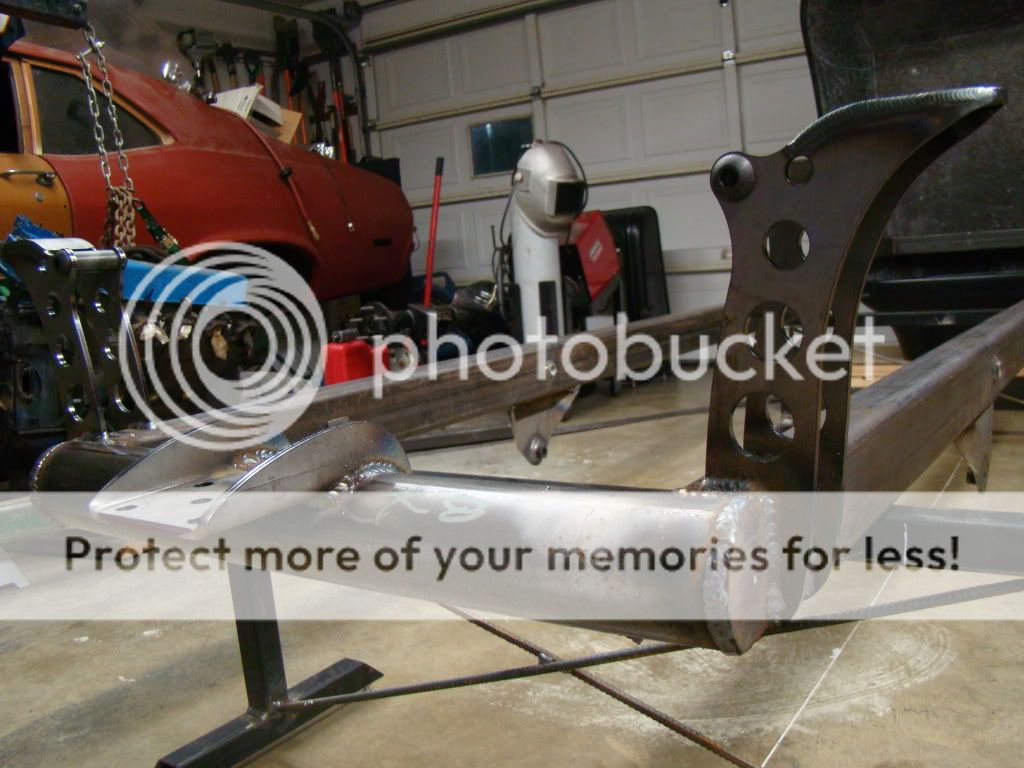
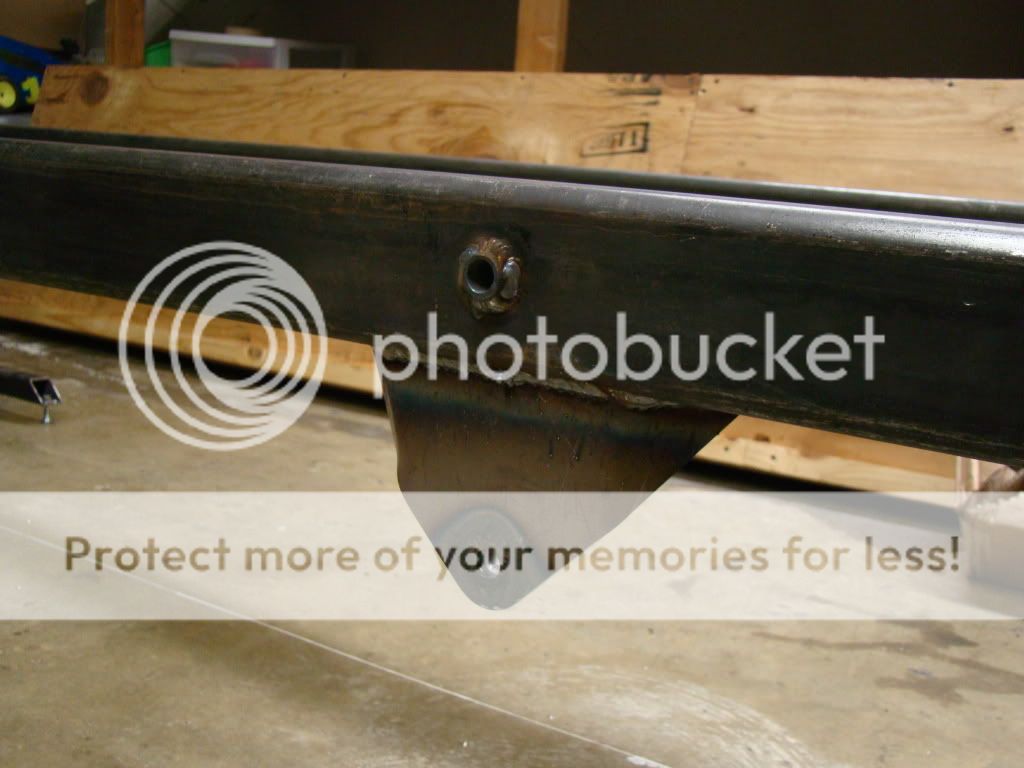
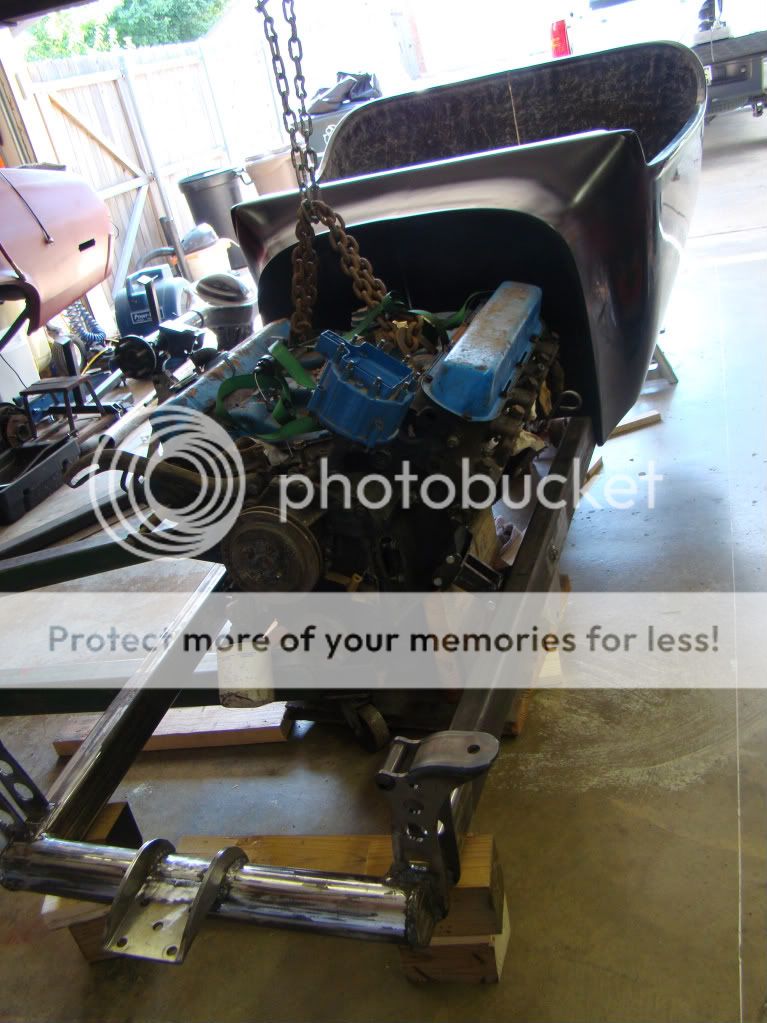
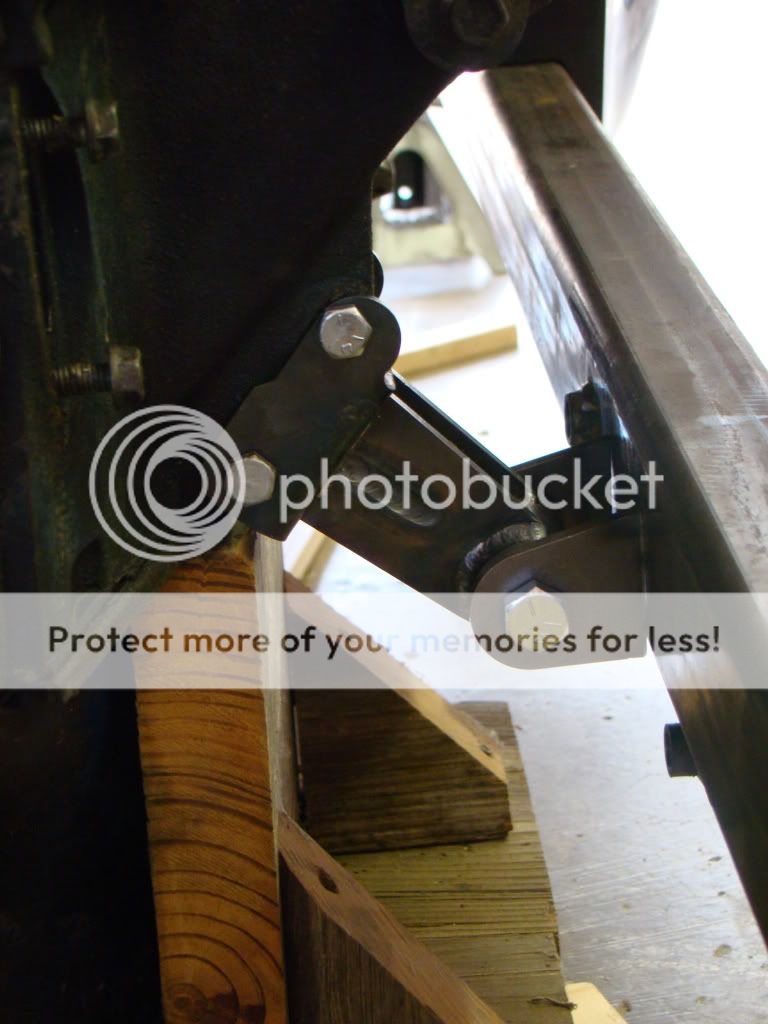
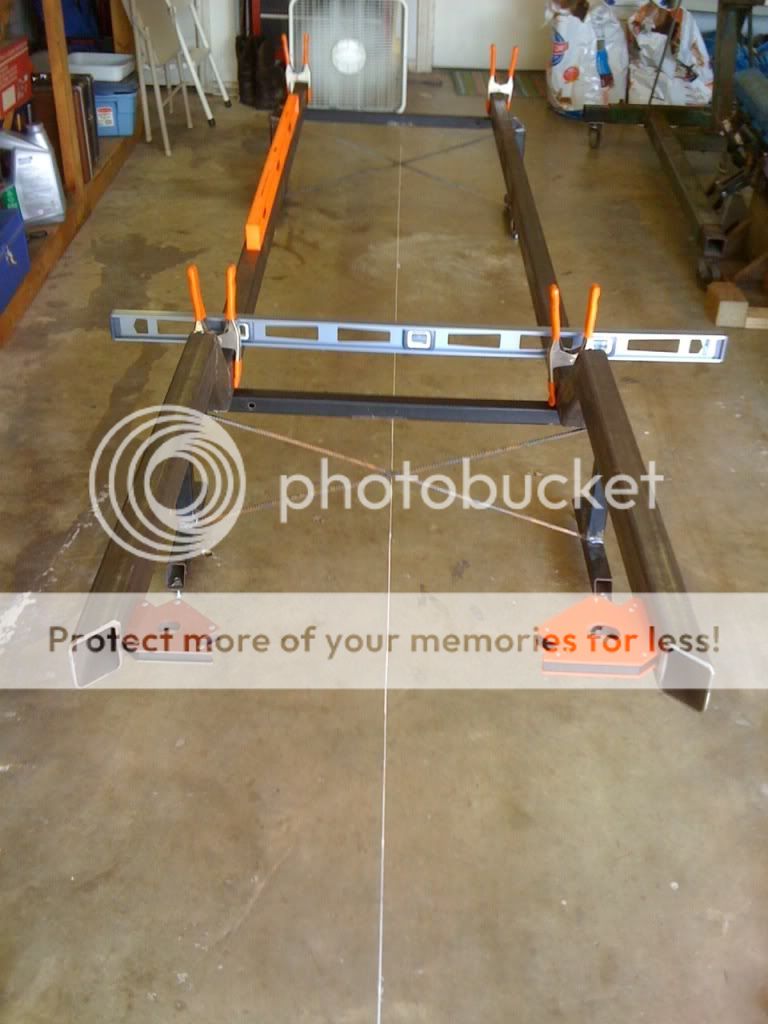
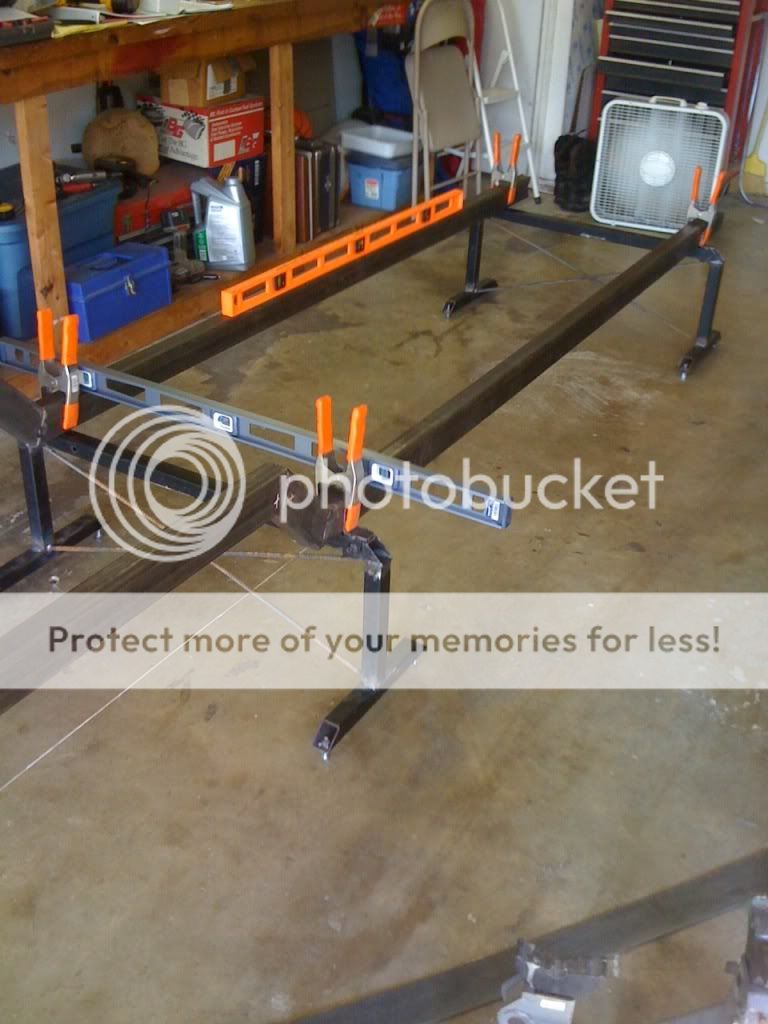
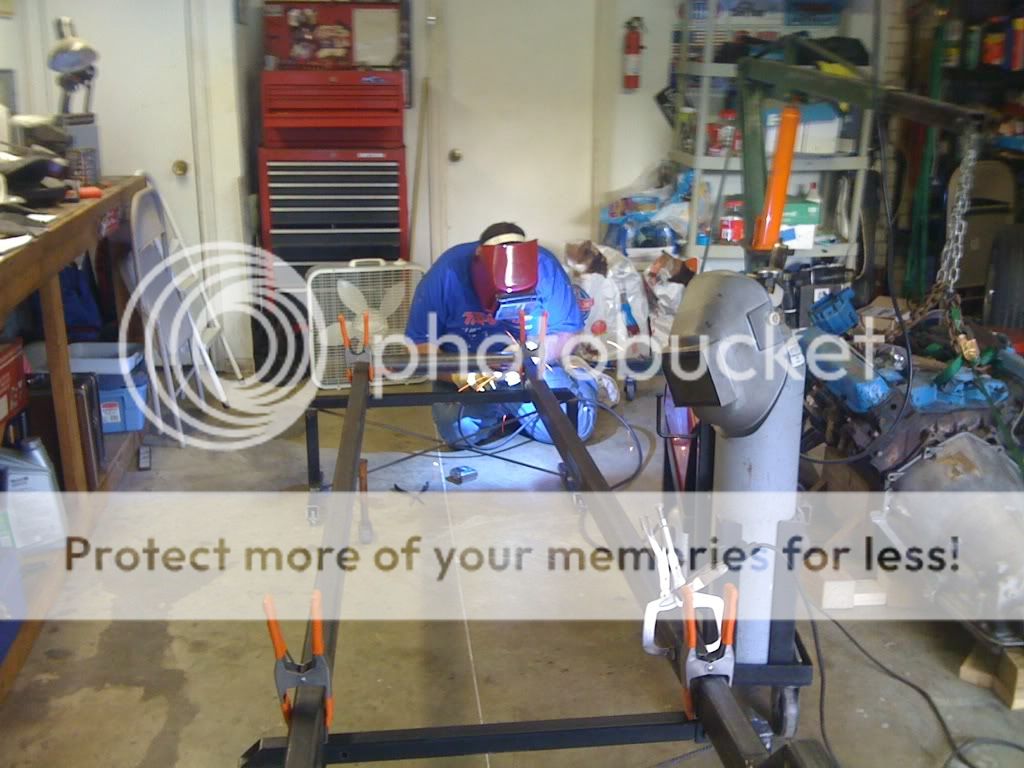
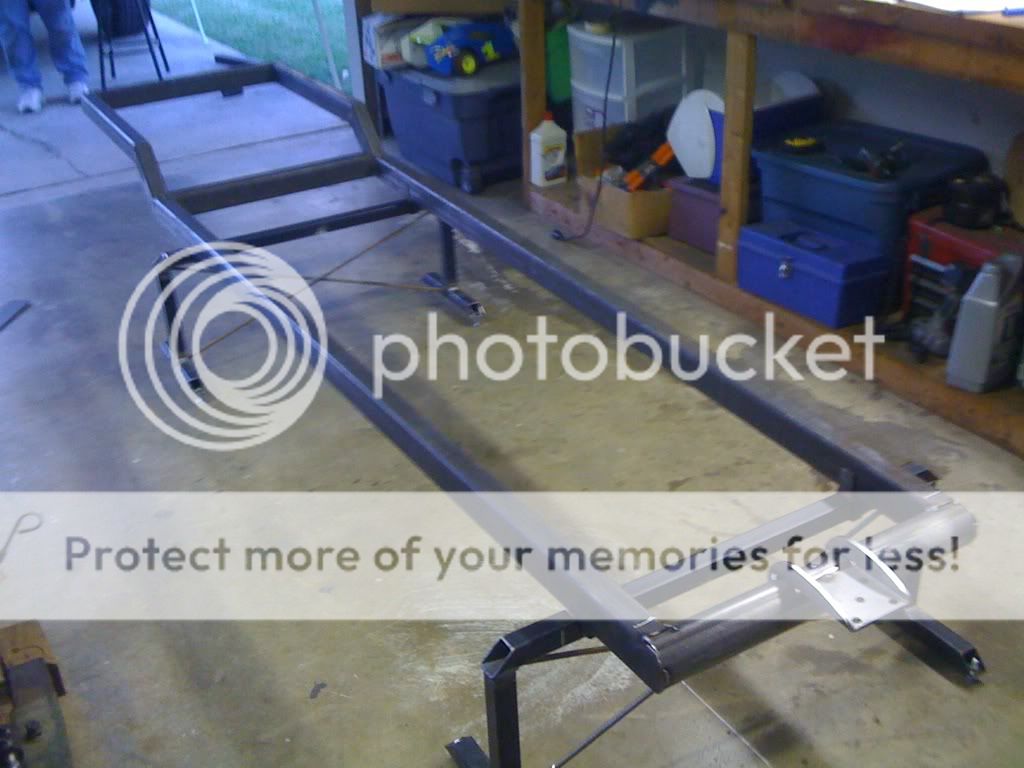
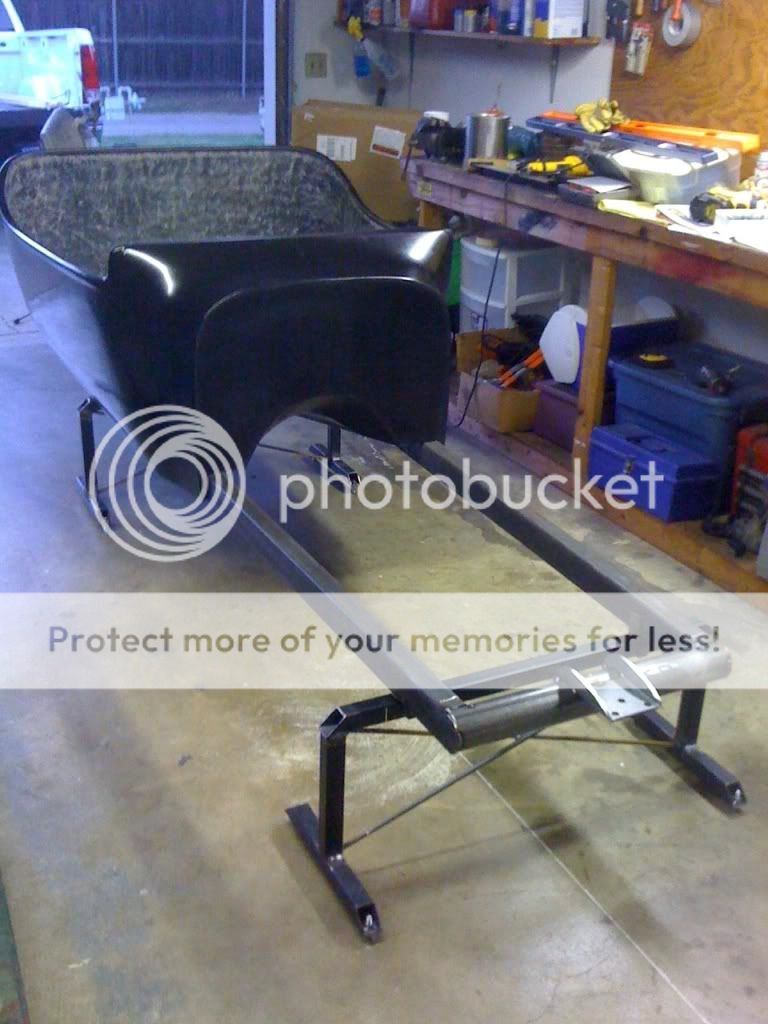
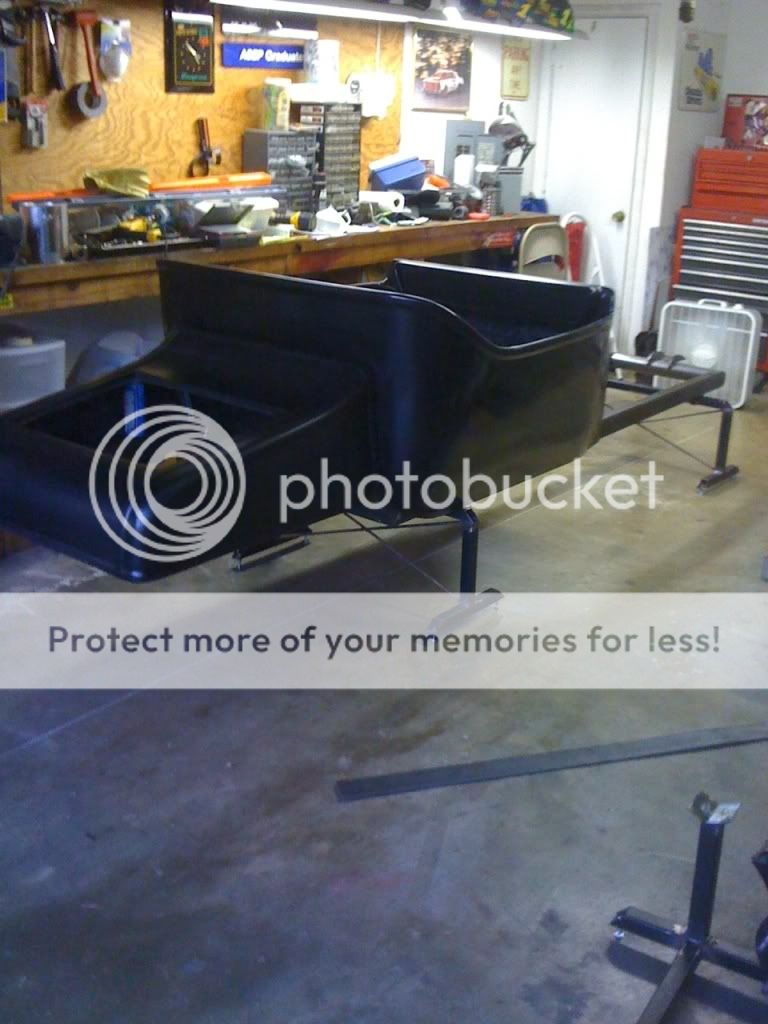
Hey guys just wanted to say HI and let ya know we have made some great progress in a short time. We built a wooden jig to set up the frame rails. Once those were tacked we built 2 small jigs to help set up the layout of the frame. Yesterday we were able to get the whole frame tacked up and ready to be fully welded. Since I dont have a welder big enough to do the job, I am going to take the frame to a friends house this coming weekend to weld it all up. I have the body, turtle deck, steering box and most of the front suspension already purchased. So I have plenty to keep me busy for a while.

Guys, please understand this is my first street rod build and I have and will make plenty of mistakes. I do have my brother and a friend who are helping out, both to whom I owe a big thanks for their help thus far. Thanks for listening to my story and we will keep in touch.:tip:


Sorry about the large pics, I will resize smaller next time.:rolleyes:

Jig20.jpg


Jig22.jpg


tackingnose.jpg
tackedframe.jpg
mockup1.jpg
mockup2.jpg
 
Casey, I hope that cross member close to the rear of the body will not be staying in there??? as it will be in the way later on... Looking very good otherwise, and why do you think your welder is too small?? I used a 110 powered SMALL wire welder (Mig) for years at Richard's, we built many, many cars of all shapes and sizes, none ever came apart at any welds... Build safe.. :rolleyes: PS, just remember to clean and chamfer all areas to be welded...
 
Looks like progress is being made. Remember keep measuring to keep everything square in the building process. Why the fan it is only 72 degrees here was 57 this morning. My kid is in the Air force in Wichita falls Texas isn't real keen on the heat.I agree with ted that will be in the way of the driveshaft. Here is a pic of RPM's frame.
th_frame-1-1_1_.jpg
Crossmember is usually the center support. I actually have 2 cross pieces right at the back to help support the gas tank . Some people I have seen weld fishplates to the sides of the angle to help reinforce that are if you are worried about strength. Sorry just started rambling.
 
Sorry, I should have specified...that rear cross member is only temporary. We used it there to help me fold in or narrow the frame at the front. I was just gonna leave it there until all the welding is complete. Once things are laid out a little further on the frame, we will add the trans crossmember, etc. And I am sure a few small braces will be added along the way as well.


Ted-- I know many people have built plenty of good cars with a 110V welder. That has been my plan all along. But I did some test welds on some scrap material and I just was not happy with the amount of penetration I got. I admit I am not a professional welder by any means but I know I can do better with more voltage. So that being said, I dont mind waiting a few days to have a better product in the end.


Putz-- The fan is there to try and help with the 100+ degree heat here in Texas. My garage faces the west and that evening sun is a killer in the summer time. :rolleyes: :tip:
 
Looking sweet! I hope to start on mine before the end of the month. Most quality 110v welders set up on gas are good to 1/4" thick material. Did you "V" out the joints? Make multiple passes? Also, if there is still concern with penetration, you can pre-hest the joints with a propane torch. But in the end, do what you feel safest doing and if that its having someone else weld it, or using a larger welder, then do so. Keep us updated!!!!
 
Looking sweet! I hope to start on mine before the end of the month. Most quality 110v welders set up on gas are good to 1/4" thick material. Did you "V" out the joints? Make multiple passes? Also, if there is still concern with penetration, you can pre-hest the joints with a propane torch. But in the end, do what you feel safest doing and if that its having someone else weld it, or using a larger welder, then do so. Keep us updated!!!!

Always had a sweet spot for turtle decks and their derivatives. Looking great and i see you have channeled it over the frame... way to go.
 
Since my car is a turtle deck model, perhaps these pictures may help you on your frame build.

IMG_0673_2.jpg


IMG_0652.jpg


img052.jpg


I hope that it can be of some use to you.

Jim
 
Since my car is a turtle deck model, perhaps these pictures may help you on your frame build.

IMG_0673_2.jpg


IMG_0652.jpg


img052.jpg


I hope that it can be of some use to you.

Jim

Really nice pics and advice as usual.
 
Ex junk...I really like those pics. How big is your fuel cell? Any more shots of the rear suspension? I like that 4 bar set up.
 
Ex junk...I really like those pics. How big is your fuel cell? Any more shots of the rear suspension? I like that 4 bar set up.

My fuel cell is 10 gallons.

The rear suspension is old drag racing set up called an adjustable "four link". It allows you to dial in how you want your car to "hook up" coming out of the hole. You are effectively making a longer or shorter traction bar depending on the bars location. The rear end is kept in place with a "wish bone" rather than a panard bar. This allows the rear to move up and down in a completely vertical motion.

In the pictures below you can see the different mounting points for the bars. There are two possible positions on the upper bar whereas there are four possible positions on the lower. This makes for ten possible combinations of the upper and lower effectively lengthening or shortening the effective traction bar.

IMG_0675_2.jpg


IMG_0676_2.jpg


Perhaps this link will help explain how it works better for you.

http://www.afcoracing.com/tech_pages/4link.shtml

I hope this is of some help to you.

Jim
 
Since my car is a turtle deck model, perhaps these pictures may help you on your frame build.

IMG_0673_2.jpg


IMG_0652.jpg


img052.jpg


I hope that it can be of some use to you.

Jim

thats just such a cool chassis shot. Nice work and my congrats to you
gerry
PS I know I dont have to put my name but its just habit from years of letter writing in my old job. Dohhhhhhhhhh
 
Gerry, thank you for the kind words. I try to always sign my name to make my posts more personal. A screen name just seems so impersonal to me. You could say that I'm "old fashioned" because I always try to spell correctly, and use proper punctuation along with signing my communications but that is the way I was brought up and educated. ( With both my mom and sister being English teachers I didn't have much choice. LOL )

I like the work that you are doing on your ride. Your front suspension is VERY similar to a former Dan Woods car that a friend of mine owned. A very slick looking system. Keep posting your progress pictures as I always look forward to checking them out.

Jim
 
Casey looks like you've got a great start there. :thumb:


Jim, I never get tired of seeing the ExJunk T :)
 
Just wanted to jump on here and give a quick progress report. I ordered a 4 link front suspension kit, so we were able to get that mocked up and installed. Got the front spring perch on, radius rod mounts drilled and tacked into place. We did run into a small hiccup with the front axle. After measuring our holes for the trailing end of the front radius rods, we noticed the right side bars were not lining up worth a hoot. So I removed the axle and placed it on a flat surface and started measuring. It appears my new axle with the "jig' located and welded mounts is not correct. I found the RH radius rod mounts are not square to the LH side. Also found the RH king pin sleeve is welded on 2 degrees different than the LH side. (I'm sorry I dont have pictures) Needless to say, that pretty much let the wind out of my sail for the day. Please understand I dont want to speak ill of a company but when you pay $1346.99 for a kit, I do want it correct. But oh well, I guess if that is the only issue I run into I am pretty fortunate.

Today we carried the frame over to a friends house, he welded up everything on the frame for us. Hopefully, Tuesday I will get my axle shipped back and get another one on the way. Now it's time to get the ole grinder out and start smoothing out some welds. Thanks fior all the positive comments and encouragement. You guys are great!!

Tbucket8-22-10002.jpg


Tbucket8-22-10005.jpg


Tbucket8-22-10003.jpg

You are on the right track. By measuring at least you know if there is a problem and can take steps to correct it before you look at your finished ride and try to figure out why it sits down on one side. My Dad always said 'measure twice cut once'. And 'an hours thinking is worth 2 hours working'. Sounds and looks like you will build a really well engineered ride.
Gerry
 
Hey guys, just wanted to give an update on the little bit of progress we made this weekend.

We finalized the position of the engine and trans inside the frame; as well as how the body will sit on the frame. I had purchased some generic style engine mountsfor my engine off of Ebay. With a little bit of cutting and pasting everything went together well. We also fabricated the trans crossmember (forgot to take pictures of that!) and got it all tacked together.

Hopefully this week I will get my front axle back and can refocus on the front suspension. Its kind of funny, my buddy and I were joking today, that we worked for 6 hours and all we got accomplished was 2 engine mounts and a trans crossmember! It's a good thing we are not trying to make a living building these things!! We would starve!!!! :laugh:

Tbucket9-6-10001.jpg
Tbucket9-6-10003.jpg
 
Hi Casey, great to see another T coming together. Seems you are using a Cad 500/400TH combo. Any fitment problems so far? That's the same combo I plan on running. Any thing different about frame wall thickness or motor mount/trans mount or anything else concerning strength or torque (500 Cads are torque blessed). Will you be modifying the engine? Please keep the board up to date.

John
 
Ted is absolutely correct, I am using 2x3x3/16" rectangle tubing.

John I do have plans to do a bit more than a stock rebuild on the Cadillac engine. I want (depends how the money goes) to use aluminum heads, intake, shaft roller rockers, forged pistons ,H-beam rods etc. I am aware this is major overkill for a T-Bucket but I want a nice piece when I'm done. I also figure if it is just waaaaayyy to much power...I've got a '72 Nova that engine would go into nicely.

The trans I am using is a 700R4. When built properly they will handle some big HP and torque numbers. But also we have to keep in mind this is going into a 2000 lb car. I doubt the tires will hold too much...therefore I dont believe the trans will be taking alot of abuse. Plus I should be able to cruise around 70MPH at about 1800 rpm. :cheer:

As far "fitment" problems......hehehe...I'm not sure....I've never built one of these before so everything is a "cut-n-paste" project. I can tell you, my original thought of using a Corvair steering box is probably not going to happen. The Cadillac engine does take up the space i had set aside for the steering box. But no worries a Vega box will work too. Again, we are pretty much building this from scratch, so I change my mind or ideas on stuff daily depending on how i like the looks of something.

Next order of business for me is brake pedal design. I hope to get to look at some cars this weekend at a local car show to give me some ideas.

Thanks for everyones positive comments here.. You guys are great!
 

     Ron Pope Motorsports                Advertise with Us!     
Back
Top