

You are using an out of date browser. It may not display this or other websites correctly.
You should upgrade or use an alternative browser.
You should upgrade or use an alternative browser.
Kaaso's T
- Thread starter Kaaso
- Start date

one finger john
Active Member
Casey, congratulations. That is so exciting to have a true roller with engine /trans. You've accomplished a ton. What next? The steering? I have to ask, how did you determine the mount points for the rear suspension? It seems that some of the brackets that are available have numerous mount holes to cover all angles as far as bite, ect. Also, could you have mounted the coilovers in front of the axle? I know it is a matter of a couple of inches, but I have heard that on sprintcars the suspension points are furthest to allow the car to "see" a a longer suspension therefore have a smoother ride. What is the wheelbase of the car as it sits? Do you have a realistic projected weight? Have you sat in it and made the "rumrum" sound (you know you will)? I'm jazzed to see a car built the way I would like to do it, especially with the 500 cu. in. Caddy. Do you have professional experience in building cars or did you have guidance and help from someone?
Any way you slice it, great job! Between English Gerry and your build I'm looking forward to seeing the completed results.
John
Any way you slice it, great job! Between English Gerry and your build I'm looking forward to seeing the completed results.
John
Kaaso
Member
Thank you everyone for the kind words.
One finger John- The steering is next. I have my Unisteer rack purchased, just need to get it mounted up. Once that is done then time to decide which column and where to put it.
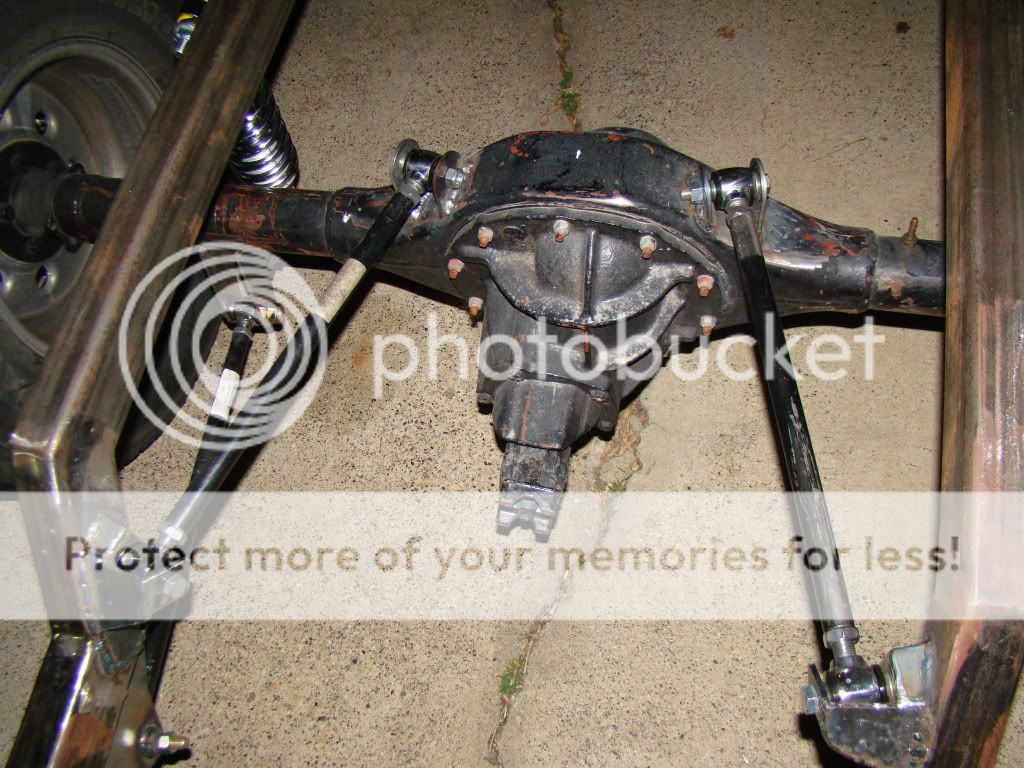
As far a the rear suspension points goes. I purchased the lower bar brackets as well at the tabs for the rear of the upper bars. I fab'd the forward mounts for the upper bars. I looked at every triangulated 4 link kit I could find and found nothing that wasnt over-priced and would not completely suit my needs. So thats why I pieced mine together. As far as the location of the mounting points go.....I just made an educated guess. I looked at every vehicle I could find and rear every article i could read and found no one does anything the same way. The lower bars are about 10 degrees and the upper bars are at 5 degrees.
I spent many years around our local dirt tracks and many years racing RC so I figured I will build it the way I want. If it turns out riding or handling like crap then I will learn from my mistakes and try again. Coilovers on the front? I dont know that I have seen that on a street rod (not saying it cant or hasnt been done). We ran what we called a "swing arm" set up on our dirt modified for a little while. That had the spring mounted to a point on the lower bars. Seemed like the car was really hooked in the right situation but not as stable as the traditional 2 link or 4 link.
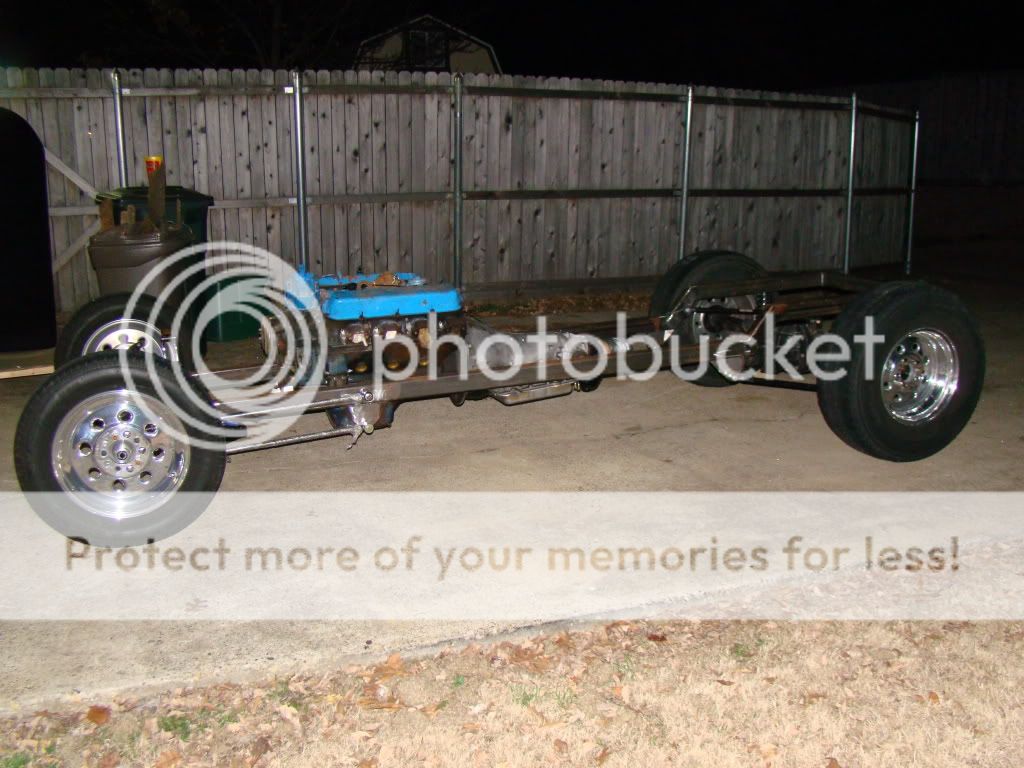
I dont have a clue for the projected weight...Im guessing about 2000-2100 lbs. The wheel base is just under 120 inches. And yes I have sat in the car and yell'd "VEROOM VEROOM!!!" Hehehe!!! Heck I did that before the chassis was built and all I had was the engine. Thanks again for the compliments.
Casey
One finger John- The steering is next. I have my Unisteer rack purchased, just need to get it mounted up. Once that is done then time to decide which column and where to put it.
As far a the rear suspension points goes. I purchased the lower bar brackets as well at the tabs for the rear of the upper bars. I fab'd the forward mounts for the upper bars. I looked at every triangulated 4 link kit I could find and found nothing that wasnt over-priced and would not completely suit my needs. So thats why I pieced mine together. As far as the location of the mounting points go.....I just made an educated guess. I looked at every vehicle I could find and rear every article i could read and found no one does anything the same way. The lower bars are about 10 degrees and the upper bars are at 5 degrees.
I spent many years around our local dirt tracks and many years racing RC so I figured I will build it the way I want. If it turns out riding or handling like crap then I will learn from my mistakes and try again. Coilovers on the front? I dont know that I have seen that on a street rod (not saying it cant or hasnt been done). We ran what we called a "swing arm" set up on our dirt modified for a little while. That had the spring mounted to a point on the lower bars. Seemed like the car was really hooked in the right situation but not as stable as the traditional 2 link or 4 link.
I dont have a clue for the projected weight...Im guessing about 2000-2100 lbs. The wheel base is just under 120 inches. And yes I have sat in the car and yell'd "VEROOM VEROOM!!!" Hehehe!!! Heck I did that before the chassis was built and all I had was the engine. Thanks again for the compliments.
Casey
For a picture of coilovers in the front, go here http://www.so-caltbuckets.com/FunRun6.html and look at the car in the top left corner.
Jeff
Jeff
:thumb:
Kaaso
Member
Hello guys,
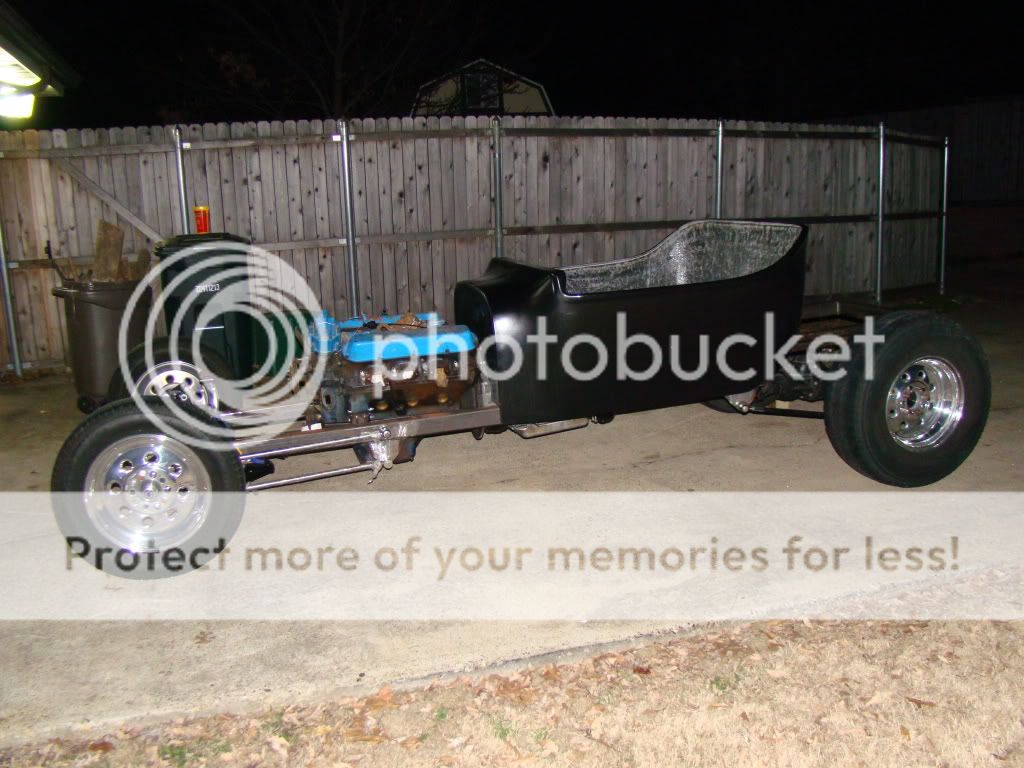
Just wanted to take a minute out and give an update. The pst 18 months has been a whirlwind. My wife and I decided to sell our house and buy a new house (old but new to us). Fortunately enough, we were able to find a house with a bigger back yard so I could build a shop. So....we built a shop!!! Now all that crazy stuff is out of the way....it time to get back started on my T-bucket.
I am presently working on the steering. I am planning on using a Unisteer cross steer rack and a Steer Clear box to acheive the look and function I want. I will be posting more pictures very soon with some updates.
My new email is kaasobaker@gmail.com
Here is a pic of my new shop and a couple of bucket pics.
Kaaso
Member
Just wanted to give an update and post some progress pictures. The last month I have been trying to move forward with the project. I was able to get the steering column and steering rack mounted as well as the shaft and u-joints completed. I had some friends come over and fiberglass in a new trans tunnel for me. I was a bit nervous playing with fiberglass for the first time. While I am by no means an expert, its really not as hard as it seems. Next I moved on the the brakes, the brake pedal placement was a big challenge for me. I know all the agruements about why some folks like it "there" and some folks like it "here". Again, I called on a trusty friend and we were able to get the brake pedal and booster/master cylinder sorted out and tacked into place. Today, I pulled the Ford 9" rear end out to tear it down and get parts ordered. I will have to get pictures of that later in the week.
Please take a look at my pics and feel free to comment.
Thanks again!


Please take a look at my pics and feel free to comment.
Thanks again!
Attachments


trikerchewie
Member
big pictures are fine by me! wicked workSorry about the large pictures...I will shrink them down more next time.
one finger john
Active Member
The pictures are jes fine!Sorry about the large pictures...I will shrink them down more next time.
Kaaso
Member
I did not build the pedal assembly. That pedal is from Speedway but I did have to slightly modify it to make it work the way I wanted. If I were doing it again, I would seriously look at the pedal from California Custom Roadsters. When I bought mine I had not been able to find any pics of theirs, but since then, I have seen one and it looks pretty good. Wintec also has a good looking pedal assembly. Hope this helps...
Casey
Casey
Similar threads
- Replies
- 22
- Views
- 4K
- Replies
- 19
- Views
- 556
