Ron Pope Motorsports                California Custom Roadsters               

Scratch built steering column

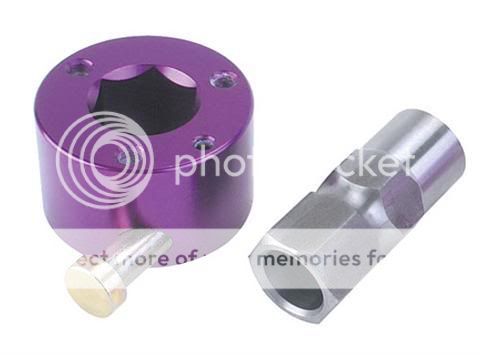
OK..Now i understand why we're having problems. Your box originally had a shaft without a coupling in it. It was one piece from inside the box to the hub. Some where along the line, it's been cut off.

I guess I would weld a stub to the end of the box shaft for a coupler. Never used one of these. If RPM is out there maybe he could help us out here.

The hub is made of either aluminum or pot metal. You can't weld either one. I'm afraid you need to get another kit.

I'm not trying to pee on your birthday cake. I just want you to have a safe and sound set up.

Ron
 
I have heard of guys running a bolt through a coupling and then thorugh the steering box shaft, that is where I got the idea.

Would this hub work for the steering wheel? The coupling is made to be welded to the shaft and has a quick disconnect for the wheel attachment. It's from Speedway. Looks good to me, but I'm a noob.:eek:

hub.jpg
 
That's a good one to use. The hex on the shaft stub works like a spline.
 
Youngster said:
That's a good one to use. The hex on the shaft stub works like a spline.

Yea, it looked pretty stout to me too and the price is right at $18!

Now, I just have to figure out if a bolt running through my shaft tube and steering box shaft is a good setup.:confused: I hate being a newbie.:mad:
 
Youngster said:
I've been asked how I build a steering column from scratch. Here are acouple of quick sketches.

I build my own columns, and the design is similar to yours. Here a couple pictures and a breif description.
I use 1.625" x .120" round tube for the outer column, and .750" x .188 for the inner shaft. For bearings I use 1.375" od x .750" id flanged bearings. Wheel barrow wheel bearings at you local hardware store LOL. But I use a little better quality bearing from Mcmaster-Carr. At the top, the bearing stays in by the weight of the steering wheel, at the bottom, I epoxy the bearing into the tube, just to hold it during assembly. Then the bottom mount holds it in place. And only the 3/4" shaft sticks out the firewall. The flared piece at the top is a copper 1.5" x 3" bell reducer. I tig weld it on with silicon bronze rod. I thread the inner shaft 3/4-16, and also thread the wheel adaptor the same, and screw them together. I put a nut on first, then the adaptor, the a lock washer, the another nut with lock tight. I have done several of these this way, and it works pretty good, and is pretty inexpensive.
I also make a top mount that goes behind the dash, but it isn't done yet on this one, so no picture of it.

100_0173.jpg
 
tfeverfred said:
I have heard of guys running a bolt through a coupling and then thorugh the steering box shaft, that is where I got the idea.

Would this hub work for the steering wheel? The coupling is made to be welded to the shaft and has a quick disconnect for the wheel attachment. It's from Speedway. Looks good to me, but I'm a noob.:eek:

hub.jpg
This is what I have on my car.
 
I am using the same one...

from Speedway. I chose it over the splined one that they sell because you can ALWAYS put the wheel back on in the same place. With a splined type disconnect, you may replace the wheel a spline or two off, or more, and you will be driving with the wheel cocked to one side or the other. I don't know if that would bother you but it would drive me nuts. ( And they say that I am nutty enough as it is now!)
 
Eureka!

Well, here's what I'm gonna do. I'm going to use this wheel hub coupler and weld it to a length of 3/4" round steel stock that will be my steering shaft.

hub.jpg


Then, I'm going to weld on this coupler and attach it to my steering box shaft.

coupler.jpg


For the column sleeve, I'll use the Total P, which comes in the length I want and has the plate attached to secure it to my floor, along with their nylon bushing. Total cost, about $90.:D

Now, I can move on to other stuff, I'm sweating about.:lol:
 
Re: Eureka!

Sounds like a good plan Fred. I didn't mean to stress you out but I had to say something. Don't want anything to happen to you or your T. OK?
 
Re: Eureka!

Youngster said:
Sounds like a good plan Fred. I didn't mean to stress you out but I had to say something. Don't want anything to happen to you or your T. OK?

Ya know, I had a talk with Rick on Sunday and he lead me in the right direction, but in my subconscience, I was trying too hard. Today, I talked to Mikey from the NTBA and he not only confirmed what you and Rick had suggested, but he reminded me of a VERY important thing. SLOW DOWN, TAKE YOUR TIME, and most important, DO NOT SKIMP ON SAFETY!

It seems I was trying to save a few dollars and cut a few corners. Not a good thing to do with something like steering.:eek: So, I'm back on track and happy as all get out. I'll post pics when I get all the parts and put them together.

Thanks again, guys.;)
 
:lol: I'm glad that's over! Onward and upward!

Ron
 
I didn't see it or I would have posted. Do a bump on it so I can see what you have to say.

Ron
 
The bell just below the steering wheel dose add a lot to finshed look,one of the EZist I've done was and alum drinking cup,cut to fit and just epoxyed in place to a few [3]screws in the pipe that made the column tube. The alum polished up looks chrome.;)
 
Great tip Dana. I've also heard of a small SS mixing bowl being used. There has to be a lot of other things out there too.

Ron
 

     Ron Pope Motorsports                Advertise with Us!     
Back
Top