Ron Pope Motorsports                California Custom Roadsters               

The Northern Build Begins on my 26 T

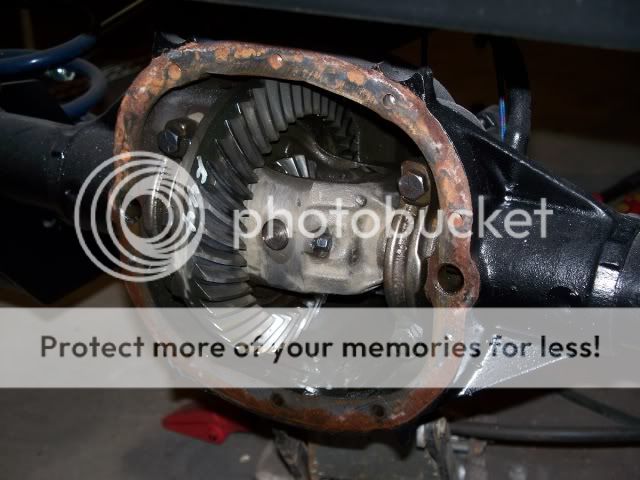
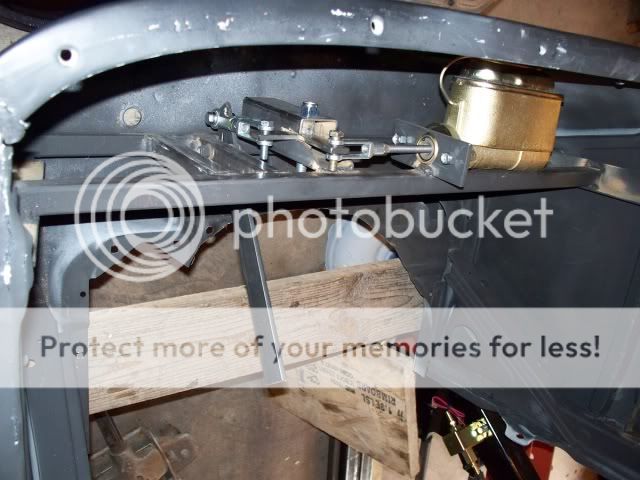
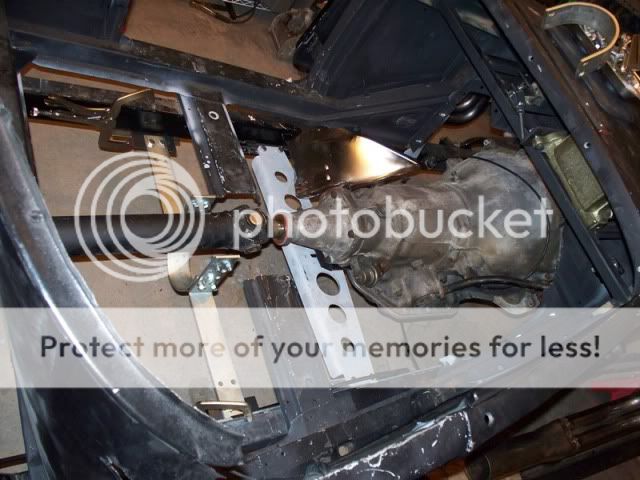
Just a side note about sand blasting rear end housings, unless you make steel block-off plates for both (axle) ends and the third member opening and use new gaskets for all to seal the housing completely from ANY sand, you will have problems for years afterwards, as ANY sand inside your housing will ruin everything... BTDT Not mine I am lucky to say, learned by someone else's mistake... I myself just wire brush and wash the complete housing before taking it apart (also do all the grinding before also) When the third member comes out, I wrap it with a big towel and pack it in a closed box to keep it VERY clean, as many have ruined their gearing with grit and grinding bits... :)
 
Thanks, I asked him to stay away from those areas and they did, I will be putting in new seals and cleaning out the old oil and putting in new.
 
Cleaned out the rear axle and installed new seals, backer plates and brake assemblies.
Z1.jpg

Z2.jpg

Z5.jpg

Z3.jpg


Working on the linkage to my cross style mount master cylinder.
Z8.jpg


And got the corvair steering box cleaned and ready to reverse the shaft.
Z9.jpg


My hand built headers for the LS motor.
100_4250.jpg


and the rear view of my LS engine with the new flexplate.
100_4276.jpg


I have not decided if I will rebuild the transmission or have it rebuilt. I have done them in the past and made my own special tools for it.
 
Just a quick note! I see you have used totally the wrong ends on the rear of that 4 bar setup, Clevises are a very big no-no in that case, (as they are not meant give movement) to use 4 bar ends at all ends, as they all must be able to swivel... Plus with the mounting brackets extended that far forward, you could end up with a leverage problem to that 4 bar setup, I would myself, keep the rear mounting points over and under the center of the rear housing, that gives a straight push and pull to those control bars... Just me here... :)
 
This was lost summer for me as I got about nothing done on my project.

This photo essay is inspirational and I promise ( to me) I'll get back on my mission.... soooon
 
My version of a 90 degree brake set up in position, just needs the proper bolts (parts run time) ( thoughts from Clamper)
Z11.jpg


Exhaust in place
Z10.jpg


And the build continues

Thanks Ted, I will be changing those out for Heim joints. These photos show more of an angle. With the car on the ground and adjusted with the jackers the struts are horizontal.
 
Todays updates.

Headlights installed.
C100_4317.jpg


Headers and rear shot of headlights
C100_4323.jpg


Setting up the drive loop. Note the trans is done and drive shaft is back in
C100_4322.jpg


Gas Tank is mounted and lines run
C100_4321.jpg


And a new how it looks
C100_4318.jpg
 
Try and get down on the floor in the center of the car, back far enough to get the whole car into the picture, that will show you/us more of how things are shaping up, and how the chassis is sitting... Much easier to change anything now, than when you get farther along... I make many changes along the way myself, as it pays to get back away from your project and check it out from a distance... Just my thoughts :) PS, You just might give some thought to using your steering box in the stock form, no reversing, just turn it around (upside down) and change the position of the pitman arm...
 
My version of a 90 degree brake set up in position, just needs the proper bolts (parts run time) ( thoughts from Clamper)
Z11.jpg


Exhaust in place
Z10.jpg


And the build continues

Thanks Ted, I will be changing those out for Heim joints. These photos show more of an angle. With the car on the ground and adjusted with the jackers the struts are horizontal.

Tom,
It looks great, I like how you did the master cylinder, it makes it so easy to check the fluid. Keep up the build pics and thanks for the kodos.

John
 
Great work and progress will have to get up your way one day.
 
looking good. You are going with a PU Bed, I guess.
Gerry
 
Drive loop done and E-brake ready for final routing and bolt-up
EbrakeSmall.jpg


So far I intend to build a wood bed with stake pocket sides.
I ordered an adjustable brake proportioner and gauges from speedway After locating that I will run the lines.
The T is setting level on jack stands right now, I need to change the rear suspension to heim joints and set the angles when it is ready to meet the floor again.
A Friend wants me to bring it to his alignment shop for a 4 wheel alignment when it is ready, but I have a ways to go for that yet.

I hope to have it on the road by spring and with the non employment it gives me more time to work on it.
 
Todays overall Pics working on running brake lines. Steering wheel and dash back in place, Radiator is out to run the lines
121020104.jpg

121020103.jpg

121020105.jpg

121020102.jpg
 
Over the weekend I ran the brake lines
100_4374.jpg


I can shift the Auto Tranny now
100_4375.jpg


and Got Belted..... er put the new belt on the engine..
Belt1.jpg
 
Tom, I've been watching this build and am really impressed by the attention to detail and the thought you have invested in this project. Could you tell me what the final wheelbase is going to be? Also any thought to running a stock length T bed (55 in.) ? Cut the center out so you could get the proper flow of lines. Or maybe you wouldn't have to. Looking forward to seeing the next installment.

John

P.S. Would really like to see a full profile shot to gain a little more perspective.
 
The wheel base is 124" and the width of the rear wheels is close to 70" wide. I have been think on a wood bed with sides and have been looking at pictures. The front portion of the bed will be raised at the tank. I am working on a Cad 3d design for the bed. Most of the special parts were drawn by me and water-jet or cnc plasma cut.
 
Starting to see more light at the end of the tunnel.
Fitting up the engine with hoses and running needed lines. Also have the 3" extension on the exhaust to exit behind the body.
100_4404.jpg


Sheet metal time for the floor
100_4400.jpg


100_4399.jpg
 
Floor is mostly done. Still have some bolts to put in
floorbpaint.jpg


Fresh primer on the floor. Little blurry
floorafter.jpg


Now to put the steering column back in and start wiring.
 
Checking the fit of the exhaust extensions
100_4410.jpg


Windshield in place, I was not to keen on the chrome supports so I got a stock black set that I will shorten.
Superior-20110114-00120.jpg


The GF caught me attempting to drive without the steering back in during my floor installing. In this photo I had cut one of the box panels and clamped it in place. Now to do the bends and make stake pockets for it along with the tubes for the edge.
100_4405.jpg


A preview of the side with the box represented.
toms26t.jpg
 

     Ron Pope Motorsports                Advertise with Us!     
Back
Top