Ron Pope Motorsports                California Custom Roadsters               

Common engine assembly errors - and how to avoid them

Keeper

Active Member
Okay with my recent issues with oil leaks and such I figured a thread that tried to address these issues might save someone else the headache of a complete teardown to fix them.

It seems that every little thing that can get you, got me on my build most resulted in a leak of some sort luckily nothing caused more then a dirty driveway. Its amazing that you spend so much time checking tolerances, torque settings and 1000 other things to make sure things run you miss all the little things, that unless you do this all the time, make up most of the mistakes.

My issues are specific for my SBC, but I am sure will apply to damn near everything else.

- check your parts for flatness - as I found out, even brand new parts need to be checked.
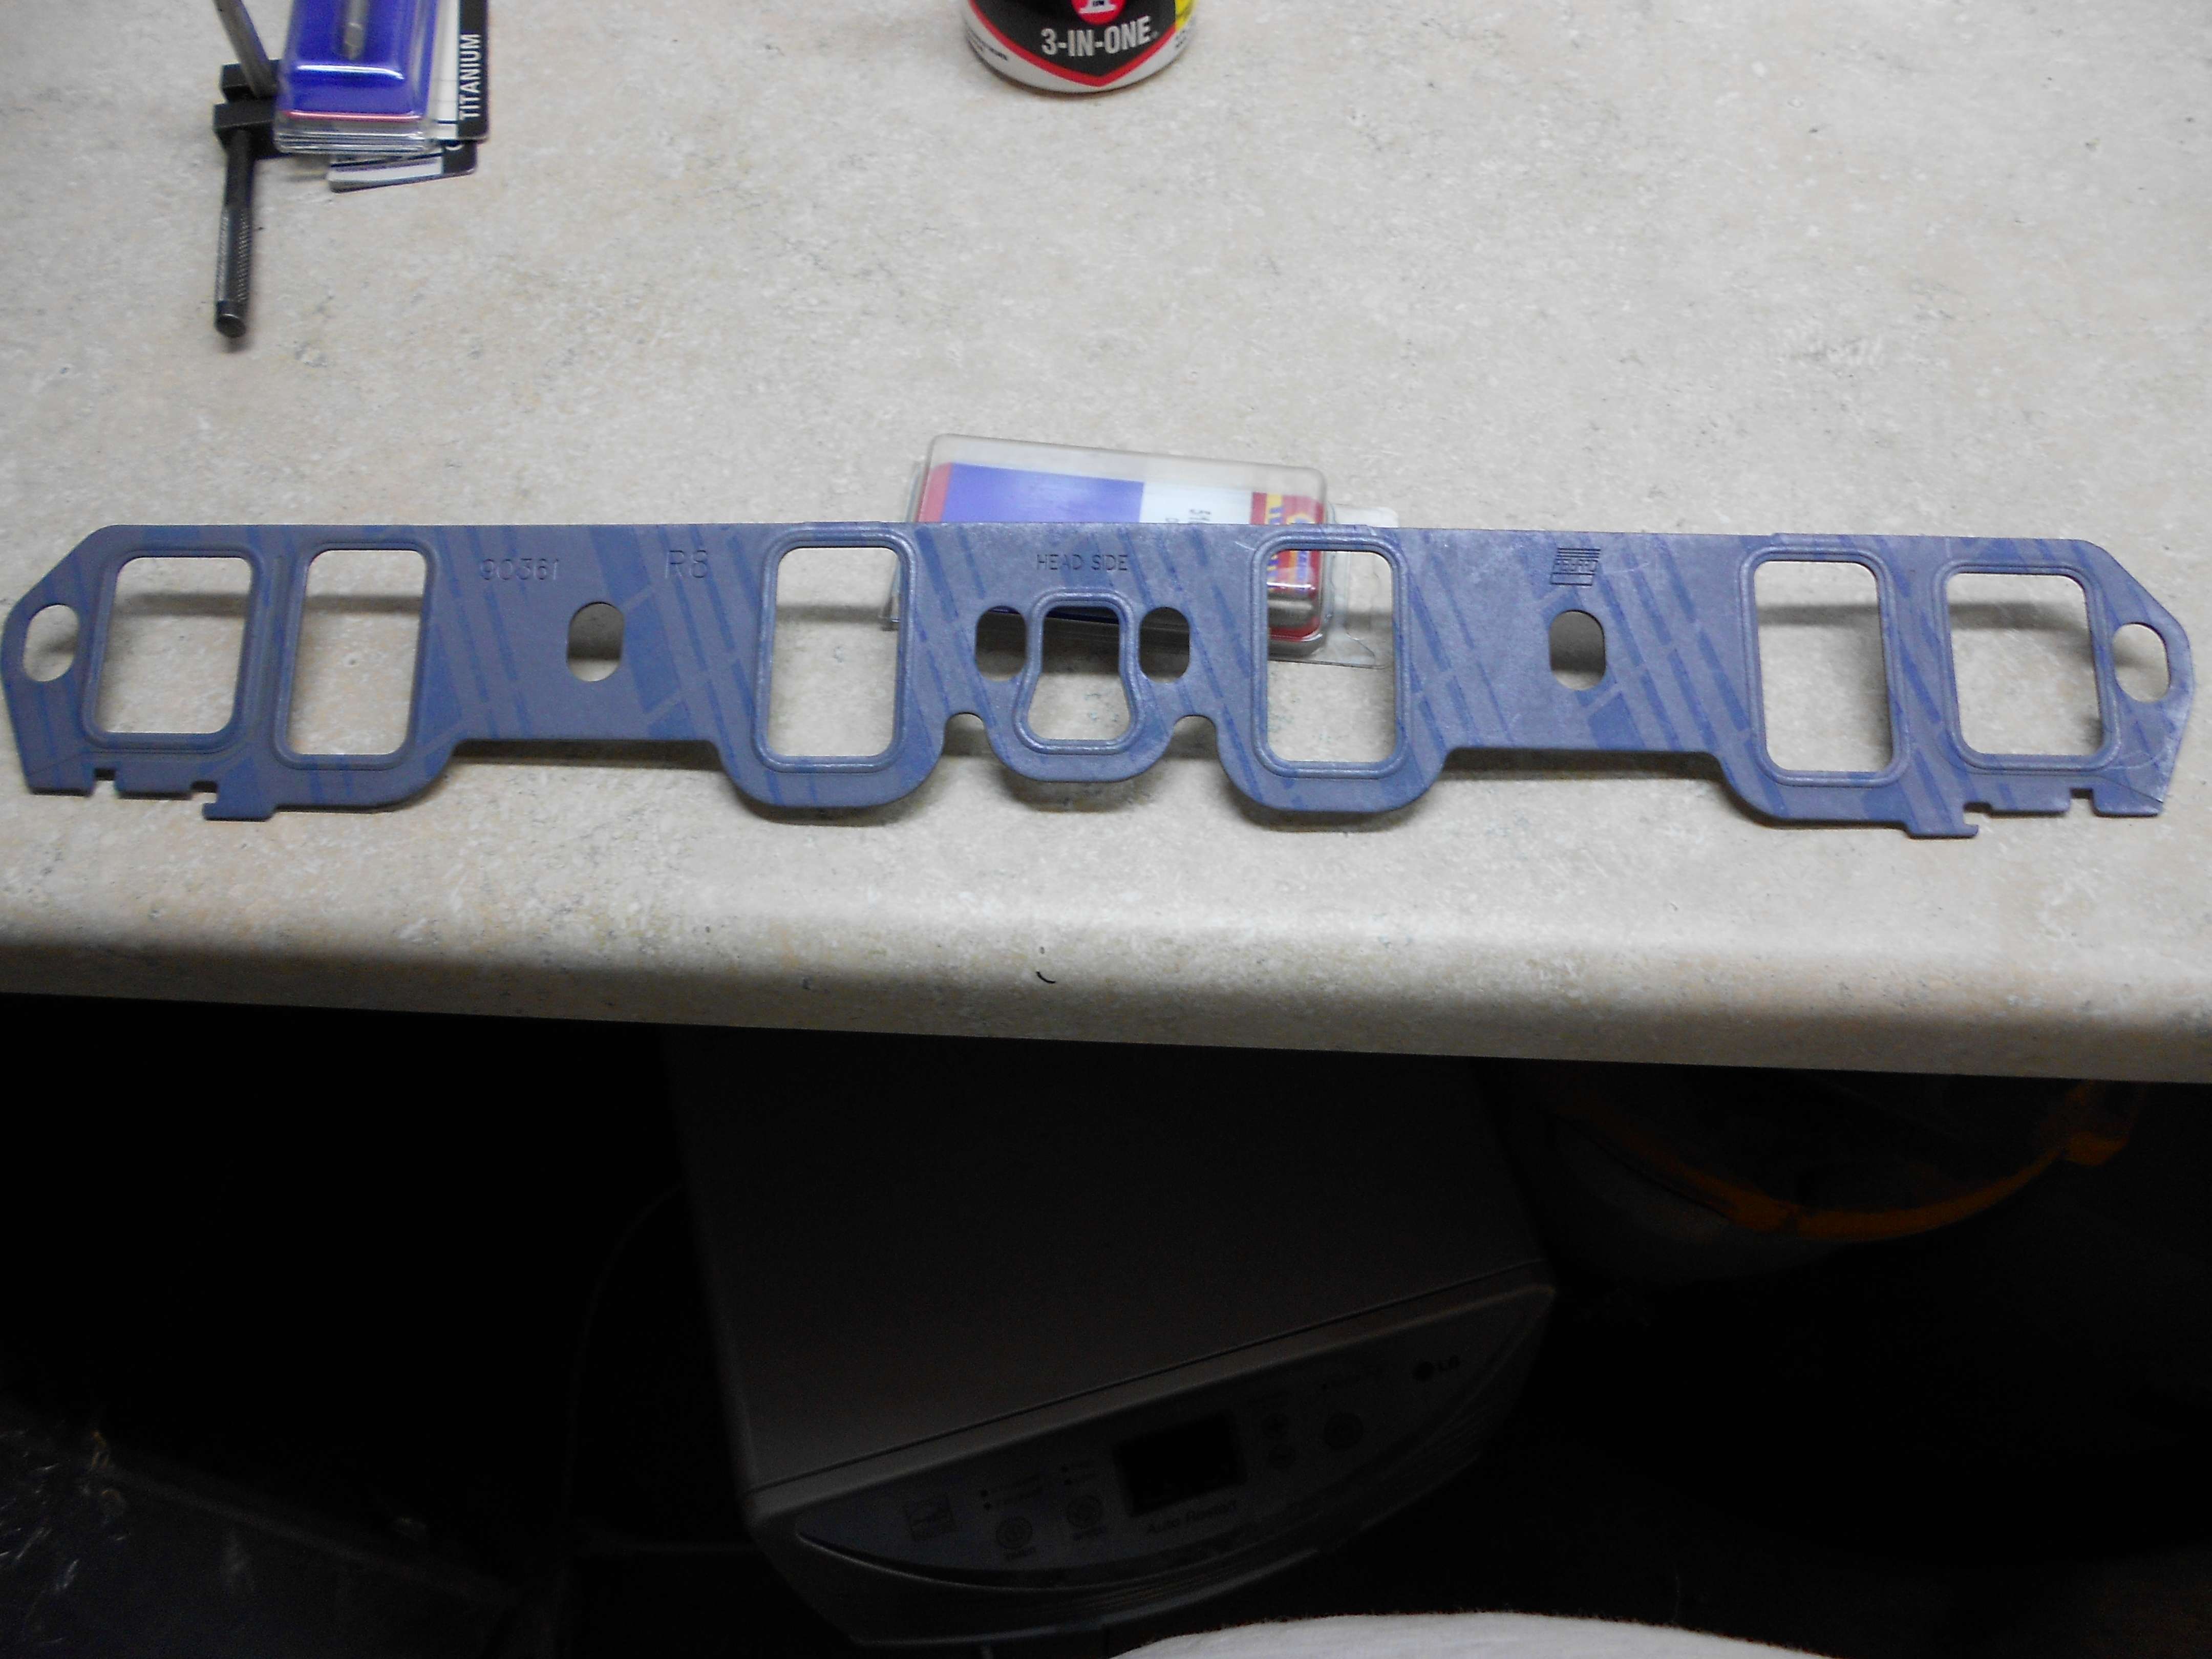
- make sure the gaskets that came with the kit are correct for your application - The hard "blue" felpro gaskets are not for aluminum intakes!
- oil seals such as the harmonic balancer seal need to be coated with locite or equiv before being driven into the cover - I thought my rubber seal was bad, turns out it was leaking around the outside of the seal as I did not realize it needed a sealer...
- clean clean clean clean clean - gasket sealer will not seal to a dirty block (see other post covering my oil leaks)
- make sure your water pump is not hitting the timing cover - the resulting leak is a pain to try and fix and no matter how much you tighten it, it won't stop.
- use thread sealer on every intake bolt, not just the water jacket ones.

Please add any other got-ya avoidance items you may have. I know there are some I have missed in here but if I remember them I will add them.
 
We've never been really engine builders per se, we lean more toward the fabrication end of building a car. However, we have put a lot of motors together and by some miracle, they have usually worked out ok. We have also had some things that ended up biting us in the behind, and we know more now than we did because of those mistakes. Here are some things we learned.

1) Do not trust anyone elses work. Even good machine shops mess up tolerances and machining steps. We trusted a brand new set of built heads on my Son's 455 Olds and they ended up being milled too far and the intake never seated properly.

2) Same for the machining, check the tolerances when you get the motor back from them and before you start to assemble anything.

3) Have all the galley plugs replaced with screw in plugs, not the ones they strake into the hole. I blew two of them out on my 331 Ford withing 300 miles and I will only use screw in plugs from now on.

4) As Keeper mentioned, some FelPro gaskets are too hard to seat well and intake gaskets like Mr Gasket composite gaskets are softer and will let the intake and heads dig in and seal better.

5) If possible, use a machine shop that specializes in race motors as opposed to the usual machine shop that does rebuilt stock motors. The cost is only slightly more and the quality can be dramatically superior. We are now using a shop that only does race motors and you can see the difference in the way things come back to you.

6) Antiseize, antiseize, antiseize. We use it these days on everything we assemble and it makes getting them apart at some future date so much easier.


Don
 
We had an assembler who was always worried about rod bolt torque. He would have the water outlet bolted onto the intake before he would bolt on the oil pan. That way, the last thing he did was check rod and main torque, before sealing up the bottom end.

There are no real secrets to engine assembly, other than obsessive preparation. Run a bottoming down each head bolt hole, before washing the block. Cleanliness is absolutely imperative. Careful measurements are absolutely imperative. Never, ever, never take anything for granted. How can you possibly know that oil pump is 100% right, without removing the cover and checking everything? And be sure you wash it, carefully, before putting it back together.

Here's one most of you likely give no consideration. When was the last time that torque wrench was calibrated? When was the last time that micrometer was calibrated? Do you check your measuring tools, to be sure they are accurate? How many times have you seen someone grab a torque wrench, wind it up to 70 or 80 lbs. and then just toss it back in the toolbox when they are finished? How long does it take to back a torque wrench down? 5 seconds? 10? If I see a torque wrench being stored without backing it down, that's a torque wrench I know I cannot trust.

When it comes time to assemble the engine, send all the onlookers home. If you want to shoot the breeze with them, put the engine assembly off until you have a chance to concentrate on it with no interruptions. One person can assemble an engine. Two people can generally assemble it a bit quicker and easier. Three people is a house party and it's impossible to assemble an engine during a house party.

Avoid cloth rags at all costs, because you never know where the lint is going to end up.

When it's time to start that new engine up, be absolutely certain the engine will light off without a lot of cranking away on the starter. Take a couple extra minutes to use a syringe and fill the carb float bowl/s with gasoline, if you're not running an electric pump. If you're unsure of how to drop that distributor in, ask someone for help. You've used a lot of assembly lube and with each revolution, that lube is getting wiped away by adjacent parts. If the motor doesn't light up right away, don't start pumping the throttle or winding the distributor in different directions. Sort out what is wrong and correct it. Keep jazzing that throttle and all the oil you used on those piston skirts is going to get washed away. That camshaft has to live with the assembly lube you used, until the rods start spraying oil, so don't spend time doing a lot of cranking.

Pull it out of the box. Measure it. Then measure it again. Then wash it. And then wash it again. When it's time to bolt it down, measure it one more time, wash it one more time and torque it up. If you have any remote doubts or questions, pull it right back off and start all over. Don't wonder if you torqued those rod bolts. Gaskets and silicone are cheap, compared to a bottom-end disaster. Yank that oil pan back off and check everything.

Trust nothing and no one. Take nothing for granted. And you'll be fine.
 
Keeper are you talking about these Felpro intake gaskets pictured below? I got these with a rebuild kit I bought from summit racing. I'm building a small block Ford. The bottom end is already back from the engine shop and the heads should be done this week. Hope to start putting everything together when the heads get here. I'll be running a Polished Edlebrock Performer RPM I bought new from Summit.

streetrodpictures006.jpg
 
Mike is 100% right! I sit in the office once every 6 months, if someone has a mic or a t-wrench, and it doesn't pass inspection, they can either send it off to be repaired or I'll throw it in the scrap heap! All mine have calibration tags on them, even the torque wrenches.
I have a torque tester mounted to one of my workbenches. Everything gets calibrated every 4 months, its checked, and my signature is on the paper before I put the tape over that Mic thimble.
All oilcans are marked and labeled. The type, the weight, the date. Someone in a shop I worked in decided to add oil to the headstock of a lathe. It was thread cutting oil....it was history inside of 3 months.....it was used alot.
Mushrooms on the punches/chisels are history, if I find one, its gone. I buy WD-40 by the barrel, those wd40 bottles better have that in them.
I have new squirt bottles all over the shop, if its not labeled, its in the trash. I put a little bit of antifreeze and waterwetter in all the wet machines (keeps rust down and doesn't freeze in the winter....also keeps the mildew and algae down), also in the tanks, I put large magnets, horseshoes and fishing, so theres hardly no grit in our coolants.
ITs all in the details. I put the cams in vertical, to keep from scratching the cam bearings. The intakes have vertical rollpins locating the intake faces to the faces on the heads, yada-yada-yada....All oiling systems are primed before startups.
Only allowed 3- 8 second start cycles, after that your lubriplate is gone off your lobes. Battery needs fully charged cells to start a healthy motor. Half-ass starts is hard on the motor and dangerous for the techs. ESPECIALLY WITH ALKY OR NITRO....Av gas isn't too forgiving either.
Last, but not least, your only as good as your tools. And how you use them. If your working on a line, use a line wrench! Don't use pipewrenches on big bolts. No matter how big it is, they do make a socket or at least a wrench to fit it....
 
Keeper are you talking about these Felpro intake gaskets pictured below? I got these with a rebuild kit I bought from summit racing. I'm building a small block Ford. The bottom end is already back from the engine shop and the heads should be done this week. Hope to start putting everything together when the heads get here. I'll be running a Polished Edlebrock Performer RPM I bought new from Summit.

streetrodpictures006.jpg

Yup those are the ones I used. Edelbrock told me those are not recommended for aluminum. Mine came in the kit from summit as well!
 
Ok I will try and find a better gasket then.

This is a great post guys!! Lots of good info here!
 
Speaking of pipe wrenches, never use one to turn a crank over, use a large cresent wrench instead. The pipe wrench teeth will put gouges in the crank snout but the cresent wrench will lock onto the key and spin the crank without leaving a mark. I know they make a tool to go onto the snout that has a hex head on it, but we do so many different brands of motors we would need a few of them, and I am poor.:D

Don
 
Yup those are the ones I used. Edelbrock told me those are not recommended for aluminum. Mine came in the kit from summit as well!
Keep your local shops in mind, guys. Sure, that Summit kit might look like a bargain, but when you add in the expense of purchasing the better gaskets, the kit starts losing its price appeal.

If you cannot afford a crank snout socket for your application, get an old balancer, hone out the bore to make it a slip fit and use it to turn the crank.
 
There is so much technical knowledge to be had in this forum it amazes me. I added up all the engines I have gone through and it added up to 35 all stock except a rebore now and then, mostly vw and a few others I was always very careful and got lucky never had one go bad. Even went through a one litter opel engine, try to find parts for one of those.
 
Yep, Mike just gave you a great tip there! Also, want a inexpensive way to prime your Motors? If you can't get all your your stuff together to spin the oilpump, go to Harbor Freight Salvage or a pawnshop, get yourself a pressure paint can that will hold the 1 gallon cans, the one that looks like the old pressure cooker, with the hoses coming off that go to the paint gun.
Load that puppy with whatever oil you you want to run, pressure it up, have a deadmans valve on the pressure side. I have mine regulated down to about 75 psi and a dryer on it too, a cheap one, to keep all the moisture out of the oil, cause even hoses sweat in the hot summer.
I screw into the oil sender hole a quick filling, with a old tractor type screw in pressure gauge (can pick them up for about 10 bucks, I mount them on all my motors, that way I can see the oil pressure while I'm tuning), I've also got several other fittings I can plug in whereever.
Pressure it up, let it hold pressure for a 6 seconds, that'll be enough time to get oil to your mains and rods, use that tool that MIKE TOLD YOU HOW TO MAKE, turn your crank slowly while you run pressurized oil thru your system, when she starts gurgling, your almost out, by the time you turn off the air, your motor is completely primed.....I do keep the valvecovers off till I see oil at the pushrods, then I put the covers on.
Why spend several hundred bucks on a primer tool when this will work for about 40 bucks, and you can prime those transmissions too, with the same too. Top comes off for easy cleaning.
*******Keep your eyes on your front oil plugs by your timing chain, if those have been changed when cleaning out your oil passages, it they don't stake them right, they can come shooting out. So, if you hear a pop inside your timing cover, thats probably what happened. I thread and tap all of mine, so, I don't need to worry.
Lowering your priming pressure to 65, maybe even to 55, should cure this, but if those plugs are not staked, they can come out!
 
A trap I see new and old players fall into is main and rod bearings contacting the radius at the sides of the journal. Especially on regrinds. Its so easy to check, a felt tip marker pen will do if you don't have a tube of blue. If the radius contacts the shell, it'll pick up in the first couple of turns, melt ("run") and drop shrapnel into the oil at best, poison the whole bearing at worst. Good rod bearing shells only have the chamfer on one side, intended to be the outside of the rod pair, get 'em in around the wrong way and even if the journal radius is OK you've created the same problem.
The other one is failure to chamfer the top of the lifter bores. A sharp edge there will "shave" oil away from the lifter, whereas a nice chamfer, say 20thou, will "funnel" the oil into the lifter bore when it's going down.
For the SBC an old distributor will make a great oil primer, grind the gear teeth off to clear the cam gear, lift the electronic guts out of the body and she's away. Hook your 1/2" variable speed drill on, wind a pressure gauge into the sender port, and, as Screamin' says, you can have that reassurance that all is well, oil pressure wise before start up. Also avoids that awful death rattle from the valve gear before the hydraulic lifters fill up. 500rpm on your drill equates to 1000rpm at the crank, of course.
 
OH, before I forget, make sure your oil cooler lines are close, (if any) and You have a oil filter on the motor, or you'll have one hell of a mess on your hands....you can also fill it from the oil filter the same way, gotta get a clean housing, gut it out and install a plug.
I just do it from the oil pressure hole, that way, I'm priming the filter too.
 
WHAT MANGO SAID! :thumbsup: If you use the Clevite 77's, they have the big chamfer on them. I've bitched to some of the older Crank Grinders all the time, getting these new kids on their machines, they don't want to take the time to dress their wheels....trying to save all the wear and tear on their corners....if the dam thing calls for a .23 radius, thats what you put on it.
The smaller dia. bearings run cooler because the surface speed is slower on your mains and throws.
 
And on the rear main seals, you want to offset your faces slightly. If you leave them lined up on the parting line, a oil leak can develop. Test fit it several times before you torque that rear cap into place. A little oil on your finger run over that seal. Dry startup on a street car will guarantee a drip later on.
If its the old rope type, take your time, cut the ends with a razor blade, and use a sharp scribe to poke and prod that sucker to profection, as far as lineup.
On your harmonic balancer, run your finger over the seal area. If theres a groove, or any hint of a groove starting, go to the parts store and get a speedysleeve and put on it... your driveway will thank you....
Oil the lips of those seals, too! With a light oil such as a 10w30 or 3 in 1 oil....enough to run that lip and seat it till the motor oil itself can lubricate it.
 
Keep your local shops in mind, guys. Sure, that Summit kit might look like a bargain, but when you add in the expense of purchasing the better gaskets, the kit starts losing its price appeal.

If you cannot afford a crank snout socket for your application, get an old balancer, hone out the bore to make it a slip fit and use it to turn the crank.
And you don't have to have a honing machine to do this! A die grinder with a sanding drum will do, I Prefer to hone them out perfectly so they won't stick, but be dam sure to wash that balancer out and blow it out good before sticking it on the end of the crank....
 
Keep all your open distr. holes, intakes without carbs, open intake ports and those freshly oiled rockers and pushrods protected by keeping them covered.
Dust and dirt and get in there....just recently had someone drop a bolt down a open intake....-Let the Games Begin!-
He fished for it for 3o minutes, I looked at him if he doesn't find it in another 5 was he gonna win some kinda prize? Pull the freakin' intake....after its all said and done you'll be 5 minutes close to quitting time....
 
Keep your local shops in mind, guys. Sure, that Summit kit might look like a bargain, but when you add in the expense of purchasing the better gaskets, the kit starts losing its price appeal.

I don't want to get to far off topic here but...

Mike I use my local shops as much as possible, but some things are so far out of whack with pricing I have no choice but to order from somewhere online. The engine kit I picked up from summit was $500 more expensive up here.

Even the little things, take the intake gaskets for instance. Summit, Jegs 17.99 Napa 19.99. My local speed shops 37.99. Now I can understand shipping etc, but our dollar is above the USD and there is no justification for that much price difference.

I am all for supporting my local shops, but them using the "exchange on the dollar" excuse gets old pretty quick.
 
For the SBC an old distributor will make a great oil primer, grind the gear teeth off to clear the cam gear, lift the electronic guts out of the body and she's away. Hook your 1/2" variable speed drill on, wind a pressure gauge into the sender port, and, as Screamin' says, you can have that reassurance that all is well, oil pressure wise before start up. Also avoids that awful death rattle from the valve gear before the hydraulic lifters fill up. 500rpm on your drill equates to 1000rpm at the crank, of course.

I just pull the cam gear off.
 
On your harmonic balancer, run your finger over the seal area. If theres a groove, or any hint of a groove starting, go to the parts store and get a speedysleeve and put on it... your driveway will thank you....

Oil the lips of those seals, too! With a light oil such as a 10w30 or 3 in 1 oil....enough to run that lip and seat it till the motor oil itself can lubricate it.

Thanks! I missed this one on mine as well...no wonder there was oil all over the place.
 

     Ron Pope Motorsports                Advertise with Us!     
Back
Top