Garage Merch                Ron Pope Motorsports                California Custom Roadsters               

How I scratch built a Modern T

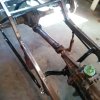
I moved the engine/tranny to the right an inch to have it line up better to the pinion offset in the rear axle. This also has the advantage of leaving more room on the left side of the engine for the steering, ignition and the carb/intake manifold. One cannot tell it is offset without looking at it very carefully.

D16.jpg

The cross member for the small block Ford with the C-4 transmission fit perfectly.
 
With the exhaust on the passenger side and the reduced room there, you're probably looking at custom headers, huh?
 
I removed the yoke ends from the truck driveshaft then bought a piece of driveshaft tubing the correct inside diameter to fit the yokes. I pressed the ends in the tube and lined it up in the lathe then welded it together. It came out pretty good, within a few thousands of an inch of straight. Anyway the angle looks good, well within the max recommended. We will see if there is any vibration once we get the car on the road.
D19.JPG D20.jpg
 
With the running gear in place we can start mounting and fitting together all the body parts, starting with the fenders, running boards and splash pans. The gel coat on the fiberglass parts from Speedway is flawless but as is typical with fiberglass parts when they are removed from the mold and have sat for a time the final curing of the resin causes them to twist and warp a little bit. With some pushing, pulling, clamping and a generous amount of cussing, I was able to get everything lined up.

D21.JPG D22.JPG D23.JPG
 
Cool, full fendered. Don't see too many of these around...
 
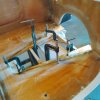
I had ordered the T bucket with a flat floor, I thought that meant that there would be no tunnel, apparently that is not the case as it came with a tunnel suitable for the Chevy automatic transmission. It was obvious that this was not going to work for me as there is not enough room between the tunnel hump and the body for the clutch, brake and gas pedal and my two feet. So I was going to have to cut out the transmission hump and make a new narrower one for the std transmission.

I started by cutting the old tunnel off with a sawzall and gluing in new plywood spacers in the floor and firewall to make up for the extra space.

D26.jpg D27.jpg
 
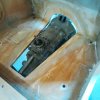
If it helps I 'moulded' the tunnel around the trans, rather than just doing just a cover over the whole thing. It gave me precious inches for my feet and opened up a lot of room that would normally be air under the tunnel. After all how much does the engine and trans move in a T, unless they use factory mounts, which I don't.
G
 
That is an interesting idea, I never thought about doing it that way. Were you still able to remove the tranny without lifting the body?
 
I do mine about like Gerry does. I put 1/2 inch padding over the trans, then used a trash bag duct taped over the padding so fiberglass wouldn't stick to it. Then added mat and resin to the desired thickness. When set up remove the cover, remove the padding. Left about 3/4 flat edge to screw it to the floor.
 
Ok, I see you guys are making a separate removable cover, never thought about doing that, I just made it part of the floor as it was before.
 
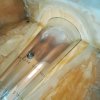
I took a piece of aluminum and formed it to a new tunnel shape and temporarily nailed it to the floor and firewall. By coating the aluminum with some mold release agent I was able to layup a new fiberglass tunnel in the floor. I put some extra layers of mat on the area that the shifter boot cover screws are going to be located.

D28.jpg D29.JPG
 

     Ron Pope Motorsports                Advertise with Us!     
Back
Top