You are using an out of date browser. It may not display this or other websites correctly.
You should upgrade or use an alternative browser.
You should upgrade or use an alternative browser.
Keepers build
- Thread starter Keeper
- Start date
2old2fast
Active Member
Keeper, what the other guys said!! Sometimes you have to make a mold piece that you can clamp in place to do outside corners , and like N.L. said ,work small areas at a time, also shrinkwrap [sometimes you can talk the box store guys out of a partial roll] is your friend, resin doesn't stick to it . the reason for cold water first is it closes the pores of your skin so the glass rinses off, hot water= open pores!! X2 on the roller , your best friend on big flat surfaces.
dave
dave
Keeper, what the other guys said!! Sometimes you have to make a mold piece that you can clamp in place to do outside corners , and like N.L. said ,work small areas at a time, also shrinkwrap [sometimes you can talk the box store guys out of a partial roll] is your friend, resin doesn't stick to it . the reason for cold water first is it closes the pores of your skin so the glass rinses off, hot water= open pores!! X2 on the roller , your best friend on big flat surfaces.
dave
Wax paper works good too... But I really don't like using it because you have to make sure to get all of it to lay flat... Card board wraped with duck tape is the way I do a lot... Most of that 32 chevy I hand made, was done with card board and duck tape... Once it get's hard, just pull the duck tape off...
Keeper
Active Member
Well I made the molds tonight. I had some 1 inch blue Styrofoam insulation left over, its a lot easier to work then MDF. So I shaped it to match the body lines of the bed.
I made it in two pieces, the top and the side with the body lines. I plan on covering it with foil duct tape, then waxing it up. The "molds" will allow me to work one side at a time (which is about all I can do.
I will take some pics when I remember to take the camera out.
I made it in two pieces, the top and the side with the body lines. I plan on covering it with foil duct tape, then waxing it up. The "molds" will allow me to work one side at a time (which is about all I can do.
I will take some pics when I remember to take the camera out.
Keeper
Active Member
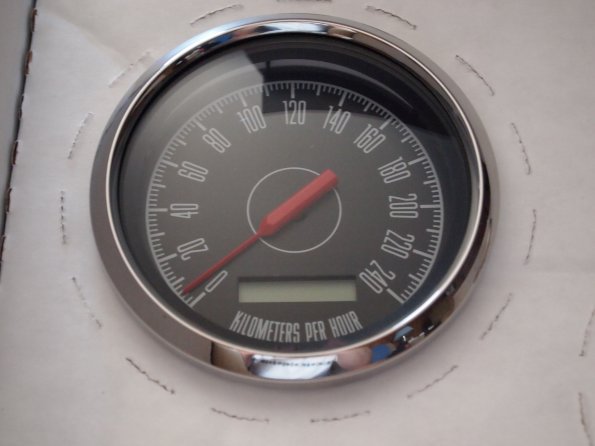
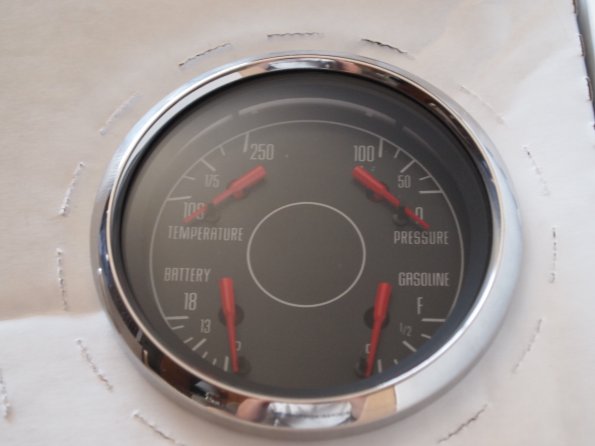
Well after the bad news of a worn out steering box I got a nice pick up in the mail.
My gauges arrived today, these things are sweet
Sorry for the off center pics, its tough trying to take the pics without my reflection showing up...lol


These are the "67" Series from new vintage gauges. The pics really do not do these things justice. I am a very happy camper.
My gauges arrived today, these things are sweet
Sorry for the off center pics, its tough trying to take the pics without my reflection showing up...lol


These are the "67" Series from new vintage gauges. The pics really do not do these things justice. I am a very happy camper.
Keeper
Active Member
An update a week in the making.
I had been fighting with fiberglass for a week, screwed up once, but in the end I got all the major stuff done there will be some more little fix it stuff to do but not much more then that.
So here we go:
Inside the body, Got the everything covered and the foot rests created, yes I see the big air bubble on the pass foot rest, its 3 layers deep and not a structural part so I should be safe!

Then the fun, frustrating and the part I screwed up, the bed stretch: (and the fun of cleaning the frame off from my messy glass work)


And the final bed with its internal structure, there will be a piece of sheet metal bent to fit the top:

Since its been rather warm in the garage I decided I needed to do some more interior work, I have the door panels left to do but could not make the templates until the glass work was done, now that its done I can make the panels:
First step template, both sides matched so it made things easier:

Transferred to 1/8 baltic birch plywood:

Copied for the other side:

For the door panels I plan on a 5 inch dark grey top that follows the contour of the body, with the bottom being black pleated vinyl. Here are the steps of me making the pleats....all 47 of them:
Laying out the lines: (They are 1 1/8 apart)

Weapon of choice for this task:

Almost half way through, the toughest part was fighting the awkward roll:

All the pleats done, I found it easier to sew all the pleats at once, from this I will cut out the two panels:

Not the best of pics:

After this was done I was cross eyed and ended things for the evening, tomorrow I will finish up the panels.
I had been fighting with fiberglass for a week, screwed up once, but in the end I got all the major stuff done there will be some more little fix it stuff to do but not much more then that.
So here we go:
Inside the body, Got the everything covered and the foot rests created, yes I see the big air bubble on the pass foot rest, its 3 layers deep and not a structural part so I should be safe!

Then the fun, frustrating and the part I screwed up, the bed stretch: (and the fun of cleaning the frame off from my messy glass work)


And the final bed with its internal structure, there will be a piece of sheet metal bent to fit the top:

Since its been rather warm in the garage I decided I needed to do some more interior work, I have the door panels left to do but could not make the templates until the glass work was done, now that its done I can make the panels:
First step template, both sides matched so it made things easier:

Transferred to 1/8 baltic birch plywood:

Copied for the other side:

For the door panels I plan on a 5 inch dark grey top that follows the contour of the body, with the bottom being black pleated vinyl. Here are the steps of me making the pleats....all 47 of them:
Laying out the lines: (They are 1 1/8 apart)

Weapon of choice for this task:

Almost half way through, the toughest part was fighting the awkward roll:

All the pleats done, I found it easier to sew all the pleats at once, from this I will cut out the two panels:

Not the best of pics:

After this was done I was cross eyed and ended things for the evening, tomorrow I will finish up the panels.
Keeper
Active Member
Soooo, Keeper 1- fiberglas 0 ? nice job on all fronts by the way!!
dave
haha no more like fiberglass 2, keeper 1. It beat me up pretty good.
tfeverfred
Well-Known Member
Keeper, that's a kick ass build! AWESOME!!
Keeper
Active Member
Keeper, that's a kick ass build! AWESOME!!
Thanks Fred, hopefully when its done I can take a trip down to Texas! Though it may be a year or two!
Keeper
Active Member
Okay tonight was a short night, but I continued on with the door panels:
Traced out the templates:


Cut out the little piece first, I was scared to cut the pleat panel...lol Give you an idea of the look

Then I just jumped in and cut and sewed them up:

Here is a small preview of what it will look like when done:

I still have a lot of trimming and fitting to do, the plan is to sew the panel to the plywood template, the top will be fastened using every ones favorite push lock plastic retainers, you will not see them as the top will be folded over them. I left an inch on the bottom that will be screwed into the floor. The screws will be covered with carpet so you will not see the attachments at all.
Traced out the templates:


Cut out the little piece first, I was scared to cut the pleat panel...lol Give you an idea of the look

Then I just jumped in and cut and sewed them up:

Here is a small preview of what it will look like when done:

I still have a lot of trimming and fitting to do, the plan is to sew the panel to the plywood template, the top will be fastened using every ones favorite push lock plastic retainers, you will not see them as the top will be folded over them. I left an inch on the bottom that will be screwed into the floor. The screws will be covered with carpet so you will not see the attachments at all.
Keeper
Active Member
Continuing on with the interior, as we actually broke 100 degrees for only the 3rd time ever.
I finished up the passenger side panel:

Here is how I attached it to the plywood, helps having a beast as a machine Though next set will be on PVC.

Then I just had to repeat for the other side and hope it all matched:

Once the panels were done I started looking at the firewall and realized I might have enough pleated stuff left over to make a cover and I lucked out!

So here is the completed interior, well minus carpet.


Next up is a gauge pod for the dash, then plumbing, wiring and first start up!
I finished up the passenger side panel:

Here is how I attached it to the plywood, helps having a beast as a machine

Then I just had to repeat for the other side and hope it all matched:

Once the panels were done I started looking at the firewall and realized I might have enough pleated stuff left over to make a cover and I lucked out!

So here is the completed interior, well minus carpet.


Next up is a gauge pod for the dash, then plumbing, wiring and first start up!
tfeverfred
Well-Known Member
Wow! Looks like the interior of a '57 Chevy!!! GREAT job!
Keeper
Active Member
I finished the last bit of fabrication today, mounting the gas tank. I bent up some straps out of 1 inch 1/8 steel. I will pick up some rubber tank insulators when I hit Napa.


And here is the pic, right before I tore it all apart!.

Its now back to a bare frame. I have to finish weld the shock mounts, then put everything back together with the correct hardware, grease and all that fun stuff.
Getting closer!!


And here is the pic, right before I tore it all apart!.

Its now back to a bare frame. I have to finish weld the shock mounts, then put everything back together with the correct hardware, grease and all that fun stuff.
Getting closer!!
Similar threads
- Replies
- 26
- Views
- 9K


