Garage Merch                Ron Pope Motorsports                California Custom Roadsters               

Keepers build

So I went to the alignment shop today to get things checked and inquire about my bounce at 110kph.

My "Shop" alignment was pretty much bang on. I need to add one more shim to the jag rear to bring the passenger side tire out a bit, and add a turn to one clevis on the passenger side radius rod. But everything else is square :)

Caster on the front:

Drivers - 5.3+
Pass - 4.4+

A turn or two on that clevis will even that out.

Toe was at 3/16 we changed it to 1/8.

Rear end measurements:

Camber:

Drivers - 1.1-
Pass - 1.4-

I will shim the passenger side to bring it out to 1.1 and leave it. The jag shop told me that they usually shoot for 1 degree -.

Now for the not so good news. I develop a "bounce" in the front tires at 110kph (70mph or so) which is pretty much minimum hwy speed up here.

Turns out my "new" Wheel Vintique rims are out or round. All 4 are out, the rears not as bad but the fronts are pretty rough. Now to see what I can do about having them replaced. I am not thinking I am going to fare to well, but we will see.
 
Keep , just as an aside, I see you're running BFG rubber , had the same " bounce " w/that brand , tried 7 different tires & couldn't find any that were "round" , switched to cooper's , was like a new car , smooth as glass !! My $.02 .....

dave
 
So I had the car at the tire shop today. We took off the rims and stock them on their road force balance machine.

Drivers side rim run out was .008 but you could actually see the wheel move side to side, seems the centers were not welded in square and the rim it out. WV will not do anything since I am out of the warranty and have mounted tires on them. Who would have thought to have the brand new rims checked.........

Passenger side run out was .018 with the same side to side wobble.

I can drive the car at any speed under 110km with out any vibration, but that keeps me off the hwy as 110 is asking to have a transport run up your rear!

So my options are down to buying a new set of rims. I have always liked the Torq thrusts, I guess I will start looking and keep my driving to relatively local cruising.
 
That's a bummer, keeper. I hate buying new and getting junk. Hope things work out.
 
In Calif, I could not get away with the headlights that low... Mine are 24 or 25 inches to center... :)
My lights on the new t bucket build are 19" to the center. Ted will I get fuzz buzz for this. Will have to deal with it when they stop me I guess. Down low look bitchin ya know. Have you talked to Alan M233ss lately talk to you later Hot Rod Ron
 
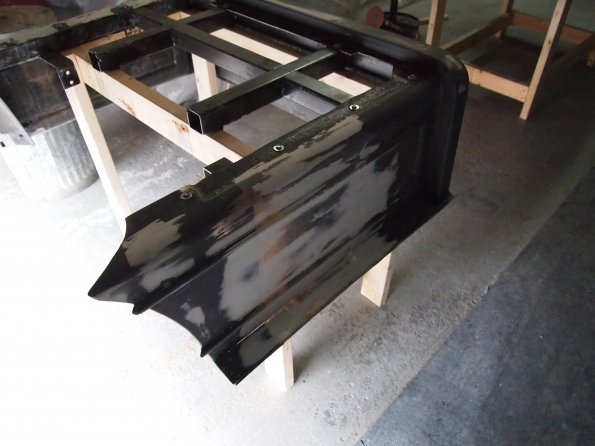
And so it begins. I have tore everything down for final body work and paint.

i.php


i.php


3%20apr%202013%20014.JPG_595.jpg


I have also looked at sewing up some new interior. Here are a couple test panels, of course I chose something completely different...lol I replaced the white with a lighter grey. Should have some pics in a few days.

31%20Mar%202013%20008.JPG_595.jpg
 
I just finished reading this thread and realy enjoyed it, learned a few things and gained a few ideas.
One thought I had on this was the bed floor, why not build a wood bed that sows on the bottom instead of sheetmetal. Looks great the way it is, just a thought.
You have done some outstanding work on your tub, looking forward to seeing it done.............................:cool:
 
I have thought about a wood bed. I even have a couple pieces of spalted maple for it. One of these days I might get around to actually fitting it in.

I was really holding off as I have been on the hunt for a steel Model A or T bed. Thats what is keeping me from using that wood!
 
I am beginning to understand why paint jobs cost so much.

I have about 18 hours worth of sanding in the books and I have not even primed it yet!

i.php


i.php


i.php


i.php


6%20Apr%202013%20005.JPG_595.jpg


i.php


The biggest challenge was the bed, where I stretched it.

Here's a tip. When you are doing your fiberglass work - If the phrase "I will fix it when I do the body work" enters your thoughts, STOP. Go back and fix the fiber glass. You will thank yourself later.

I still have a ton of hours left to go, but I am almost to the point where I can spray some primer.

I do have a question though. While I was blocking out the body, I sanded through the gel coat in a few spots. Do I need to do anything special there before I prime?
 
More sanding today, but I am now at the point I can spray some primer, going to wait a couple days for warmer weather.

So instead I sewed up some more test panels, as I am still not decided on where I want to go with the interior.

7%20Apr%202013%20001.JPG_595.jpg


7%20Apr%202013%20002.JPG_595.jpg


7%20Apr%202013%20003.JPG_595.jpg


Its amazing, for such a small car, how many "interior" pieces there are:

7%20Apr%202013%20007.JPG_595.jpg


7%20Apr%202013%20009.JPG_595.jpg


7%20Apr%202013%20008.JPG_595.jpg


No comments on the carpet....this is my basement, that was actually in the living room when we bought the house....it was pretty bad....lol
 
Looks like everything is coming together, I also like what you are doing with the interior.
I`ve heard you don`t have to worry about the gel-coat, but I`m not a profesional body man so please don`t take my word for it.
Keep up the great work.
 
Thats the old interior all laid out there. The test panels are where it will be going in the new version.

I think this is going to be my choice for the new interior. On the plus side, I am getting lots of practice with all the test panels...lol.

7%20Apr%202013%20002.JPG_595.jpg


Since I am awaiting some warmer weather so I can paint. I should be starting the interior this week. I will start making all the small stuff then move to the larger panels.
 
Finally got a piece of the puzzle. I had a custom shifter knob created, this is #2. The first one was conveniently "lost" by the USPS. So if you happen to see another of these floating around California (where the tracking stopped), please let me know!

10%20Apr%202013%20006.JPG_595.jpg


10%20Apr%202013%20002.JPG_595.jpg


I cannot be more happy with how this turned out!
 
Finally got a coat of primer on. Pro tip. If you are spraying in your garage, make sure the fumes cannot get into the house.

Seems we have some leaks somewhere in the garage allowing fumes into the house, add that to the summer time fix it list.

So once I got the primer on, I realized I had many more pinholes then I thought. So skip ahead to some more putty work:

14%20apr%202013%20001.JPG_595.jpg


14%20apr%202013%20002.JPG_595.jpg


14%20apr%202013%20003.JPG_595.jpg


14%20apr%202013%20005.JPG_595.jpg


Here is after some more block work on the back, I let the rest setup for the night so I will sand it up tomorrow.

14%20apr%202013%20004.JPG_595.jpg


So while I was waiting for the filler to setup, I started on some small interior pieces. Nothing much just a couple covers to get back into the swing of things.

These are the steering column and shifter cover, also made up the e-brake handle cover but no pics.

14%20apr%202013%20006.JPG_595.jpg


Once I get the block work sorted out I plan on moving the body over to a buddies house to do the rest of the paint work, his garage is not attached to the house, so no fume issues.

Its a small update, but its moving forward again.
 

     Ron Pope Motorsports                Advertise with Us!     
Back
Top