You are using an out of date browser. It may not display this or other websites correctly.
You should upgrade or use an alternative browser.
You should upgrade or use an alternative browser.
My First T-Bucket Build
- Thread starter cmcdanl
- Start date
choppedtop
Well-Known Member
Perhaps it requires a spacer behind the inner bearing to move the rotor out. Would you will have room for the cotter pin thru castle nut?
cmcdanl
Member
Are these the cast brackets from Speedway?
Yes they are the cast brackets from speedway. They came in the disc brake kit that I bought from them.
Perhaps it requires a spacer behind the inner bearing to move the rotor out. Would you will have room for the cotter pin thru castle nut?
I hadn't thought of that. Do you know if anyone makes a spacer for that or is that something I would have to make?
cmcdanl
Member
I did some google searching and found that fastenal sells machinery bushings that have the correct inner diameter to slip over the bearing adapter that is on the spindle. I happen to have a fastenal right by my house so I'm going to stop there and see if they have them in stock. Here's a link to what I'm talking about. I assume these would work.
Flat Washers | Fastenal
Flat Washers | Fastenal
mountainman
Member
On your first post on the brake issue (#252), you state you are having problems on the driver side brake. Is the passenger side installed and if so, do you have the same issue? If no issue on passenger side, start measuring everything to find the difference. Wouldn't be the first time incorrect or defective parts were included in a kit.
choppedtop
Well-Known Member
Pure speculation here. Is there a chance that the paint/powder coating is to thick where the two surfaces meet, holding the caliper bracket to far out. I always remove paint or powder coat on places where two things bolt together. If when bolts are tightened, it compresses paint or pc, and they can cause looseness later on causing problems. I know when I first started doing pc on harley frames, the engines would loosen in the mounts if pc was not removed. Not sure how much you are off, but that could possibly be your problem..??
choppedtop
Well-Known Member
I am using just about the same tank in my roadster. I wish I would have welded in a place for a gauge before I put gas in it. It gets about 25/30 mpg, but it would be handy to have a gauge.
Did you figure out your caliper problem? Curious to see what you found.
Did you figure out your caliper problem? Curious to see what you found.
cmcdanl
Member
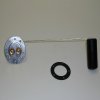
I actually have a fuel level sending unit I'm going to put in mine so I can have a gauge for it on my dash. I'm kind of worried about having such a small tank. I haven't had a chance to dig into the caliper problem yet. Might get to it this weekend. I will let you know what I find out.
Last edited:
cmcdanl
Member
Been a while since I posted an update. I have been working on brake lines. I was having a lot of trouble making a good flare after trying a couple different tools, so I bit the bullet and just bought the professional brake flaring tool from eastwood. I should have just done that from the start. what a difference that made. After I got that tool it all came together pretty quickly. So now my brake system is done. The bends aren't the greatest but I think I did ok for my first time. I also made my fuel line and mounted it. Next up is to put the body back on and start wiring.


fletcherson
Well-Known Member
Having the right quality tool for the job makes a big difference, especially with inverted flair fittings, all things tubing, really. I recently invested in a new hydraulic flair tool with all of the dies to create every possible variation to date, this was due to replacing fuel lines on my GM truck, and the quick disconnects that they use to connect vinyl lines to steel and filters. I wasn't happy about it, but it is a cool tool. Mastercool is the brand, if anyone is interested. There are also some decent tools for working with the vinyl fuel, vapor, vacuum line, and its resistant to all chemicals, the heat worries me though.Been a while since I posted an update. I have been working on brake lines. I was having a lot of trouble making a good flare after trying a couple different tools, so I bit the bullet and just bought the professional brake flaring tool from eastwood. I should have just done that from the start. what a difference that made. After I got that tool it all came together pretty quickly. So now my brake system is done. The bends aren't the greatest but I think I did ok for my first time. I also made my fuel line and mounted it. Next up is to put the body back on and start wiring.


