tfeverfred
Well-Known Member
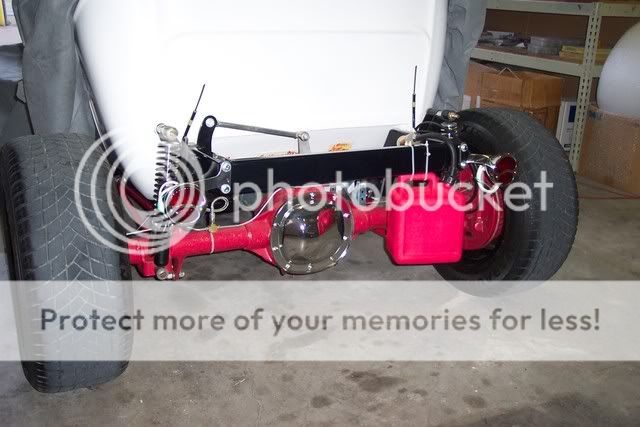
Here ya go Paul.


PaulR said:Fred,
Thanks for the pic. Are you going to run the wires inside? I'll have to come on by and take a look at Miss Behavin.
Paul


 :lol: But one thing I have noticed in the past and today was that the push button on top of the knob wants to stay depressed. A little jiggle seems to make it pop up, but this not how it should be.
 Duke said:Fred, on the Lokar shifter, you need to adjust it just a little. Looking forward from the back, on the right side at the base, you will see the starter safty switch.. To adjust the safety switch there is two screws near the base that when loosened, you can move the switch plate to adjust the switch position. - On the left side - there is two screws at the bottom of the left side plate. This plate adjust the shifter locking points. It has some dedents on the inside of the plate that the shifter locks into. You need to adjust this plate just a little one way or the orther - and the button will pop up and lock the shifter in postition. Being as how you can get the button to pop up with a little bump to the shifter tells me you are real close and need to adjust the dedent plate just a hair. Hope this helps -
") I checked out the bolts and they had worked themselves loose OR I probably never had them tight enough to begin with. Never the less, I was able to adjust the setting and tighten the bolts up. It was a minor struggle to reach the bolts and them being allen heads sure didn't help any either. All is well in Miss Behavin' land. I know what I have to pay for switches from my suppliers and a fiver isn't even close.
I checked out the bolts and they had worked themselves loose OR I probably never had them tight enough to begin with. Never the less, I was able to adjust the setting and tighten the bolts up. It was a minor struggle to reach the bolts and them being allen heads sure didn't help any either. All is well in Miss Behavin' land. I know what I have to pay for switches from my suppliers and a fiver isn't even close.")
Mike said:Fred, I'm hoping you checked out the electrical specs on that disconnect switch carefully. It was sold under the Molten Lava or Roman Candle trade names, was it?
You better make sure of what you have there. We don't want to have to start calling you Smokey!
all-world1 said:This is the first time I've read thru this thread, I like how you did the updates chronogically with a lot of good pics as well. It's a great build fred... a very clean looking chassis, well thought out. Your experiences will be a big help to us new builders. Two thumbs up.
tfeverfred said:....See, I don't have my car wired yet, so it's running off the battery. When I leave it hooked up, it drains it a little, so I installed this to keep from losing a little juice while just sitting.
tfeverfred said:...ELECTRICITY IS THE DEVIL!


 :lol: Actually, you can take your last look and have your last laugh. I should be ordering her gas tank this weekend and if all goes well, the next time you see Miss Behavin's butt, she'll have a nice round can back there!:bow:


